Archive | March, 2013

a Sicilian tradition :: Pasta alla Norma recipe

becca-garber-sicilian-pasta-tomatoes

On Monday a few of my friends and I gathered for a cooking class with Maria, a wonderful Italian woman who often watches our children.  She is known for being a fabulous cook and we’ve all enjoyed her bruschetta and pasta alla norma in the past.  She had agreed to teach us both recipes so we can recreate them after we leave Sicily.

I’m going to share her pasta alla norma recipe today and her bruschetta recipe tomorrow.  Pasta alla norma is a classic Sicilian dish that is made with fried eggplant, tomatoes, and salted ricotta cheese.  I’m not a huge fan of eggplant — even though it is ubiquitous in Sicily — but I will eat pasta alla norma by the kilo, it seems. It tastes like Sicily to me.

Here are some pictures of the process and then the recipe is at the end.  Enjoy!

becca-garber-sicilian-pasta-tomatoes-2

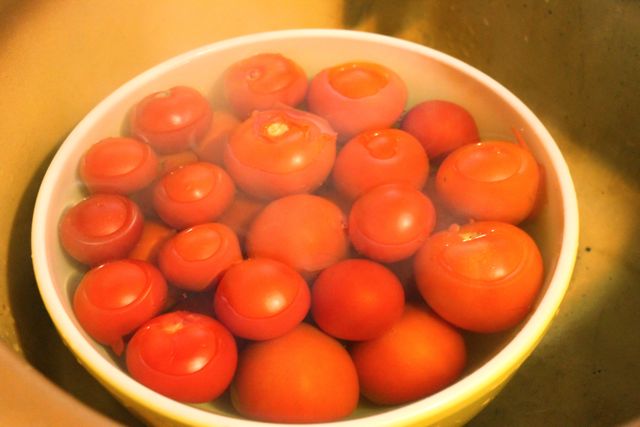
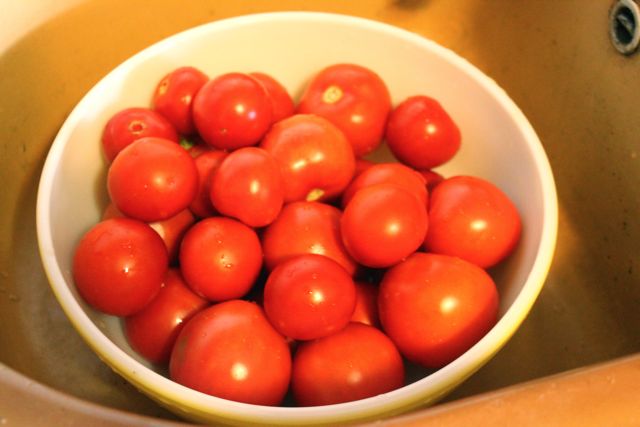
First, take a kilo of tomatoes and pour boiling water over them.  Let it stand while you prepare the eggplant by cutting strips off four sides.  Eggplant becomes very soft when cooked so the remaining skin helps it to keep some shape.

becca-garber-sicilian-pasta-chopped-eggplant

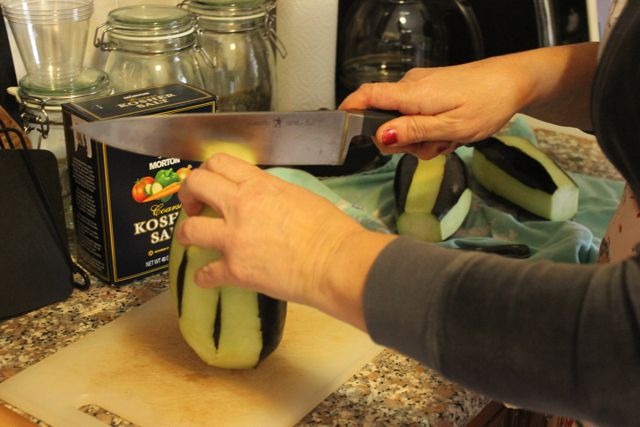
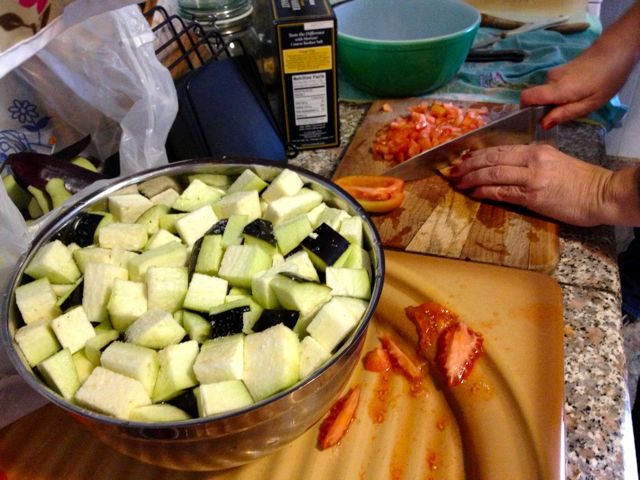
Chop the eggplant into 1-inch pieces and put in a bowl of cold salted water.  Sprinkle salt on top.  The salt helps draw out the bitterness of the eggplant.

Meanwhile, take your tomatoes, deseed them, and then dice them.

becca-garber-sicilian-pasta-eggplant-saltwater

Next you’ll need olive oil.  Our olive oil comes in 5-liter jugs around here!

becca-garber-sicilian-pasta-olive-oil

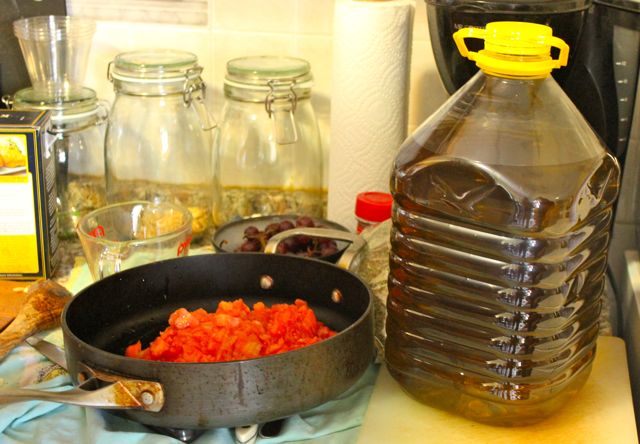
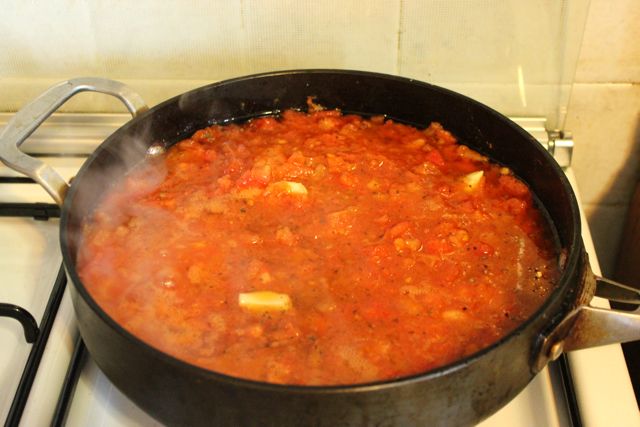
Simmer the tomatoes with 3/4 cup olive oil and 6 cloves of garlic for about an hour.

becca-garber-sicilian-pasta-garlic

Take a break to admire all our cute kids playing around the house…

becca-garber-legoes

And a sleeping baby, bless him.  It lasted 5 minutes before he was back in Mama’s arms.

becca-garber-sicilian-pasta-sleeping-baby

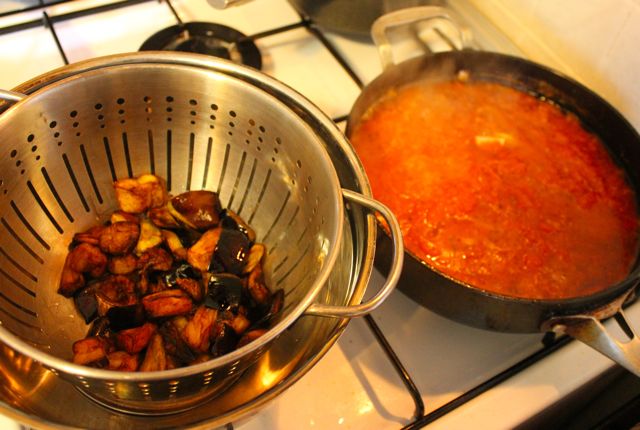
In a cup of hot vegetable oil, fry the chopped eggplant in batches.  Be sure to squeeze out the salt water before adding the eggplant to the oil.

becca-garber-sicilian-pasta-frying-eggplant

Your eggplant should look like this when it’s done frying.  Yum!

becca-garber-sicilian-pasta-fried-eggplant

Take another break to admire cute kids admiring a cute baby.

becca-garber-children-admiring-baby

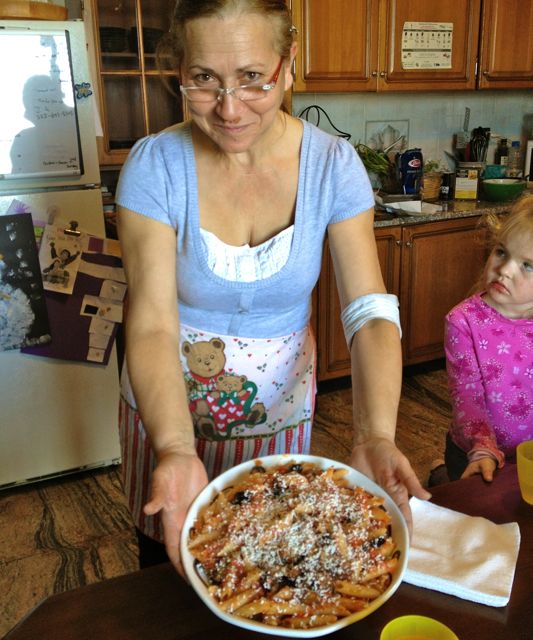
Cook your pasta and then toss it with the sauce and the fried eggplant. Top with grated ricotta cheese.

becca-garber-sicilian-pasta-ricotta-salata

And eat!  Best when served by a sweet Italian nonna.  Buon appetito!

becca-garber-sicilian-pasta-italian-woman


Pasta alla Norma Recipe

Ingredients

  • 1/2 kilo pasta (1 lb)
  • 1 kilo tomato (2 lbs)
  • 3 eggplants
  • 6 whole cloves garlic
  • 1 cup vegetable oil
  • 1/2 Tbsp salt
  • Cold water with small handful of kosher salt
  • 3/4 c. olive oil
  • Ricotta Salata
  • 1 Tbsp Sugar (for sauce if tomatoes aren’t sweet enough)
  • 1Tbsp dried basil or handful of fresh basil

Directions

For Eggplant:

  • Peel eggplant leaving 1in. strips of skin around. (4 strips of skin, 4 strips of flesh) and dice
    into 1in. pieces and place in prepared salt water. Sprinkle 2 palm fulls of salt onto top of
    eggplant
  • Heat vegetable oil in large skillet. Squeeze water from eggplant really well. Fry eggplant
    (in small batches) 5 minutes, turn pieces over, continue to fry until golden brown.
  • Drain into colander set in large bowl.

For sauce:

  • Place tomatoes in large bowl. Bring pot of water to a boil and pour over tomatoes.
  • Let sit for 10 minutes, drain, then peel, seed (by squeezing tomato), and pit tomatoes.
  • Dice very small and place in large skillet pour 1/2 Tbsp salt in tomatoes and bring to simmer.
  • Pour in 3/4 c olive oil. Add 6 whole cloves of garlic. Simmer for 30 minutes.
  • Taste sauce, add sugar if needed. Stir, continue to simmer. Let simmer 1 hr.
  • Add 1 Tbsp dried basil or handful of fresh basil

Add tomato sauce and eggplant to cooked pasta. Top with shredded ricotta salata cheese.

15 :: in eat this, friends, Sicily

a newborn photo shoot… or at least an attempted one!

becca-garber-newborn-photoshoot-1

Don’t you just love those darling cheeks?!

I borrowed a couple of props from a friend to take these newborn photos of Gil.  Unfortunately the photo shoot did not go quite as I’d hoped.  How do photographers keep babies happy long enough to get those gorgeous photos?

becca-garber-newborn-photoshoot-5

becca-garber-newborn-photoshoot-3

Here are a couple outtakes, just for laughs.  So far my fellow is not a big fan of hats!

becca-garber-newborn-photoshoot-2

becca-garber-newborn-photoshoot-bloopers

And here is how the photo shoot ended… and that’s indicative of how most of life is these days, too.  Gil loves to be held.   Oh well, though it often becomes tiresome in the moment (or hour… or hours…), I’ll hold him while I can.  These days will be over too soon!

becca-garber-newborn-photoshoot-4

10 :: in Gil

How to Organize Your Kitchen Storage Containers in 5 Easy Steps

Sometime around when I left for college, my mom overhauled her plastic storage container stash. I came home one weekend to find her plastic containers neatly stacked and their lids meticulously organized. Although it took a little more time to keep things organized her way (as opposed to, you know, just tossing them into the cupboard after I pulled them out of the dishwasher), I liked the sense of order and I loved always being able to find the right sized lid every time.

Motivated by her method, I have tried to keep our plastic containers equally organized. Here are 5 things I do to keep the storage container cupboard tidy:

photo 1

1) Buy only one kind of storage container.

This is really the secret to my organization. Having a dozen different types and sizes of containers makes it hard to establish any kind of organizational system.

Our one kind of storage container is the Rubbermaid Easy Find Lid sets. I put these on our wedding registry because I was entranced by the price (less than $20 for 40 pieces) and the fact that the lids were interchangeable with different sizes of containers. I also liked that they were BPA free. It seemed like this style of container would be around for awhile, too, and so I thought I could easily replace my containers as they went missing over the years. Recently I did just that, and now I keep a box with new, extra containers so I can replace containers as they disappear.

For Lena’s snacking needs, we bought the Gerber Graduates Bunch-a-Bowls that are also BPA free and come with lids. Recently I also bought sets of IKEA’s colorful cups, bowls, and plates for Lena (and any young visitors) to use at mealtime. Bonus: these make great stacking toys!

photo 4

2) Organize all your containers by size.

We have 6 different container sizes but only 3 different lid sizes. I can nest my shorter containers inside deeper ones, which frees up a lot of cupboard space and helps me see at a glance what is in my cupboard.

photo 5

3) Store your lids by size.

I put my lids inside larger, inexpensive containers that I probably won’t ever need to use. You could also use containers that have lost their lids. I looooove having all my lids organized so that they can’t go slipping and sliding all over the cupboard.

photo 3

4) Store seasonal or little-used items in the back of the cupboard.

I keep my plastic drink pitchers out of the way right now. One of them stores all our sippy cups that are not in use. In the summer I might rotate these pitchers to the front of the cupboard (or just keep them in the fridge full of limeade!).

photo 2

5) Keep a stash of giveaway containers.

When you want to send some extra soup or leftovers home with a friend, or when you’re providing a meal for a family, it’s nice to have some containers on hand that you don’t mind never seeing again. Plus, a new mom loves not having to keep track of your Pyrex (or your nice Rubbermaid containers!) to wash and return to you.

I keep my giveaway containers stored on the top shelf of a kitchen cupboard, tucked up next to the teapot we hardly ever use and the cake storage container that, sadly, I use even less frequently than the teapot.

——–

And that’s how I keep my food storage containers organized! I’d love to know if you have a system. Do you have any tips or tricks to share?

Related Posts Plugin for WordPress, Blogger...
11 :: in tutorials

Powered by WordPress. Designed by WooThemes