Archive | eat this

For Everyone Stuck in the Snow :: Stay-in-Bed Stew and Biscuits Recipes

becca-garber-stay-in-bed-stew-biscuits I love all the snowy pictures in my Instagram feed this week, especially after a giant snowstorm hit the East Coast yesterday! So many bundled up children, so many snowmen, frosted trees, covered driveways, well-loved shovels, and ready-to-go sleds. I am almost jealous. ;)

I’ve been meaning to share these two recipes because they’re just too good to keep to myself. Elliott’s mom made this stew throughout his childhood, and we’d barely been married a month before I was learning the recipe myself. It’s the ultimate comfort food in our house on a cold day!

Also, as a mom and a minimalist cook, I love that the soup is a one-pot, throw-it-all-in-and-forget-about-it dish, and the biscuits are easy and fun to make with my kiddos. I have a picture to prove the biscuit-making part:

becca-garber-making-biscuits They both come running and line up like this as soon as I say the word “biscuits.” May you have as many happy memories with stay-in-bed stew and biscuits as we’ve had already!

///

Stay-in-Bed Stew

 Ingredients

  • 2 lbs stew beef
  • 2 cups peas (frozen or canned is fine)
  • 2 cups sliced carrots
  • 2 chopped onions
  • 2-3 large potatoes, cut into bite-sized pieces
  • 2 tsp salt (I often use beef bouillon instead)
  • Pepper to taste
  • 1 large can (not the traditional size) tomato soup
  • 1/2 soup can filled with red wine (you can also use white wine or clear fruit juice works well too)
  • 1-2 bay leaves

Directions

  • Mix all ingredients in dutch oven.  Add water or beef broth to desired consistency. Cover.  Bake at 275-300 degrees in oven for around 5 hours or until meat is tender.
  • OR mix all the ingredients in a large pot. Cover. Simmer on the stove for 3-4 hours.

Serves 6-8, and there are usually leftovers!

///

Homemade Whole Wheat Biscuits

Ingredients

  • 1.5 cups whole wheat flour
  •  1.5 cups white flour
  • 6 tsp. baking powder
  • 3/4 tsp cream of tartar
  • 1-2 tbsp sugar (optional)
  • 3/4 cup shortening (I use butter)
  • 1 cup milk (I substitute Silk soymilk for the lactose intolerant, and it works perfectly)

Directions

  • Blend dry ingredients.
  • Cut in shortening/butter, preferably lightly and with a pastry cutter.
  • Add milk and mix till doughy and just blended.
  • Roll out with a little flour and cut out biscuits. You can use a water glass, but I love these biscuit cutters.
  • Bake on a greased baking sheet at 350F/180C for 10-15 min or until lightly browned and firm on top.

    Makes 12-13 biscuits

13 :: in eat this, hospitality

currently enjoying

photo(88)

Happy Monday! It’s a blustery, almost-wintery one here, which totally foiled my friends’ and my plans for a pool date with our little kiddos. Way to be confusing, June.

Instead, I took my kids to the gym on base, where I locked them up in the ingenious kids’ play area and attempted to get a 15-minute speedy jog in on the treadmill. I kind of have a gym-phobia (all those intense people), but I also keep saying I want to “get back into running” when we move to CA. And… I haven’t run regularly since college… six years ago. So wish me luck. Do you run/exercise regularly??

In other news, here are some fun links to start off your Monday:

I tear up every time I watch this. So much joy and beauty in this dancing!

The photo above is from dinner last night, which is one of the quickest, cheapest, tastiest meals I know. Win win win!

Can’t stop thinking about this outfit. (And Madeline and Natalie are pretty great too.)

Think of your local thrift store as your storage unit.

Love Taza and Oh Joy! teamed up to make this fabulous new app. I think I’ll try it!

I inhaled two books over the weekend: one about flowers, one about cancer.

Lena’s uncle promised to teach her how to do this! (J/k…. but wow!!!)

What if humans were dogs? Hilarious.

Toxic sunscreen + some safe options. (We love this one.) Thanks for the link, Laura!

3 things to save time every day.

I love Anne’s amazing blog, and her summer reading list is the best around.

What were they celebrating?

I have the 5 euro-bought-on-the-street version of these and love ’em. Maybe if I ever want to spend $100 on sunglasses…

I picked this back up as per my goals for 2014… let’s see if I stick with it to the end this time!

——–

What are you reading? What are you enjoying? What are you wearing? I’d love to know!


0 :: in eat this, good reads, links I love

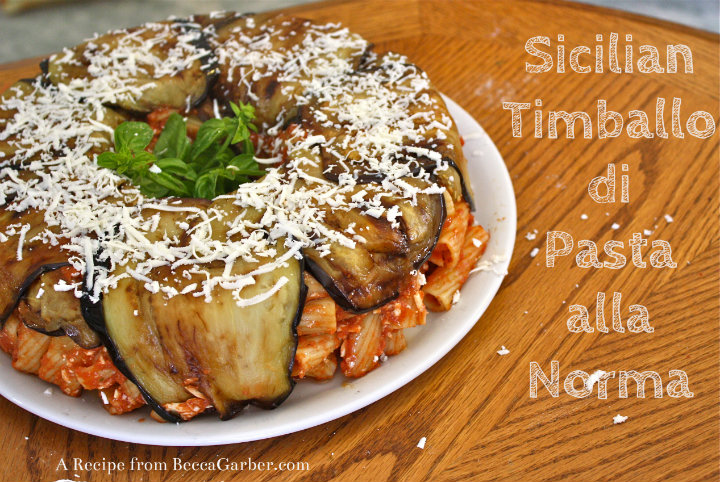
a Sicilian tradition :: Timballo di Pasta alla Norma

becca-garber-sicilian-pasta-eggplant-2

Full recipe at end of post.

I’m excited to share another truly Italian recipe with you today!  Anna, my friend and fellow crafter, organized a cooking class at her house last week.  Anna invited her friend and neighbor, Maria, and her daughter to teach the class, and together they taught us how to make a sponge cake with ricotta filling, cannoli (!), and the recipe I’m sharing with you today: Timballo di Pasta alla Norma.

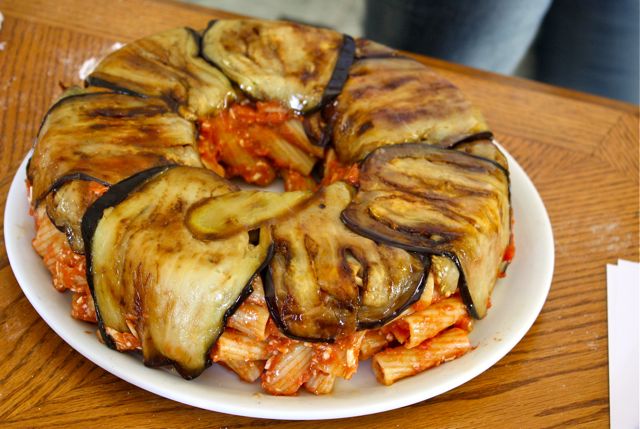
Pasta alla Norma is… umm… amazing.  It is a delicious combination of fried eggplant, homemade marinara sauce, and fresh pasta, and it is always topped with shavings of ricotta salata cheese.  (Earlier this year, I shared the recipe here.)  It’s also a classically Sicilian dish, something that will bring a smile to any Italian’s face.  This particular version is a play on the classic dish; timballo, as best I understand, means drum, and this dish is basically Pasta alla Norma baked in a bundt pan, with the end result being that your main dish does look a little bit like a colorful, extremely tasty drum!

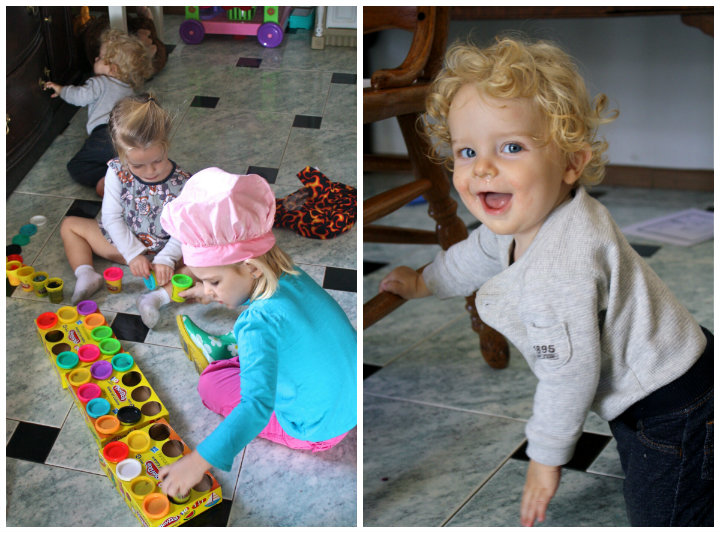
So, without further ado, let’s get drumming cooking.  I will make a brief apology for the quality of some of these photos.  I was trying to photograph three dishes as they were being cooked simultaneously, and I was also keeping these two munchkins out of trouble.  I know.  They don’t look like they even know the meaning of the word, but… trust me.  They do.

becca-garber-sicilian-pasta-eggplant-1

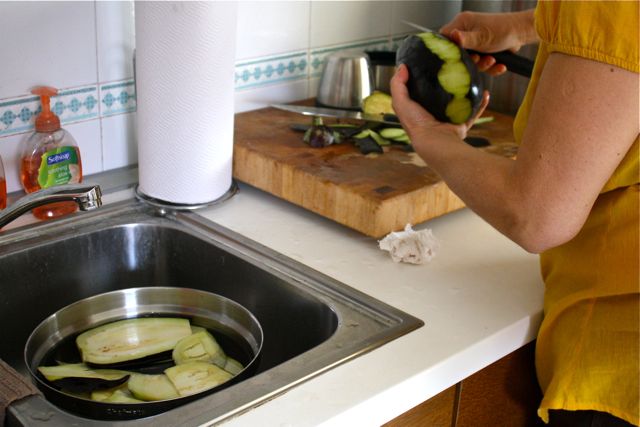
Begin by preparing your eggplant.  Italians like to peel off only the ends and a strip of skin on each side so that the eggplant will hold its shape as it fries.

becca-garber-sicilian-pasta-eggplant-3

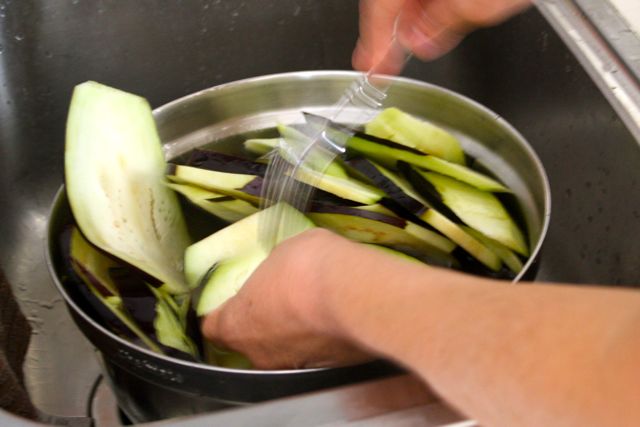
Thickly slice the eggplant and put it in a cold bath of heavily salted water for about 5 minutes.  This draws out the bitterness in the eggplant.  After 5 minutes, stab the slices with a fork.  Soak for 5 minutes more.

becca-garber-sicilian-pasta-eggplant-4

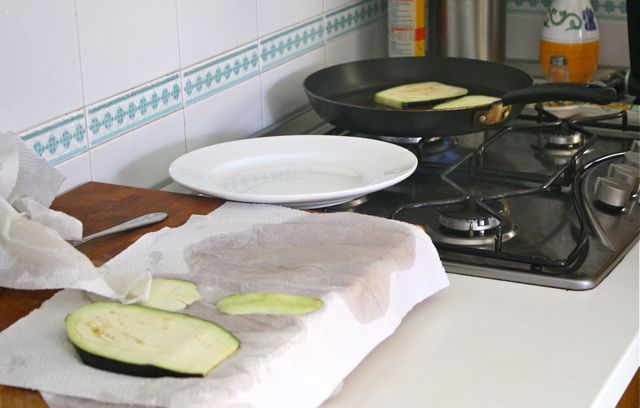
Drain the water (which will be brown) and rinse the eggplant.  Pat the slices dry.  Heat up your vegetable oil and start frying the eggplant in batches.

becca-garber-sicilian-pasta-eggplant-5

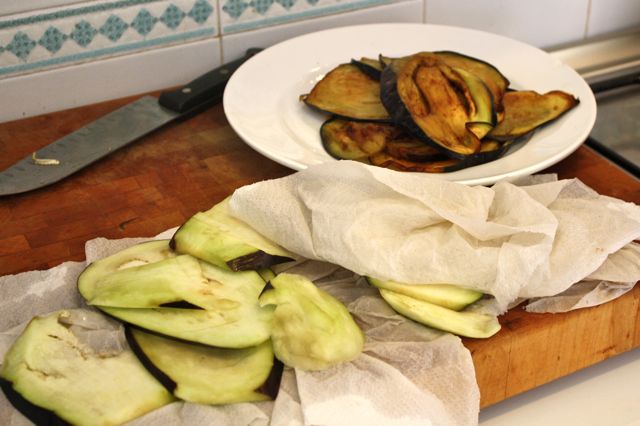
Cook until golden brown and tender.  Drain on paper towels until completely cool.  (And try not to eat it all right now.  Fried eggplant is unbelievably delicious… and this is coming from someone who didn’t like eggplant until she moved to Sicily.)


becca-garber-sicilian-pasta-eggplant-7

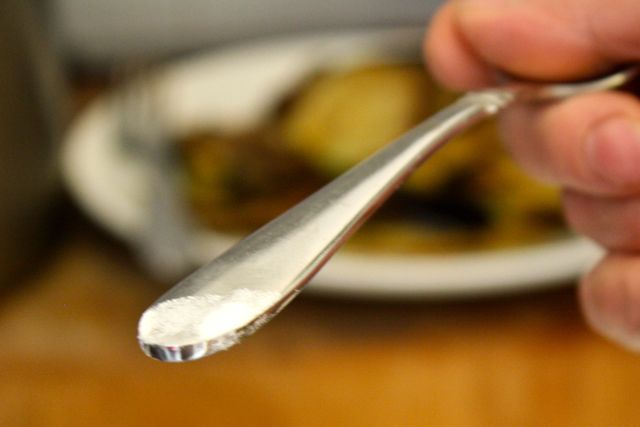
At this point you can begin preparing your pasta sauce.  The recipe is basic: tomato sauce, garlic, olive oil, salt, fresh basil.  The two secrets that make this sauce distinctive are (1) teaspoon of sugar and (2) a pinch of baking soda, if you can believe it!  The small amount (pictured below) alters the acidity of the tomato sauce and gives it a unique sweetness.

becca-garber-sicilian-pasta-eggplant-8

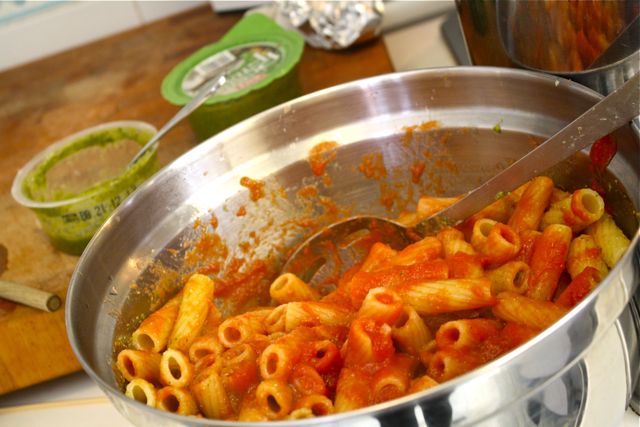
Cook your rigatoni pasta.  When it is al dente, mix in your sauce and 1 cup of pesto.

becca-garber-sicilian-pasta-eggplant-10

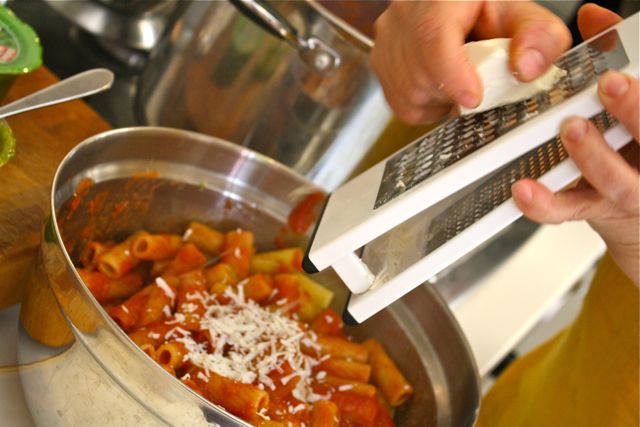
Add about 1.25 cups of ricotta salata and mix together.

becca-garber-sicilian-pasta-eggplant-11

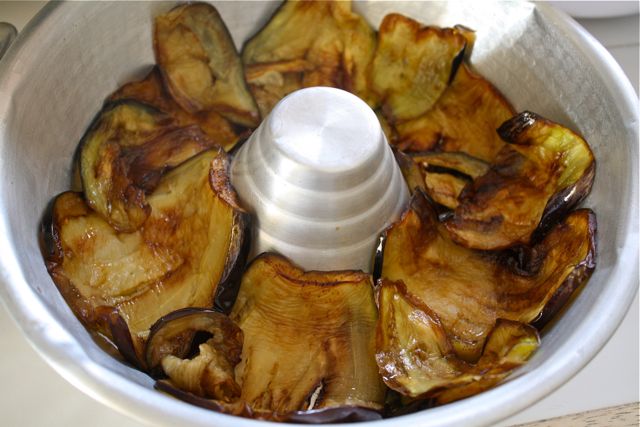
Line 2 bundt pans with the browned eggplant slices.

becca-garber-sicilian-pasta-eggplant-9

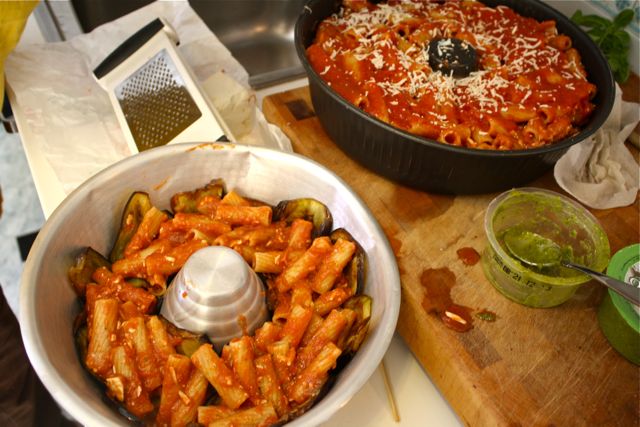
Pour the pasta on top of the eggplant and sprinkle with another 1/4 cup of ricotta salata.

becca-garber-sicilian-pasta-eggplant-12

Bake in the oven for about 10 minutes at 250 degrees F (120 C).  Remove from the oven and allow to cool.  (If you turn it out too early, your timballo will lose its shape, especially when you serve it.)

becca-garber-sicilian-pasta-eggplant-13

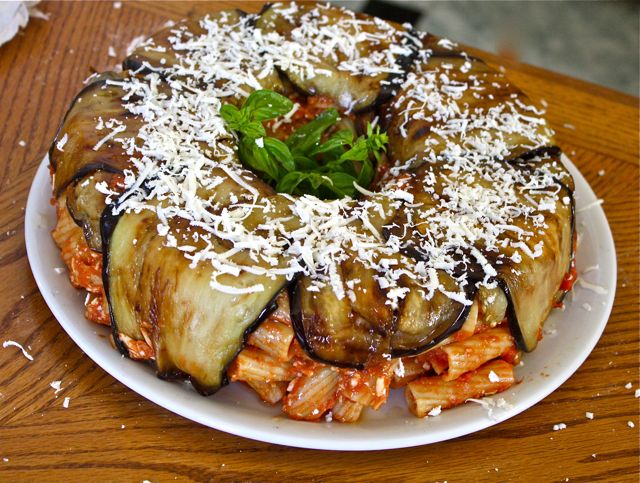
Decorate with fresh sprigs of basil and a sprinkle of ricotta salata.  And there it is!  A rich blend of salty and sweet, chewy and textured, too wonderful for just one helping.  A taste of Sicily in your kitchen!

becca-garber-sicilian-pasta-eggplant-14

Timballo di Pasta alla Norma

Eggplant

  • 2 Eggplants
  • Salt
  • Vegetable (sunflower) oil (for frying)
  1. Cut off ends and the skin down one side of each eggplant. Slice lengthwise in ½ inch slices.
  2. Place slices in a bowl of water and salt heavily. Let soak for 5 minutes.  Pierce eggplant slices with a fork. Let soak 5 minutes longe.  Drain water and dry each slice with a paper towel, piercing again with a fork.
  3. Heat vegetable oil and fry dried eggplant slices until golden brown on both sides. Drain on paper towels to remove excess oil. Let cool completely.

Sauce

  • 3 jars Passata (tomato sauce)
  • 2 Garlic cloves
  • Salt to taste
  • 1/8 tsp Baking soda
  • 1 tsp Sugar
  • ¼ c. Olive oil
  • Handful fresh basil
  1. Simmer tomato sauce, garlic, and salt for 20-30 minutes until thickened. After it is thickened, stir in baking soda and sugar.
  2. Remove from heat and add olive oil and basil.

Pasta and Finishing

  • 1 kilo (2 lbs) pasta (we used rigatoni but spaghetti can also be used)
  • 1 c. basil pesto
  • 1 ½ c. ricotta salata cheese, shredded with ¼ c. reserved
  1. Preheat oven to 250 degrees F.
  2. Cook pasta according to package instructions in salted water. Drain.
  3. Stir pesto and 1 ¼ c. sliced cheese into pasta. Add tomato sauce to pasta mixture.
  4. Line 2 bundt pans with the browned eggplant slices. Pour pasta into pan on top of eggplant then top with any remaining sauce. Sprinkle reserved ricotta salata on top.
  5. Bake for about 10 minutes.
  6. Wait until cool, then flip onto large flat plate. Put basil stems in center and top with shredded ricotta salata.
6 :: in eat this, in my kitchen, Sicily

Wild Blackberry Tarts Recipe

becca-garber-berry-blackberry-picking-8

Faced with buckets of blackberries in my kitchen (see our recent berry picking adventures here and here), I went a-hunting for a delicious baked good to showcase our wild harvest.  According to my friends and my husband (a tough one to please when it comes to sweets; I think sometimes that he’d never notice if desserts ceased to exist), these little tarts/pies take the cake… so to speak.

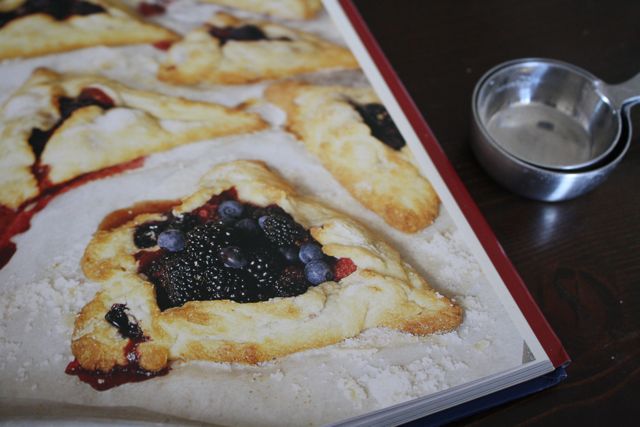
I adapted my recipe from one of my favorite cookbooks: The Pastry Queen.  (Thanks for the great wedding gift, Josh and Becca!*)  The recipe in this book is for “Emergency Fruit Crostatas,” which are delicious but enormous.  I used the same dough but adapted the size to be more that of a cookie.  A little mini pie.  Nom nom nom.

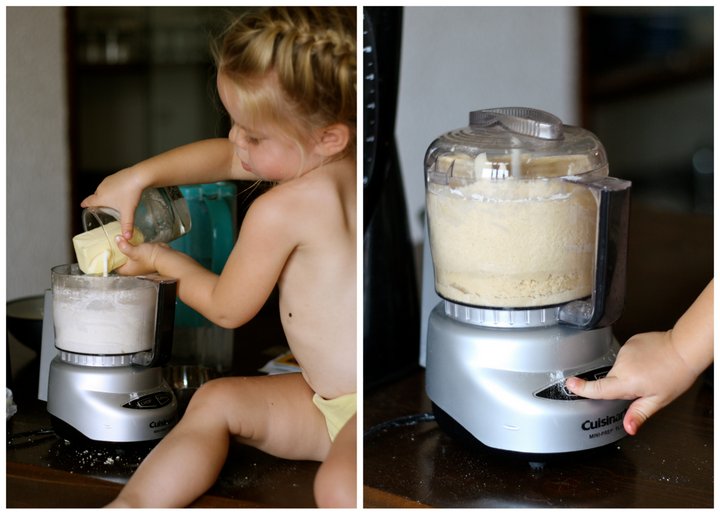
Here are some pictures to guide you through the process.  (Please excuse my little helper’s lack of clothing.  Remember last summer when all she wore was diapers?  This is the two-year-old version of diapers, I guess.  It’s too hot for anything else!)

The kitchen-friendly recipe is at the end of this post.

becca-garber-blackberry-berry-tarts-6

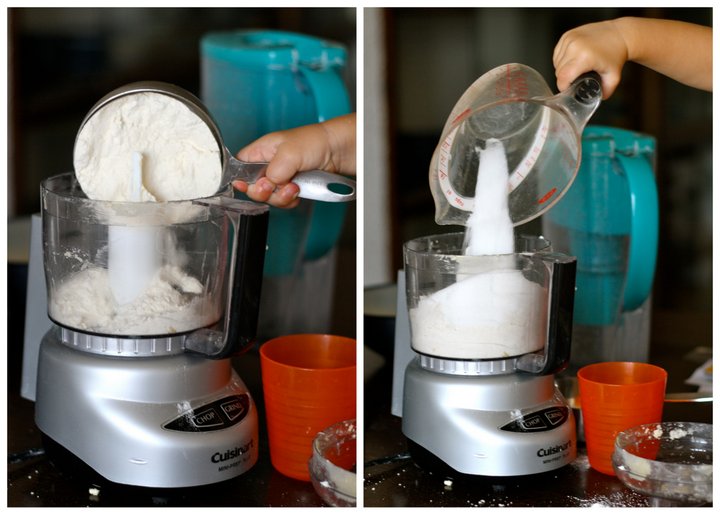
To begin, mix sugar, flour, and salt in a food processor.  (Note: I only have a mini food processor, which is too small to fit all the ingredients at once.  I divide the ingredients and mix everything in two batches.)

becca-garber-blackberry-berry-tarts-5

Add butter and then ice-cold water and mix some more.  Remove the dough, wrap in plastic, and chill in the refrigerator 1 hr or until firm enough to handle.

becca-garber-blackberry-berry-tarts-7

At this point you can make the original Fruit Crostatas from the dough with whatever berries you have on hand (including frozen).  Just divide the dough into four parts, pat each one into a circular shape, spoon berries into the middle, and form the dough around it to make a triangle.  I made these way-back-when my doula came for a home visit before Lena was born.  She and I both loved them but thought they were just too big.  Here’s a smaller, even cuter version:

becca-garber-blackberry-tarts-berry-1

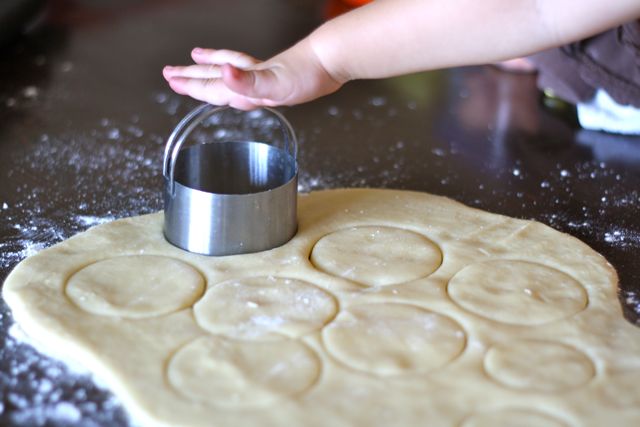
Using biscuit cutters or cups of different sizes, cut out smaller circles (mine were about 2 inches in diameter) and larger circles (about 3 inches in diameter).  I managed to get about 26 circles from the dough for a total of 13 tarts.

becca-garber-blackberry-berry-tarts-2

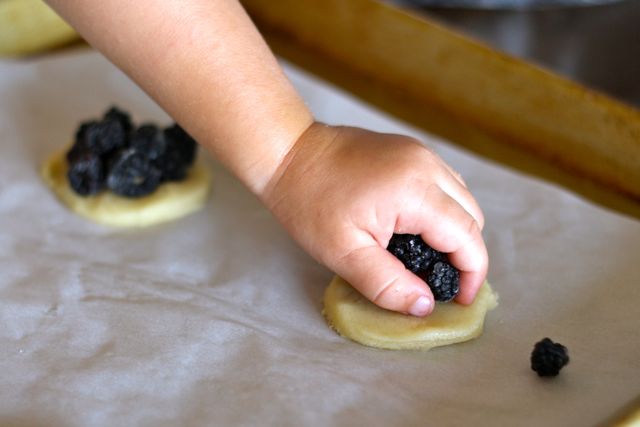
Put the smaller circles onto a tray lined with parchment paper.  Pile the berries onto the dough, pressing them down and piling them up as best you can.  I tried to get at least 10 berries on each little circle of dough.

If desired, sprinkle generously with sugar.  (I usually don’t add sugar until the end, but if you have a sweet tooth or very tart berries, go ahead!)

becca-garber-blackberry-berry-tarts-3

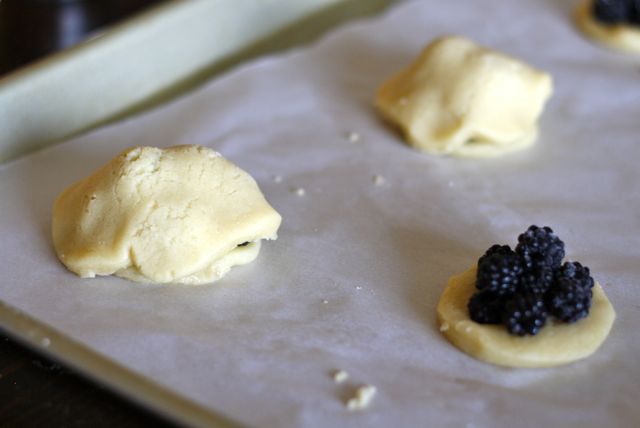
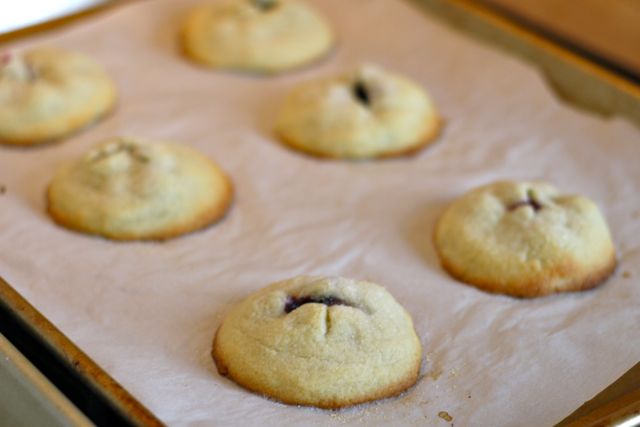
Gently place the larger circle of dough on top of each pile of berries.  Tuck the ends underneath the smaller circle.  Gently cut slits in the top of the pie/tart (I made a + sign) with a sharp knife.  Sprinkle with sugar.

Slip into a 450 degree F oven for about 10-12 min or until the edges of the tarts are golden.  Eat (perhaps with vanilla ice cream?) and enjoy!

becca-garber-blackberry-berry-tarts-4

*This is a different Becca and Josh than the Arthurs.  Yes, we have two couple friends named Becca and Josh… and get this: they named their son Elliot.  How crazy is that?!

Wild Blackberry Tarts Recipe

Ingredients

  • ½ cup sugar
  • 2 cups all purpose flour
  • ¼ teaspoon salt
  • 1 cup (2 sticks) chilled butter, cut into small pieces
  • 4 tablespoons ice water
  • 1 cup fruit

Directions

  • Preheat oven 450 degrees F.  Line two baking sheets with parchment paper or butter generously.
  • In a food processor fitted with a metal blade, pulse together the sugar, flour, and salt.
  • Add the butter and pulse 3 to 5 times, until the mixture is crumbly.
  • Pour the water through the feed tube 1 tablespoon at a time, and pulse until the dough begins to hold together.  (Note: I usually just need 1 tablespoon of water.)
  • Remove the dough, shape it into a ball, wrap it in plastic wrap, and refrigerate for 1 hr.  (If you are in a huge hurry — which I often am — freeze the wrapped dough just log enough to prepare the fruit filling.  It will be a little harder to work with, but it’s an acceptable trade-off when time is short.)
  • Roll out the dough on a floured surface.  Cut out approximately 12 circles that are 2 inches in diameter and 12 circles that are 3 inches in diameter.
  • Place the smaller circles on the baking sheet.  Pile as many berries as you can onto the circle of dough.  (Note: I fit about 10 onto each circle, but this number will vary with the size of your circles and your berries.)
  • Carefully place the larger circles of dough over the berries.  Tuck the edges of the dough underneath the smaller circle.
  • Cut slits (I made a + sign) on the top of the tart.  Sprinkle generously with sugar.
  • Bake for 10-12 minutes or until golden brown.  Cool on the baking sheet for no more than 10 minutes or they might be difficult to remove whole.
  • Serve warm or room temperature… preferably with vanilla ice cream!
10 :: in eat this, in my kitchen

an Italian tradition :: Tiramisu!

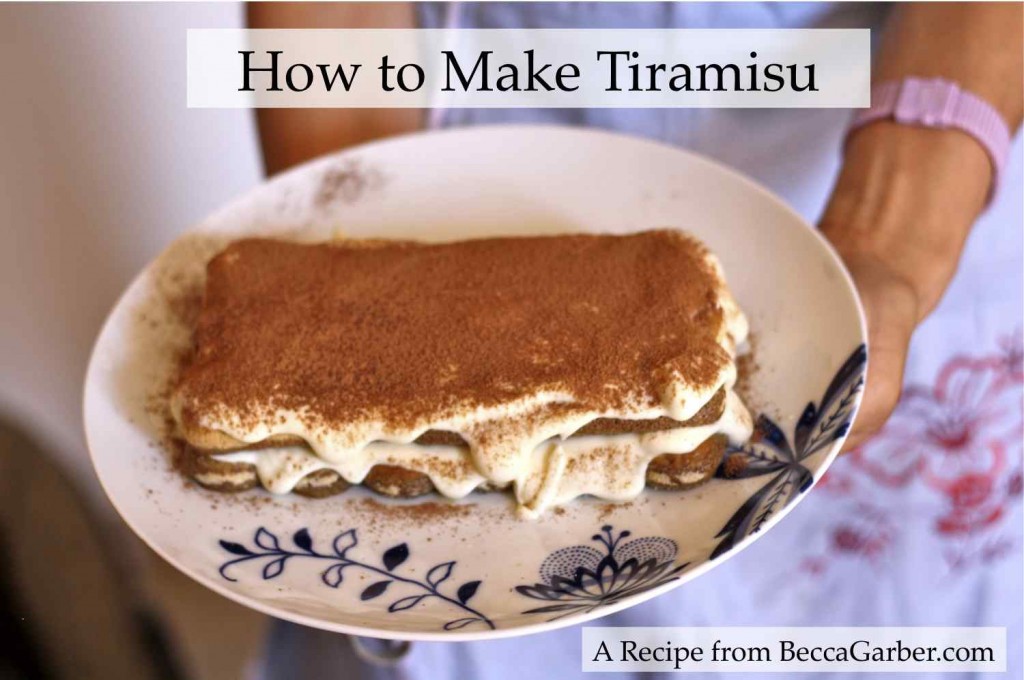
becca-garber-how-to-make-tiramisu-recipe

I have a confession: I really am not a huge tiramisu fan.  In fact, I didn’t even know what it was until I moved to Sicily.  Am I alone in this?  It seems like a lot of people have a love/hate relationship with tiramisu.

But then my friends and I got together recently for another Italian cooking class and we all learned how to make tiramisu.  My first reaction was: wow, it’s really easy!   Surprisingly so, considering what an elegant dessert you can create in so little time.

My second reaction came when I bit into the fresh tiramisu itself: wow… I think I love this.  Cool on a hot day, the perfect blend of cream and coffee, light as well as rich… I was hooked.  One piece wasn’t enough.  I wanted to eat the whole plate!

And now here’s how to make a whole plate for yourself.  I’ve included the kitchen-friendly recipe at the end of the post for easy reference.
becca-garber-tiramisu-recipe-espresso

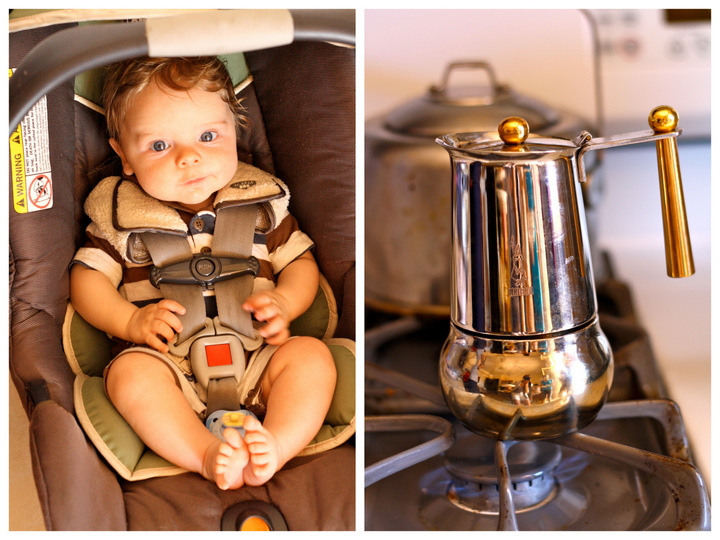
First, brew up 6 cups of Italian espresso, which is how much one Italian espresso pot makes.  In American terms, that’s 9 oz, or about 1.5 measuring cups of very strong, very dark coffee.

Admire any cute babies while you’re at it.

Pour the espresso into a shallow dish, add 2 teaspoons of sugar, and let it cool while you prepare the cream filling.
becca-garber-tiramisu-recipe-ingredients

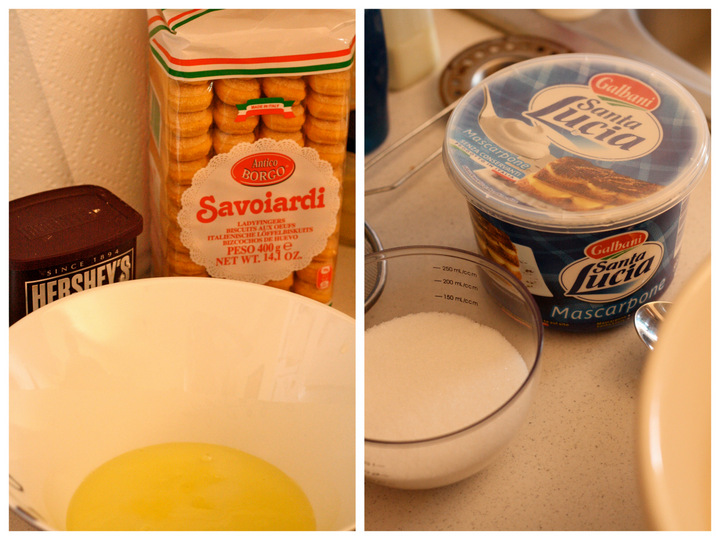
Assemble your ingredients: 4 eggs, 120 grams of sugar (1/2 a cup), 400 grams of lady fingers (about 50 cookies), and 1 lb of mascarpone cheese.  Divide the eggs into two medium-sized bowls.
becca-garber-tiramisu-recipe-eggs

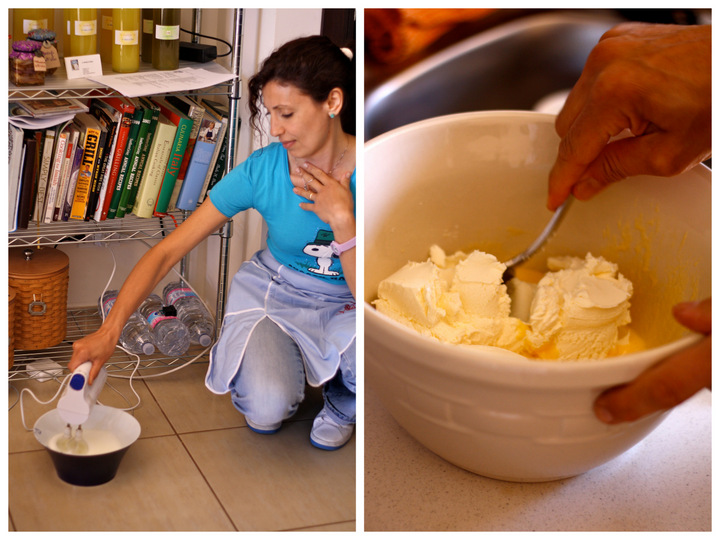
In the bowl with the egg whites, add a pinch of salt and then beat the egg whites until soft peaks form.  This picture of Ester beating egg whites on the floor made me laugh because it is so typical of my own cooking experience in several Italian kitchens, ie. electric sockets are not always where you expect them!

In the bowl with the egg yolks, add the 1/2 cup of sugar and then beat the mixture until it is a very light yellow.  After that, add the 1 lb of mascarpone cheese (see above) and mix it by hand until it is white and fluffy.
becca-garber-tiramisu-recipe-1

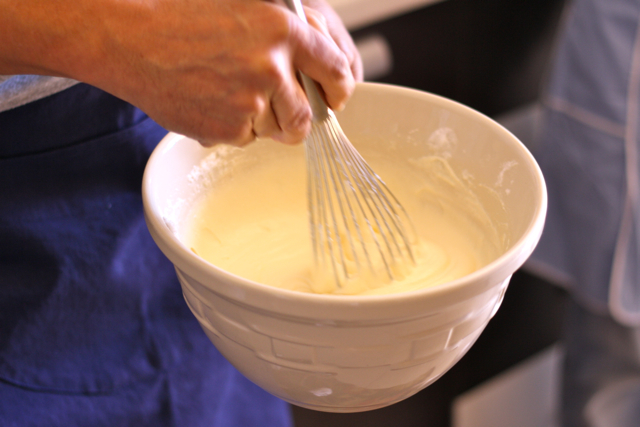
Fold the two egg mixtures into each other in one bowl.

Now it’s time to assemble your tiramisu!  Make sure you have your shallow dish of cool coffee, your bowl full of the cream mixture, your packet of lady fingers, and a dish for your tiramisu.
becca-garber-tiramisu-recipe-2

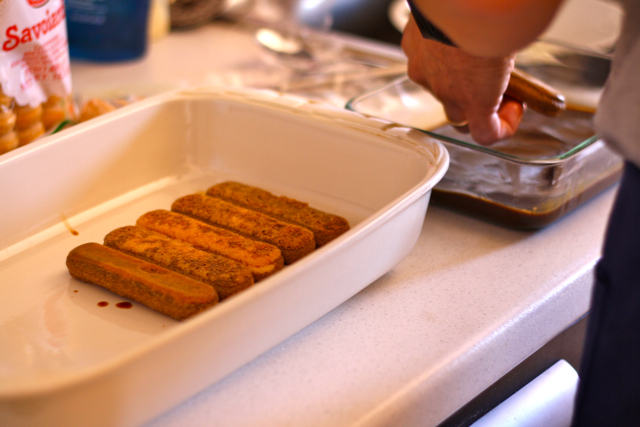
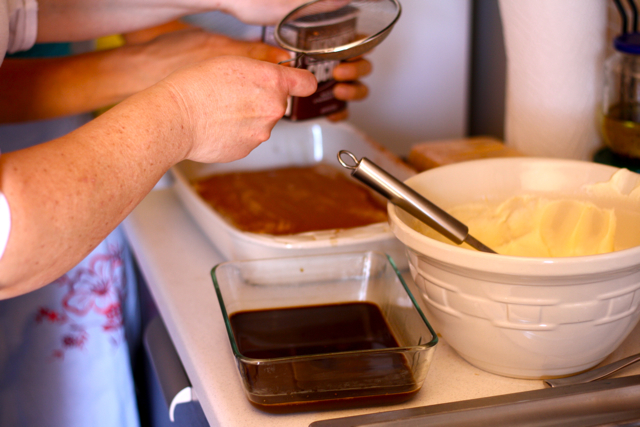
Begin by dipping a lady finger into the coffee mixture.  Lay it in the mixture, flip it over to soak the other side, and then remove it.  Take care not to leave the lady finger in the coffee too long or it will become too soggy and begin to dissolve.  Lay your cookie in your tiramisu dish.  (Note: we used both a casserole dish and a plate, and in our opinion the tiramisu on the plate looked prettier in the end.)  Continue this process, laying lady fingers next to each other in a neat row, until you have made the base of your tiramisu as large as you would like it.
becca-garber-tiramisu-recipe-5

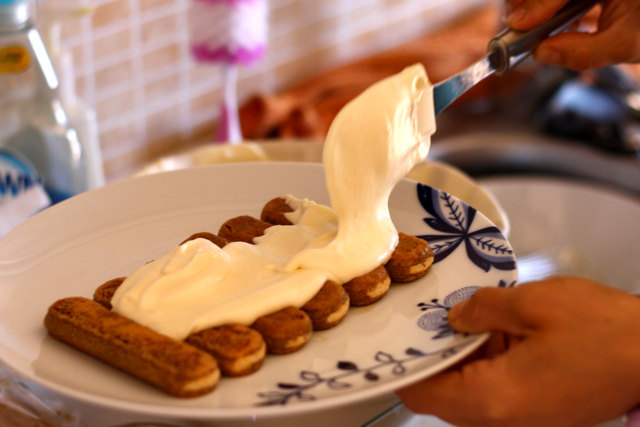
Spread about half of the cream over the top of the lady fingers.
becca-garber-tiramisu-recipe-3

Dust with a layer of unsweetened cocoa powder.
becca-garber-tiramisu-recipe-6

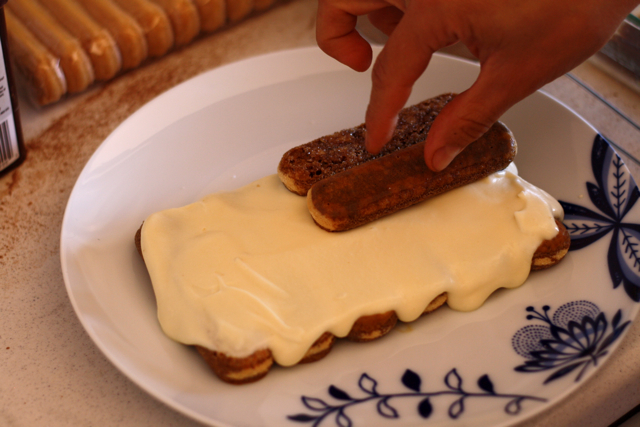
Continue the process with another layer of coffee-soaked lady fingers.  Add another layer of cream and unsweetened cocoa…
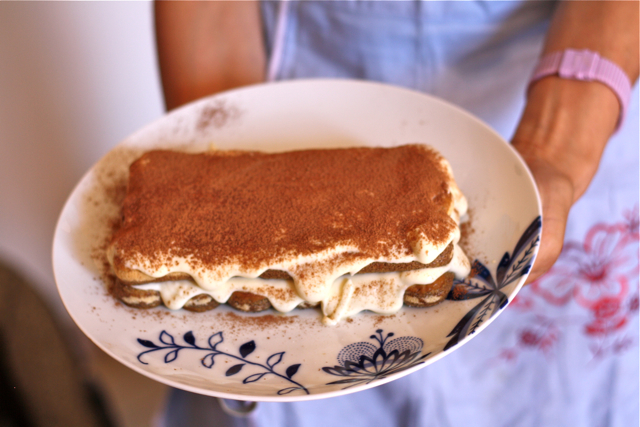
becca-garber-tiramisu-recipe-7

… and voilà!  Tiramisu!  Isn’t it pretty?  I love the sloppy elegance.

Chill in the refrigerator at least 4 hours before serving.  Alternatively, you can put it in the freezer for 30-45 minutes and serve.

Here are a few possible variations:

  1. You might have noticed that this recipe includes raw eggs!  Not good if you’re pregnant… or if you’re just not a fan of raw eggs.  You can use panna montata (whipping cream) with mascarpone and omit all eggs for the cream.  Beat the whipping cream with the 1/2 cup of sugar and whip in the mascarpone cheese.
  2. If you do not like the flavor of coffee or just want a different option you can use crushed strawberries mixed with sugar.  Soak the biscuits the same way and you can also add fresh strawberries as garnish.
  3. Liqueur is sometimes added to the cream to add a twist to the dessert (and is commonly included in tiramisu gelato, too!).  Add brandy or another liqueur if you would like.

Tiramisu Recipe

Ingredients
  • 6 Italian cups of espresso + two tsp sugar (cooled)
  • 4 eggs
  • 120g sugar (1/2 cup)
  • 400g lady fingers (about 50 cookies)
  • unsweetened cocoa
  • 500g or ½ kilo or 1 lb mascarpone cheese (if you are in Italy, I recommend the Galbani Santa Lucia brand)

Directions

  • Prepare 6 Italian cups of espresso.  While still hot, add 2 teaspoons of sugar and let it cool in a shallow dish.
  • Divide the egg yolks and the egg.  Put the egg whites in one bowl and the egg yolks in another bowl (both bowls large enough to beat the eggs in).
  • Put 120grams (1/2 cup) of sugar in the bowl with the egg yolks.  Make a cream by whipping it by hand until it changes color to be light yellow.  Mix the mascarpone cheese in with the egg yolks until it is white and fluffy.
  • Add a pinch of salt to the egg whites and beat until it forms stiff peaks.
  • Fold the two egg mixtures in together to form a cream.
  • Dip lady fingers very quickly into the espresso mix and place quickly in to the pan.  Don’t do them too long or they will be soggy.  Place lady fingers only in the bottom of the pan.
  • Spread less than half of the cream on top of the biscuits.
  • Sprinkle unsweetened cocoa on top of the cream.  Add another layer of biscuits, the rest of the cream and top with unsweetened cocoa.
  • Chill in the refrigerator for at least 4 hours or you can put it in the freezer to eat it faster.  You can also freeze tiramisu and eat frozen; just pull it out of the freezer 30 minutes before you want to eat it.
Related Posts Plugin for WordPress, Blogger...
7 :: in eat this, Italy, Sicily

Powered by WordPress. Designed by WooThemes