Archive | Making Room {Handmade}

Fingerless Gloves Under Your Christmas Tree!

becca-garber-fingerless-gloves-2014-6
I had a burst of motivation last night and finally finished a bunch of fingerless gloves! They are all hand-knit from beautiful blend of Chinese Tussah silk and merino wool, and they feel like a soft cloud wrapped around your hands. When you’re texting or driving or working with your fingers, they keep your hands and wrists cozy and warm.

Can you think of someone you’d like to give them to? Would you like a pair in time for Christmas? Order by Saturday, DECEMBER 20, within the U.S.A. and you get your wish! You can contact me directly, or I will also be listing them in my Etsy shop very soon. Only these five pairs are available this year!

Each pair is $25 each. Shipping will be $5 per order, which is a discount from the true Priority Mail cost, but I want to be sure you get them in time!
becca-garber-fingerless-gloves-2014-4

Bright yellow and deep purple, size small (fits most).

becca-garber-fingerless-gloves-2014-3

Fuchsia and yellow, size small (fits most).

becca-garber-fingerless-gloves-2014-2

Colors are brighter on your screen than in real life. These gloves are a beautiful peachy-red and sea blue. Size small (fits most).

becca-garber-fingerless-gloves-2014-1

Gray and deep red, size small (fits most).

becca-garber-fingerless-gloves-2014-5

Bright blue and yellow, size medium and extra long.

And MERRY CHRISTMAS, EVERYBODY!!!

——–

Update: All these gloves sold within 36 hours of me writing this post. Thank you, friends!!!

5 :: in knitting business, Making Room {Handmade}

new in the Etsy shop

newfrommakingroomhandmade

Yesterday I took Lena to a friend’s house to share their babysitter, put Gil down for a nap, and then worked furiously to update my Etsy shop.  I’ve made a few fun new things recently and also wanted to give the shop a facelift while I was at it.  Well, Gil didn’t stay asleep for long, and Lena’s playful morning was all too short, but finally by around 11pm last night I did accomplish my goal!

Check out Making Room {Handmade} on Etsy to see what I’ve been working on.  I’m especially in love with those darling little purple Mary Janes in the photo above.  I made a pair for my friend Becca’s new baby (who arrived last night… yay!) and can’t wait to see them on those little baby toes!

Have you been crafting lately?

4 :: in Making Room {Handmade}

pregnancy survival guide

This pregnancy has been a different ball game than my pregnancy with Lena.  Let me paint a picture for you of how my third trimester was last time:

  1. Husband is deployed
  2. My foot is broken
  3. I cannot work because of said broken foot (I am an ICU nurse)
  4. I am stuck inside in January, and February, and March
  5. I am very miserable

Honestly I don’t know how those last few months of my pregnancy with Lena even happened.  They are a blur now.  Thanks to good friends and a wonderful church and living near my family, I was very well cared for, but I was very, very glad when those months were over and I had a beautiful baby in my arms!

This pregnancy has been sooo different.  I have a husband at home to take care of me and worry over me.  (He took care of me and worried over me last time, too, but from Egypt, so it was a little completely different.)  I don’t have any broken bones… yet.  I work hard, but my job description has changed to include mothering a toddler, running a home in a foreign country, and managing my knitting and sewing venture.  I am not stuck inside, but I do spend a lot of my time inside, and that will explain a lot of the things on my list!

Here are a few things I’ve loved this pregnancy:

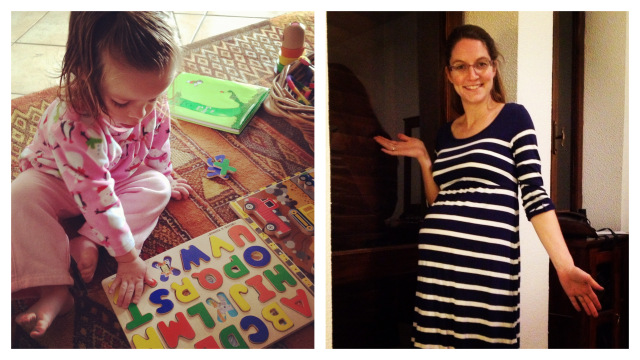
1. Cute jeans.  I love my jeans, which were a gift from my mom and have helped me feel stylish throughout both my pregnancies.  These jeans are a cut above Old Navy brand but not as pricey as Citizens or Sevens.  (Save that splurging for the many, many months of your life when you’re not pregnant!)

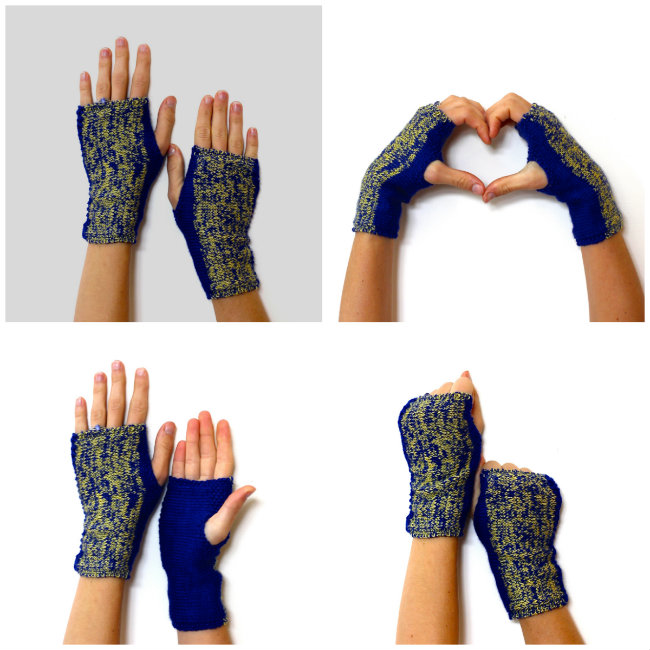
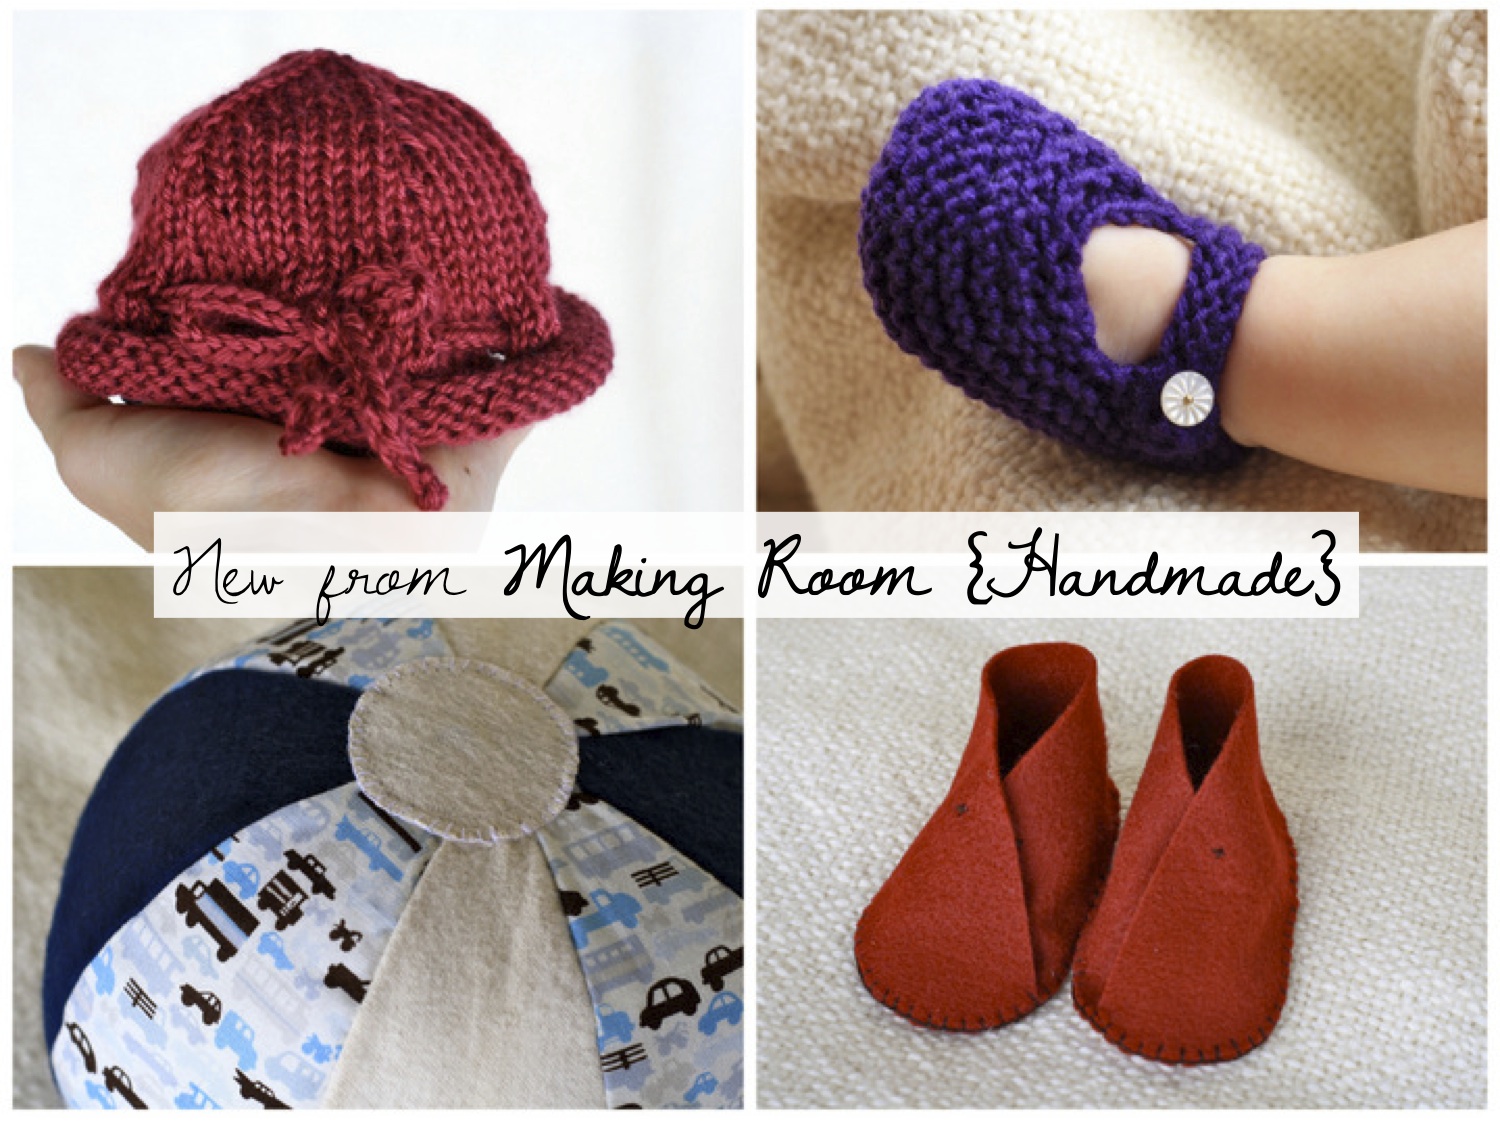
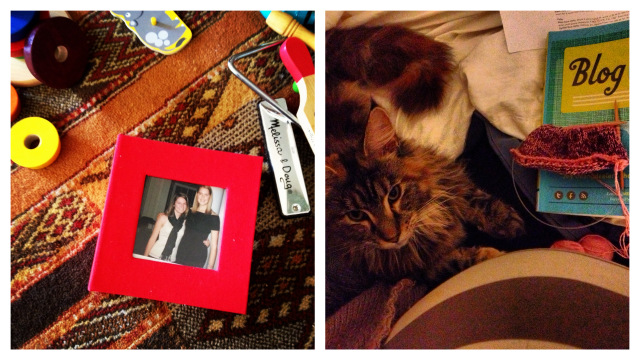
2. Knitting.  You all know I love it!  This season I have been so content to sit and knit in the evenings or occasionally even while Lena is playing during the day.  The slide and click of my knitting needles is relaxing, and so is the feeling of productivity as I create beautiful things.  Image via here.

3.  Oranges!  They are in season in Sicily and they are delicious.  Lena and I eat multiple oranges a day.  She is learning to peel mandarin oranges all by herself.  I love to watch her quietly as she furrows her brow in concentration and delicately peels off the skin.  Image via here.

4.  Warm, caffeine-free drinks.  I am sipping this Mighty Leaf tea right now.  I tasted this brand for the first time in a spa before a pregnancy massage two years ago and have been hooked ever since.  During these cold days I also love my decaff coffee every morning (with plenty of cream and sugar) and often enjoy a mug of spiced cider in the evenings.  I make my own (recipe here!), store the jug in the fridge, and heat up a cupful whenever I’m ready for a warm treat.

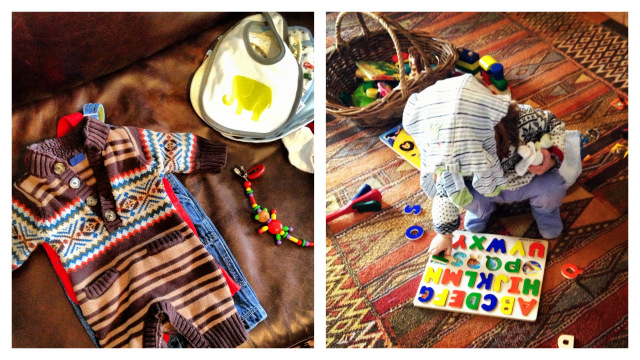
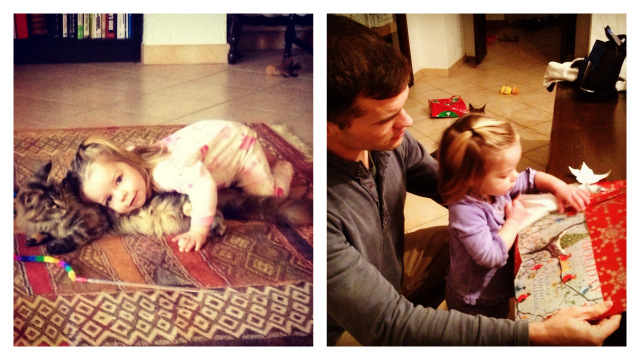
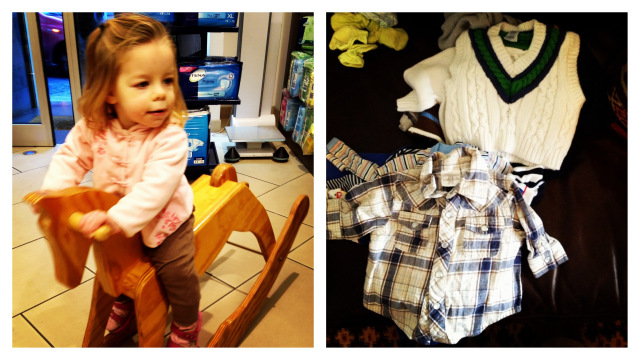
5. IKEA stacking toy.  I bought it on a whim at IKEA a few months ago and it has amused Lena for hours.  I had no idea she would love it so much, but wow… I am so grateful!   It’s teaching her important motor skills on the living room rug while I run around getting dinner ready.  Now we’re giving her this toy for Christmas… partly because all the reviews say it kept their kids entertained for so long!

6.  Slippers.  Our Italian house is cold during the winter and the floors are the coldest part of all.  You literally cannot walk on them in socks because the chill seeps right through socks and into your bones.  My sister Emily and sister-in-law Jess (who are best buds… how cool is that?) bought me these slippers last year and I literally wear them for about 8 hours every. single. day.  Thank you, girls, you really nailed that Christmas present.

7.  Knee-high, flat-heeled leather boots.  I bought a pair (not these, but they sure are gorgeous) a few years ago and wear them with dresses all winter long.  Especially when you are pregnant, any dress will seem awfully short when your big belly hikes up the skirt in front!  Knee-high boots add a little coverage, look so cute with a dress, and will be a staple from the first hint of fall till the green leaves pop out on the trees again.

8. This book has its quirks, as does the whole Bradley method, but I am so grateful for this manifesto for natural childbirth.  I gave birth to Lena using this method and had a great experience, and so natural childbirth is my goal with this bambino too.  I’ll be re-reading a lot of my old materials in January in order to prep for labor, delivery, and the post-partum period… which is coming up so soon!
 

A few things not pictured:

  • Zantac.  I have awful reflux this time around; it just feels like my stomach doesn’t even have room for a snack sometimes.  Popping one of these tiny over-the-counter pills kills the reflux in 30 minutes and makes me a much happier girl.
  • Nap time.  Lena is still taking two naps a day most days and how I love them.  Time to knit, read, blog, clean, bake, prep for dinner, or just sit still for a little while and pet the cat.
  • Body pillow.  Elliott bought me this pillow during my last pregnancy and I just got it out of storage last week.  I’m so glad I did; it makes sleeping at night so much more comfy!  Thank you again, Elliott.

Any suggestions for things you or your loved ones enjoyed during pregnancy?  I’m all ears!

9 :: in Baby Numero Due, links I love, Making Room {Handmade}

life lately

 washing, sorting, and storing clothes for our little man!
& someone “helps” me with her baby brother’s socks and onesies
 the new puzzle from Grammie is a huge hit 
& part of a photoshoot for my sister-in-law Jess to thank her for a great birthday present: maternity duds!  
33 weeks now :-)
 Lena discovered this photo album of me in my college days and loves to page through it
& knitting, reading, a Maine Coon kitten, and a baby bump
best buds
& opening the Advent calendar from Auntie Eden

 rockin’ out in a pharmacy in town (where they provide toys for children?!  I love Italy!)
& more baby boy clothes… I couldn’t resist
 mop bucket madness
& photo from a classical piano concert we attended with friends 
(and stayed out till 2am… I had forgotten I could do that!)
what happens when you ask your hubby to “just let me finish knitting this hat”
& Daddy’s warm weather gear on a blue-eyed babe

***

Linking up with Lindsay of Hello Hue today!

4 :: in Baby Numero Due, holidays, life lately, Making Room {Handmade}

Craft Fair Tips & Tricks

Well, dear readers, here it is: the craft fair advice post!  I didn’t know I had learned so much until I began to write it all down for you.  A craft fair is a lot of work with a steep learning curve from start to finish!

Here are my tips as well as my checklists, a few pictures, and some more resources at the end.

Table Decorations & Props 

I felt rushed to build up my inventory (because I only found out about the craft fair three weeks before!) so I spent very little time thinking about how my craft fair table would actually look.  I should have designed my display on my kitchen table before the event so I could play around with spacing, props (like bowls or dishes or pretty trays), and even the amount of products I wanted to display.  Therefore I only had a basic vision for my table and just played around with the design once I got to the fair.  Since I had a couple of hours before the fair began, I could arrange and rearrange a dozen times.

A couple of things I did know ahead of time:  I wanted to use a plain white tablecloth over the dark wooden table to really make my brightly-colored products pop.  I wanted to display smaller items in matching Polish pottery bowls, which are the prettiest things in my kitchen and are very complimentary to my fabric choices and personal style.  I also planned to hang a homemade pennant banner on the front of my table so I didn’t just have a plain white tablecloth there.  (Some of you will remember it from Lena’s first birthday party.)

As you can tell from my photos of the craft fair, my friend Anna spent a lot of time thinking about her display and had some darling ideas and a beautiful vertical display for her chef’s hats.  Her attractive use of space definitely drew customers in!  She also had printed a larger version of her logo to hang on the front of her booth.

Because Anna and I were sharing a table, we both had to crowd our displays in order to show all the items we offered.  Considering this, we took a lot of care to make sure that all our items were grouped well and that we kept any extra inventory off the table to provide as much calming white space between items as possible.  In the end our table looked rich with attractive choices but not overcrowded or overwhelming.

We both encouraged people to interact with our displays and products, meaning Anna was happy for kids to swirl her whisk around a bowl with her felt sugar cubes and felt eggs.  I also cheerfully suggested that people try on my gloves whenever they paused to look at them; I know they look so much more attractive on your hands than simply lying on a table. 

Business Cards and Logo 

Most professional crafters will have invested in a professional designer create a logo for them.  I haven’t done this yet, so I just made my own sign with the name of my shop, a tagline (“Knitted and Sewn by Becca Garber”), and the addresses of my blog and Etsy shop.   In retrospect there were a dozen things wrong with my sign design (ie., it wasn’t colorful, the web addresses were long and distracting), but hey… better next time.  I printed a sign with my shop name, tagline, and web addresses on fine resume paper and framed it in a picture frame we had in our house.  I also printed “business cards” that looked exactly the same as the sign.  These I printed on resume paper and then cut out myself with a craft paper cutter.

Price Tags 

All the resources I read before the craft fair emphasized that your prices must be obvious.  They suggested framing little price signs by each category of your inventory.  I didn’t have enough little frames for that, so I made little paper “price tents” with the name of the product, a description, and its price on the front.  Here’s an example from my bean bags:

The “price tents” were easy to make on Microsoft Word.  I formatted a page to have two columns, typed up a product description and price in each column towards the bottom of the page, and then printed the page.  I cut the page in half lengthwise—two strips of paper, each with a product description and price near the bottom—and then folded the strip in half and folded the ends underneath.  I taped the ends together and this made a little 3-sided tent with the product description and price on the front side.  These stood up well by themselves and didn’t lose their shape throughout the day.  When I packed up after the show, I carefully peeled off the tape and smoothed the papers out.  They’ll be used again!

For individual products like a scarf or hat, I made price tags on fine resume paper and attached them to the product with a natural cotton yarn.  I also made “original price tags” and then “alternative price tags.”  The alternative price tags were $5 less for everything in case I decided to lower my prices to encourage sales halfway through the show.  Kind of awkward to decide this and then have to rewrite your prices with a Sharpie.

I made sure every sign was printed (no random handwritten signs) using the same type of font and the same kind of paper.  This consistency gave cohesiveness to a table full of various products.   

Gift Wrapping  

It’s a nice touch to hand your customer their purchase in a pretty bag or box.  I bought brown paper lunch bags at the grocery store; they were big enough to fit most of my products.  I would have liked to glue on handles with a hot glue gun and twine, but I ran out of time.  I did manage to use a hot glue gun to quickly attach my business card to the front of the paper bags, and that was a nice addition and guaranteed that my customers would go home with my card and all my contact information.

I bought cute red-and-white-striped tissue paper to go inside each bag.  This made the new purchase look more like a gift and reminded everyone that they were shopping for Christmas… yay!

Paperwork: Receipts, Custom Orders, and Inventory Checklists  

These are a few pieces of paper that you might like to have with you at the fair:

The first is receipts.  Some customers might like a receipt of purchase, particularly if they just bought a large item.  You can create your own in Microsoft Word or download a customizable template here.

Secondly, if you are willing to offer custom orders, you might be opening yourself up to a whole new scope of your business.  I was eager to offer custom orders on my gloves, particularly because I’d only had time to make three pairs before the show.  Every time people showed any interest in the gloves I encouraged them to try them on and then pulled out a bag full of yarn so that they could imagine a pair of gloves in colors that appealed to them.  This way I got three custom orders in a three-hour show, which is $75 I wouldn’t have otherwise made!  I designed little custom order forms.

Lastly, you will want to keep an inventory checklist so that you know what you’re selling.  I made a nice one on Microsoft Word but ended up just keeping a running list myself of what I had sold and for how much.  This tally of how much I had made thus far also motivated me to keep selling hard! I’m glad I have this record because my memory fades quickly and I’ll need to know these figures for taxes in April.

 
Ploys

By this I mean candy or cookies or your business logo stickers or whatever encourages people to come on over, snag a handful, and take a look.  I wanted to accommodate all those who might be tempted by chocolate!  I set out an attractive Polish pottery dish that matched my other display dish and filled it with Hershey’s kisses wrapped in Christmas-colored foil.  These were a hit… especially with me.  

Craft Fair Checklist

  • Your inventory with price tags either attached now or made to be attached later.  I recommend packing everything in a rolling suitcase!
  • Table decorations and/or props
  • Receipts
  • Custom order forms
  • Inventory checklist/price list
  • Paper towels for unfortunate spills or accidents or to provide shape to your products (like stuffing hats instead of laying them flat on your table)
  • Mirror so people can see what they look like as they try your products on!
  • Cash—I had $20 in $10, $5, and $1 bills and it was more than enough as people began paying in cash immediately and bulked up my stash.  I also accepted checks.
  • A small table or a chair on which to place your cash box, paperwork, pens, and water bottle, as it’s awkward to have them on the floor and you need to use your table to display your wares.
  • Office supplies
    • Tape—masking tape for securing your tablecloth/décor and gift tape for odds and ends
    • Pens and Sharpie
    • Pins—preferably plain metal straight pins so as to be as invisible as possible in your display
    • Safety pins
    • Scissors
    • Needle and thread
    • Calculator
  • For yourself
    • Camera
    • Phone
    • Water or drink of preference (ie. decaff coffee for that early morning for me!)
    • Sweater if the craft fair location is cold
    • Food—consider including a full meal if you’ll be there all day, but also consider that the booth down the hall selling fresh Mexican street tacos might be calling your name!  Also consider if you want to eat behind your table (not recommended for appearance’s sake…) and who will sit there in your stead while you go eat.  Can your husband or a good friend relieve you for 30 minutes and also be trusted to bring in sales while you’re gone?
Resources and Other Considerations

OK, now go forth, craft, and sell!

Related Posts Plugin for WordPress, Blogger...
71 :: in arts and crafts, knitting business, Making Room {Handmade}

Powered by WordPress. Designed by WooThemes