Archive | in my kitchen

Making Room on Thanksgiving

becca-garber-thanksgiving-2013-3

The first time we saw our future home in Sicily, we fell completely in love with the gigantic farmhouse table and benches in the dining room.  The landlords told us that the table came with the house, and I immediately began to dream of filling the table with friends and family.  I love to put people around that table!

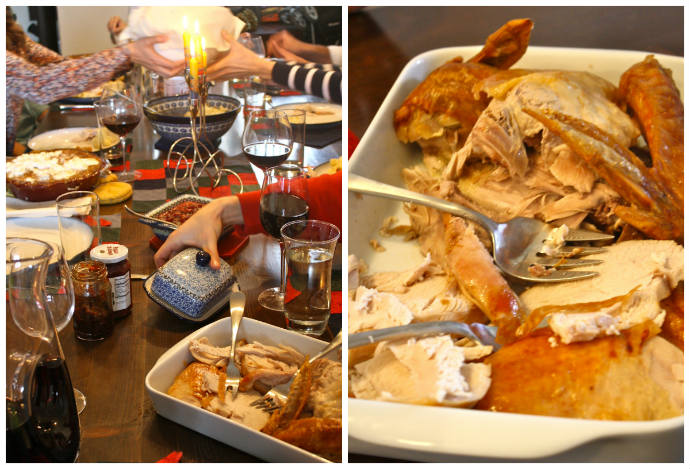
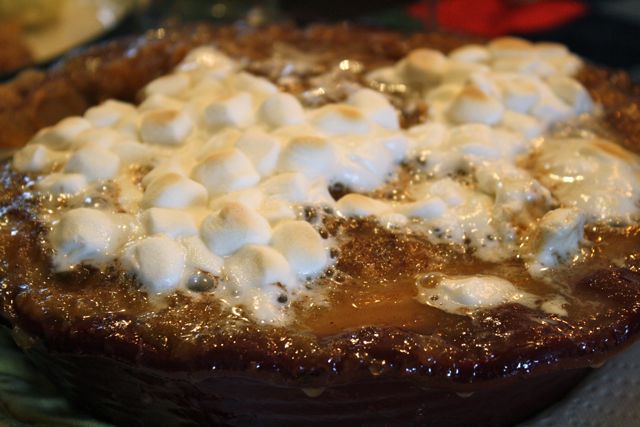
We’ve made some new friends recently, and I thought they might be feeling far from family for their first big holiday in Sicily.  We sent out an email, arranged a potluck, and all converged in our home on Thanksgiving.  Alyssa brought spinach and artichoke dip, an apple pie, salted caramel brownies, and hot rolls; Laura made her mom’s famous broccoli and sweet potato casseroles; and Brigitta brought cider and mulling spices, two pumpkin pies, and the Charlie Brown Christmas DVD for Lena to borrow!  I took care of the turkey, cranberry sauce, gravy, and mashed potatoes, and also made a new favorite for us: pear and ginger bruschetta with goat cheese. Everyone contributed wine.  And we feasted!

becca-garber-thanksgiving-2013-1

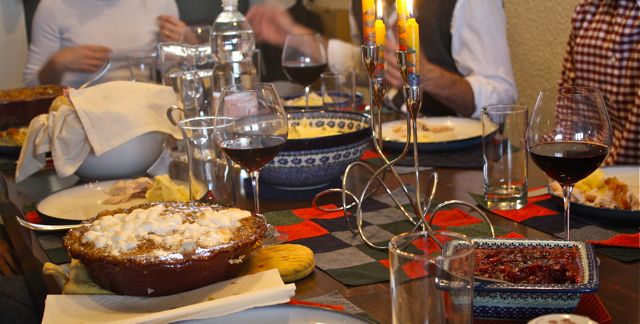
One thing I love about hosting is the chance to bring out all the dishes that otherwise only see occasional use in our house, like our beautiful glass wine decanter and the Polish pottery my mom gave us as a wedding gift.  I also lit four colorful Shabbat candles that Elliott and I bought in Israel; we visited there during Elliott’s yearlong assignment in Egypt soon after we got married.  It felt extravagant and joyful to burn four of them at once in a candelabra in the middle of our Thanksgiving feast.

becca-garber-thanksgiving-2013-4

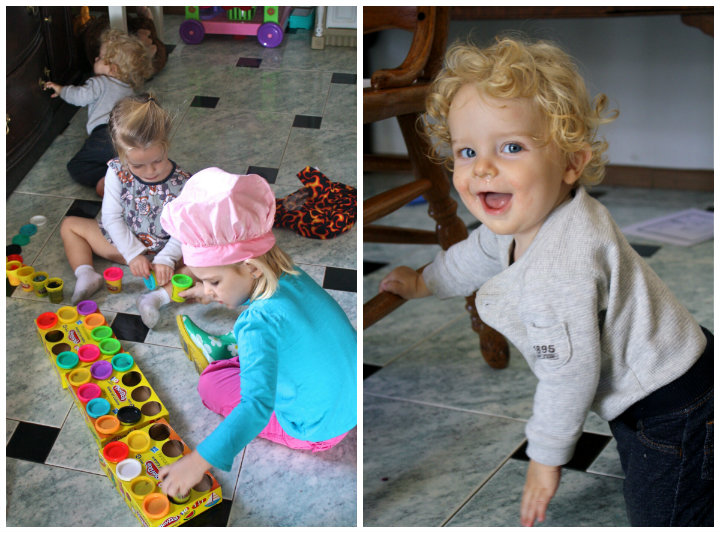
Before the meal, between dinner and dessert, and after we were too stuffed to eat one more bite, we gathered around our fireplace with glasses of wine or mugs of mulled cider.  Gil and Lena played relatively happily around us, and we carried on adult conversation over their little blond heads.  I felt relaxed as a hostess because of the many hands there that were so eager to help with everything: serving, clearing, packing up leftovers, playing with children, and even washing the dishes.  (Thank you, Laura, for spearheading that… I wanted to kiss your feet later when I realized how tired I was and how much you’d helped me!)

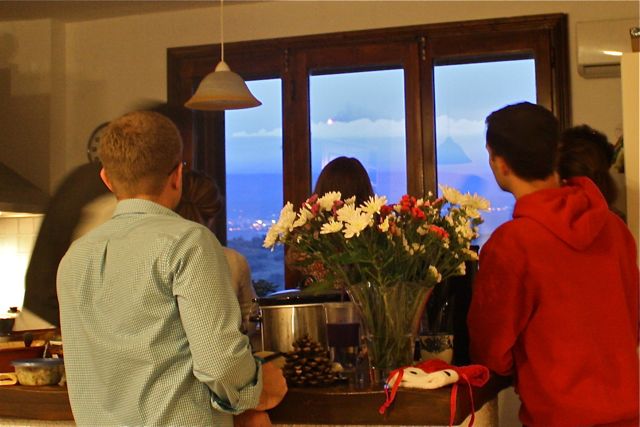
The highlight of the evening came when everyone was talking in the kitchen, and suddenly someone said, “Oh wow… Etna’s erupting!”  We all looked out the window and were treated to the best eruption so far this fall.  (In the photo below, you can just see the glow of the eruption above the clouds.)  She erupted for hours, and we were treated to a spectacular view out of our kitchen window.  Quite a fun dollop of whipped cream on the proverbial pumpkin pie!

becca-garber-thanksgiving-2013-5

Thank you, friends, for braving the tiny Italian streets to share Thanksgiving with us.  We’re so thankful for these growing friendships with you!  Can’t wait for many games of Settlers of Catan and hikes up Etna in the future.

As we head into the holidays, I want to continue to “make room” in our home, lives, and hearts for others, to be attuned to their needs just as much as my own.  I read this quote again from one of my favorite books, and I hope that such simplicity of focus and love is evident in my heart throughout this Christmas season:

[S]implification is not just about taking things away.
It is about making room, creating space in your life, your intentions, and your heart.

***

For those of you who might be interested, here’s the recipe for the pear and ginger bruschetta.  It was a hit, and I’ll be making it again soon!

Pear-Ginger-Goat Cheese Bruschetta

adapted from Style Me Pretty’s Thanksgiving 2012 Guide

Ingredients

  • 1 long French baguette
  • 4 large pears
  • 2 tsp freshly grated ginger
  • 1/3 cup apple cider vinegar
  • 1/3 cup brown sugar
  • 1/3 cup chopped raisins
  • 1/4 tsp salt
  • 10 oz goat cheese
  • Parsley

Directions

  1. Preheat the oven to 350* F (180* C).  Slice the baguette in 1/2″-thick slices.  Toast in the oven for 10 minutes, 5 minutes per side, or until crisp and slightly brown around the edges.  Remove and place on a wire rack to cool.
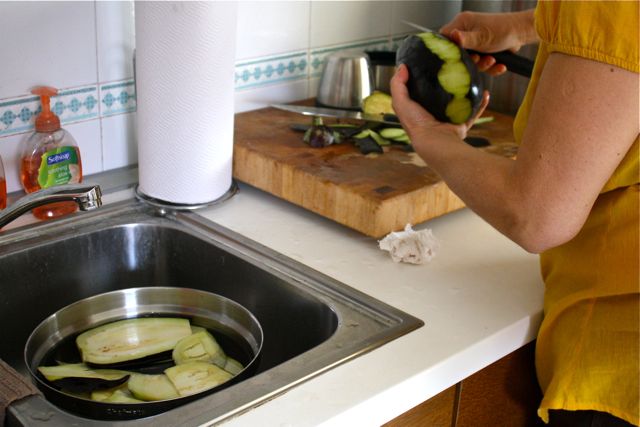
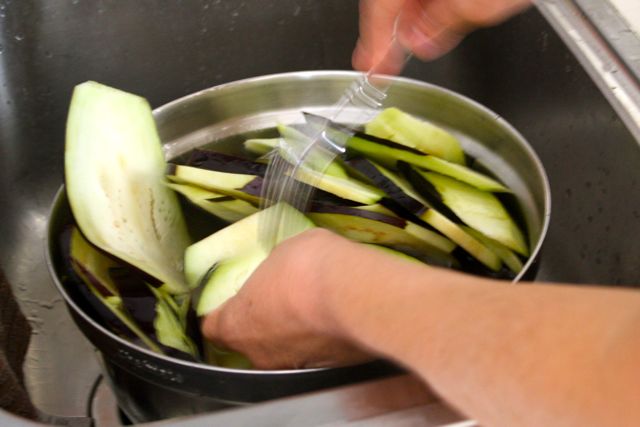
  2. Core and peel the pears and then cut them into a 1/2″ dice.
  3. Put the pears, ginger, vinegar, brown sugar, raisins, and salt into a medium non-stick pan.  Cook for 25-30 min, stirring occasionally.  Stir frequently in the last 10 minutes as the sugar caramelizes and the mixture begins to darken and thicken.
  4. Spread a tsp of goat cheese on each slice of baguette.  Spoon the pear chutney on top of each slice.  Top with a parsley garnish if desired.
11 :: in friends, holidays, hospitality, in my kitchen, Mt Etna

a Sicilian tradition :: Timballo di Pasta alla Norma

becca-garber-sicilian-pasta-eggplant-2

Full recipe at end of post.

I’m excited to share another truly Italian recipe with you today!  Anna, my friend and fellow crafter, organized a cooking class at her house last week.  Anna invited her friend and neighbor, Maria, and her daughter to teach the class, and together they taught us how to make a sponge cake with ricotta filling, cannoli (!), and the recipe I’m sharing with you today: Timballo di Pasta alla Norma.

Pasta alla Norma is… umm… amazing.  It is a delicious combination of fried eggplant, homemade marinara sauce, and fresh pasta, and it is always topped with shavings of ricotta salata cheese.  (Earlier this year, I shared the recipe here.)  It’s also a classically Sicilian dish, something that will bring a smile to any Italian’s face.  This particular version is a play on the classic dish; timballo, as best I understand, means drum, and this dish is basically Pasta alla Norma baked in a bundt pan, with the end result being that your main dish does look a little bit like a colorful, extremely tasty drum!

So, without further ado, let’s get drumming cooking.  I will make a brief apology for the quality of some of these photos.  I was trying to photograph three dishes as they were being cooked simultaneously, and I was also keeping these two munchkins out of trouble.  I know.  They don’t look like they even know the meaning of the word, but… trust me.  They do.

becca-garber-sicilian-pasta-eggplant-1

Begin by preparing your eggplant.  Italians like to peel off only the ends and a strip of skin on each side so that the eggplant will hold its shape as it fries.

becca-garber-sicilian-pasta-eggplant-3

Thickly slice the eggplant and put it in a cold bath of heavily salted water for about 5 minutes.  This draws out the bitterness in the eggplant.  After 5 minutes, stab the slices with a fork.  Soak for 5 minutes more.

becca-garber-sicilian-pasta-eggplant-4

Drain the water (which will be brown) and rinse the eggplant.  Pat the slices dry.  Heat up your vegetable oil and start frying the eggplant in batches.

becca-garber-sicilian-pasta-eggplant-5

Cook until golden brown and tender.  Drain on paper towels until completely cool.  (And try not to eat it all right now.  Fried eggplant is unbelievably delicious… and this is coming from someone who didn’t like eggplant until she moved to Sicily.)


becca-garber-sicilian-pasta-eggplant-7

At this point you can begin preparing your pasta sauce.  The recipe is basic: tomato sauce, garlic, olive oil, salt, fresh basil.  The two secrets that make this sauce distinctive are (1) teaspoon of sugar and (2) a pinch of baking soda, if you can believe it!  The small amount (pictured below) alters the acidity of the tomato sauce and gives it a unique sweetness.

becca-garber-sicilian-pasta-eggplant-8

Cook your rigatoni pasta.  When it is al dente, mix in your sauce and 1 cup of pesto.

becca-garber-sicilian-pasta-eggplant-10

Add about 1.25 cups of ricotta salata and mix together.

becca-garber-sicilian-pasta-eggplant-11

Line 2 bundt pans with the browned eggplant slices.

becca-garber-sicilian-pasta-eggplant-9

Pour the pasta on top of the eggplant and sprinkle with another 1/4 cup of ricotta salata.

becca-garber-sicilian-pasta-eggplant-12

Bake in the oven for about 10 minutes at 250 degrees F (120 C).  Remove from the oven and allow to cool.  (If you turn it out too early, your timballo will lose its shape, especially when you serve it.)

becca-garber-sicilian-pasta-eggplant-13

Decorate with fresh sprigs of basil and a sprinkle of ricotta salata.  And there it is!  A rich blend of salty and sweet, chewy and textured, too wonderful for just one helping.  A taste of Sicily in your kitchen!

becca-garber-sicilian-pasta-eggplant-14

Timballo di Pasta alla Norma

Eggplant

  • 2 Eggplants
  • Salt
  • Vegetable (sunflower) oil (for frying)
  1. Cut off ends and the skin down one side of each eggplant. Slice lengthwise in ½ inch slices.
  2. Place slices in a bowl of water and salt heavily. Let soak for 5 minutes.  Pierce eggplant slices with a fork. Let soak 5 minutes longe.  Drain water and dry each slice with a paper towel, piercing again with a fork.
  3. Heat vegetable oil and fry dried eggplant slices until golden brown on both sides. Drain on paper towels to remove excess oil. Let cool completely.

Sauce

  • 3 jars Passata (tomato sauce)
  • 2 Garlic cloves
  • Salt to taste
  • 1/8 tsp Baking soda
  • 1 tsp Sugar
  • ¼ c. Olive oil
  • Handful fresh basil
  1. Simmer tomato sauce, garlic, and salt for 20-30 minutes until thickened. After it is thickened, stir in baking soda and sugar.
  2. Remove from heat and add olive oil and basil.

Pasta and Finishing

  • 1 kilo (2 lbs) pasta (we used rigatoni but spaghetti can also be used)
  • 1 c. basil pesto
  • 1 ½ c. ricotta salata cheese, shredded with ¼ c. reserved
  1. Preheat oven to 250 degrees F.
  2. Cook pasta according to package instructions in salted water. Drain.
  3. Stir pesto and 1 ¼ c. sliced cheese into pasta. Add tomato sauce to pasta mixture.
  4. Line 2 bundt pans with the browned eggplant slices. Pour pasta into pan on top of eggplant then top with any remaining sauce. Sprinkle reserved ricotta salata on top.
  5. Bake for about 10 minutes.
  6. Wait until cool, then flip onto large flat plate. Put basil stems in center and top with shredded ricotta salata.
6 :: in eat this, in my kitchen, Sicily

Wild Blackberry Tarts Recipe

becca-garber-berry-blackberry-picking-8

Faced with buckets of blackberries in my kitchen (see our recent berry picking adventures here and here), I went a-hunting for a delicious baked good to showcase our wild harvest.  According to my friends and my husband (a tough one to please when it comes to sweets; I think sometimes that he’d never notice if desserts ceased to exist), these little tarts/pies take the cake… so to speak.

I adapted my recipe from one of my favorite cookbooks: The Pastry Queen.  (Thanks for the great wedding gift, Josh and Becca!*)  The recipe in this book is for “Emergency Fruit Crostatas,” which are delicious but enormous.  I used the same dough but adapted the size to be more that of a cookie.  A little mini pie.  Nom nom nom.

Here are some pictures to guide you through the process.  (Please excuse my little helper’s lack of clothing.  Remember last summer when all she wore was diapers?  This is the two-year-old version of diapers, I guess.  It’s too hot for anything else!)

The kitchen-friendly recipe is at the end of this post.

becca-garber-blackberry-berry-tarts-6

To begin, mix sugar, flour, and salt in a food processor.  (Note: I only have a mini food processor, which is too small to fit all the ingredients at once.  I divide the ingredients and mix everything in two batches.)

becca-garber-blackberry-berry-tarts-5

Add butter and then ice-cold water and mix some more.  Remove the dough, wrap in plastic, and chill in the refrigerator 1 hr or until firm enough to handle.

becca-garber-blackberry-berry-tarts-7

At this point you can make the original Fruit Crostatas from the dough with whatever berries you have on hand (including frozen).  Just divide the dough into four parts, pat each one into a circular shape, spoon berries into the middle, and form the dough around it to make a triangle.  I made these way-back-when my doula came for a home visit before Lena was born.  She and I both loved them but thought they were just too big.  Here’s a smaller, even cuter version:

becca-garber-blackberry-tarts-berry-1

Using biscuit cutters or cups of different sizes, cut out smaller circles (mine were about 2 inches in diameter) and larger circles (about 3 inches in diameter).  I managed to get about 26 circles from the dough for a total of 13 tarts.

becca-garber-blackberry-berry-tarts-2

Put the smaller circles onto a tray lined with parchment paper.  Pile the berries onto the dough, pressing them down and piling them up as best you can.  I tried to get at least 10 berries on each little circle of dough.

If desired, sprinkle generously with sugar.  (I usually don’t add sugar until the end, but if you have a sweet tooth or very tart berries, go ahead!)

becca-garber-blackberry-berry-tarts-3

Gently place the larger circle of dough on top of each pile of berries.  Tuck the ends underneath the smaller circle.  Gently cut slits in the top of the pie/tart (I made a + sign) with a sharp knife.  Sprinkle with sugar.

Slip into a 450 degree F oven for about 10-12 min or until the edges of the tarts are golden.  Eat (perhaps with vanilla ice cream?) and enjoy!

becca-garber-blackberry-berry-tarts-4

*This is a different Becca and Josh than the Arthurs.  Yes, we have two couple friends named Becca and Josh… and get this: they named their son Elliot.  How crazy is that?!

Wild Blackberry Tarts Recipe

Ingredients

  • ½ cup sugar
  • 2 cups all purpose flour
  • ¼ teaspoon salt
  • 1 cup (2 sticks) chilled butter, cut into small pieces
  • 4 tablespoons ice water
  • 1 cup fruit

Directions

  • Preheat oven 450 degrees F.  Line two baking sheets with parchment paper or butter generously.
  • In a food processor fitted with a metal blade, pulse together the sugar, flour, and salt.
  • Add the butter and pulse 3 to 5 times, until the mixture is crumbly.
  • Pour the water through the feed tube 1 tablespoon at a time, and pulse until the dough begins to hold together.  (Note: I usually just need 1 tablespoon of water.)
  • Remove the dough, shape it into a ball, wrap it in plastic wrap, and refrigerate for 1 hr.  (If you are in a huge hurry — which I often am — freeze the wrapped dough just log enough to prepare the fruit filling.  It will be a little harder to work with, but it’s an acceptable trade-off when time is short.)
  • Roll out the dough on a floured surface.  Cut out approximately 12 circles that are 2 inches in diameter and 12 circles that are 3 inches in diameter.
  • Place the smaller circles on the baking sheet.  Pile as many berries as you can onto the circle of dough.  (Note: I fit about 10 onto each circle, but this number will vary with the size of your circles and your berries.)
  • Carefully place the larger circles of dough over the berries.  Tuck the edges of the dough underneath the smaller circle.
  • Cut slits (I made a + sign) on the top of the tart.  Sprinkle generously with sugar.
  • Bake for 10-12 minutes or until golden brown.  Cool on the baking sheet for no more than 10 minutes or they might be difficult to remove whole.
  • Serve warm or room temperature… preferably with vanilla ice cream!
10 :: in eat this, in my kitchen

new favorites in my kitchen

becca-garber-mini-spatula-3

When my mom visited in March, she brought Lena these two “mini spatulas” for when she helped me in the kitchen.  I don’t know quite how it happened, but one day I found myself using them myself… and I’ve been using them daily ever since!

Of course, if I’d seen these in a store, I would have thought, “How cute!” and walked right on by.  (Part of my “just say no” spending strategy, maybe?)  But I would have totally underestimated their power.

These little spatulas get in all the nooks and crannies of child-sized dishes, blenders, food processors, and those hard-to-reach spots where you spilled batter on the pan in between the cupcakes.  They’re light and easy to maneuver, unlike my other spatulas… which I also love but now hardly ever use.

becca-garber-mini-spatula-2

becca-garber-mini-spatula-1

Who would have thunk it?  You can get mine on Amazon here OR get an even prettier set with better ratings here.

What’s your latest and greatest kitchen gadget?

P.S. Thanks, Mom! :)

Related Posts Plugin for WordPress, Blogger...
7 :: in in my kitchen

Powered by WordPress. Designed by WooThemes