A few of you have asked me what we packed for our trip to Europe. Three kids for three weeks and only carry-on bags–I wouldn’t have believed it possible, but we did it! I spent a lot of time thinking about our planned activities, weather conditions, and complimentary clothing. Overall, we packed well, but I made a couple of errors, as you’ll soon see.
Note: I’m only discussing the kids’ and my own suitcases. Elliott packed for himself about 15 minutes before we left for the airport. To each their own, right?!
SUITCASES
I researched the carry-on requirements for the airlines we’d be flying: Norwegian Airlines to and from Europe, and SAS and British Airways within Europe. They all had slightly different carry-on baggage size requirements, but the smallest requirements were 20 inches tall and 9 inches deep. We didn’t own good carry-on bags that were that size (U.S. airlines generally allow carry-ons that are 22 inches tall), so we made the pricey-but-right decision to invest in 4 carry-on suitcases that should last us quite some time.
We purchases these Rockland suitcases from Amazon. They are not super amazing, but after our trip they still look almost new, so I am happy with our purchase. The kids loved them, too!
They were also larger than I expected. I could fit all my clothing items plus a couple of books and my toiletry bag in mine. For the kids, Gil and Forest could share the red suitcase with room to spare, and Lena shared her purple case with some schoolbooks, paperback books for me and Elliott, and two white noise machines.
BAG BREAKDOWN
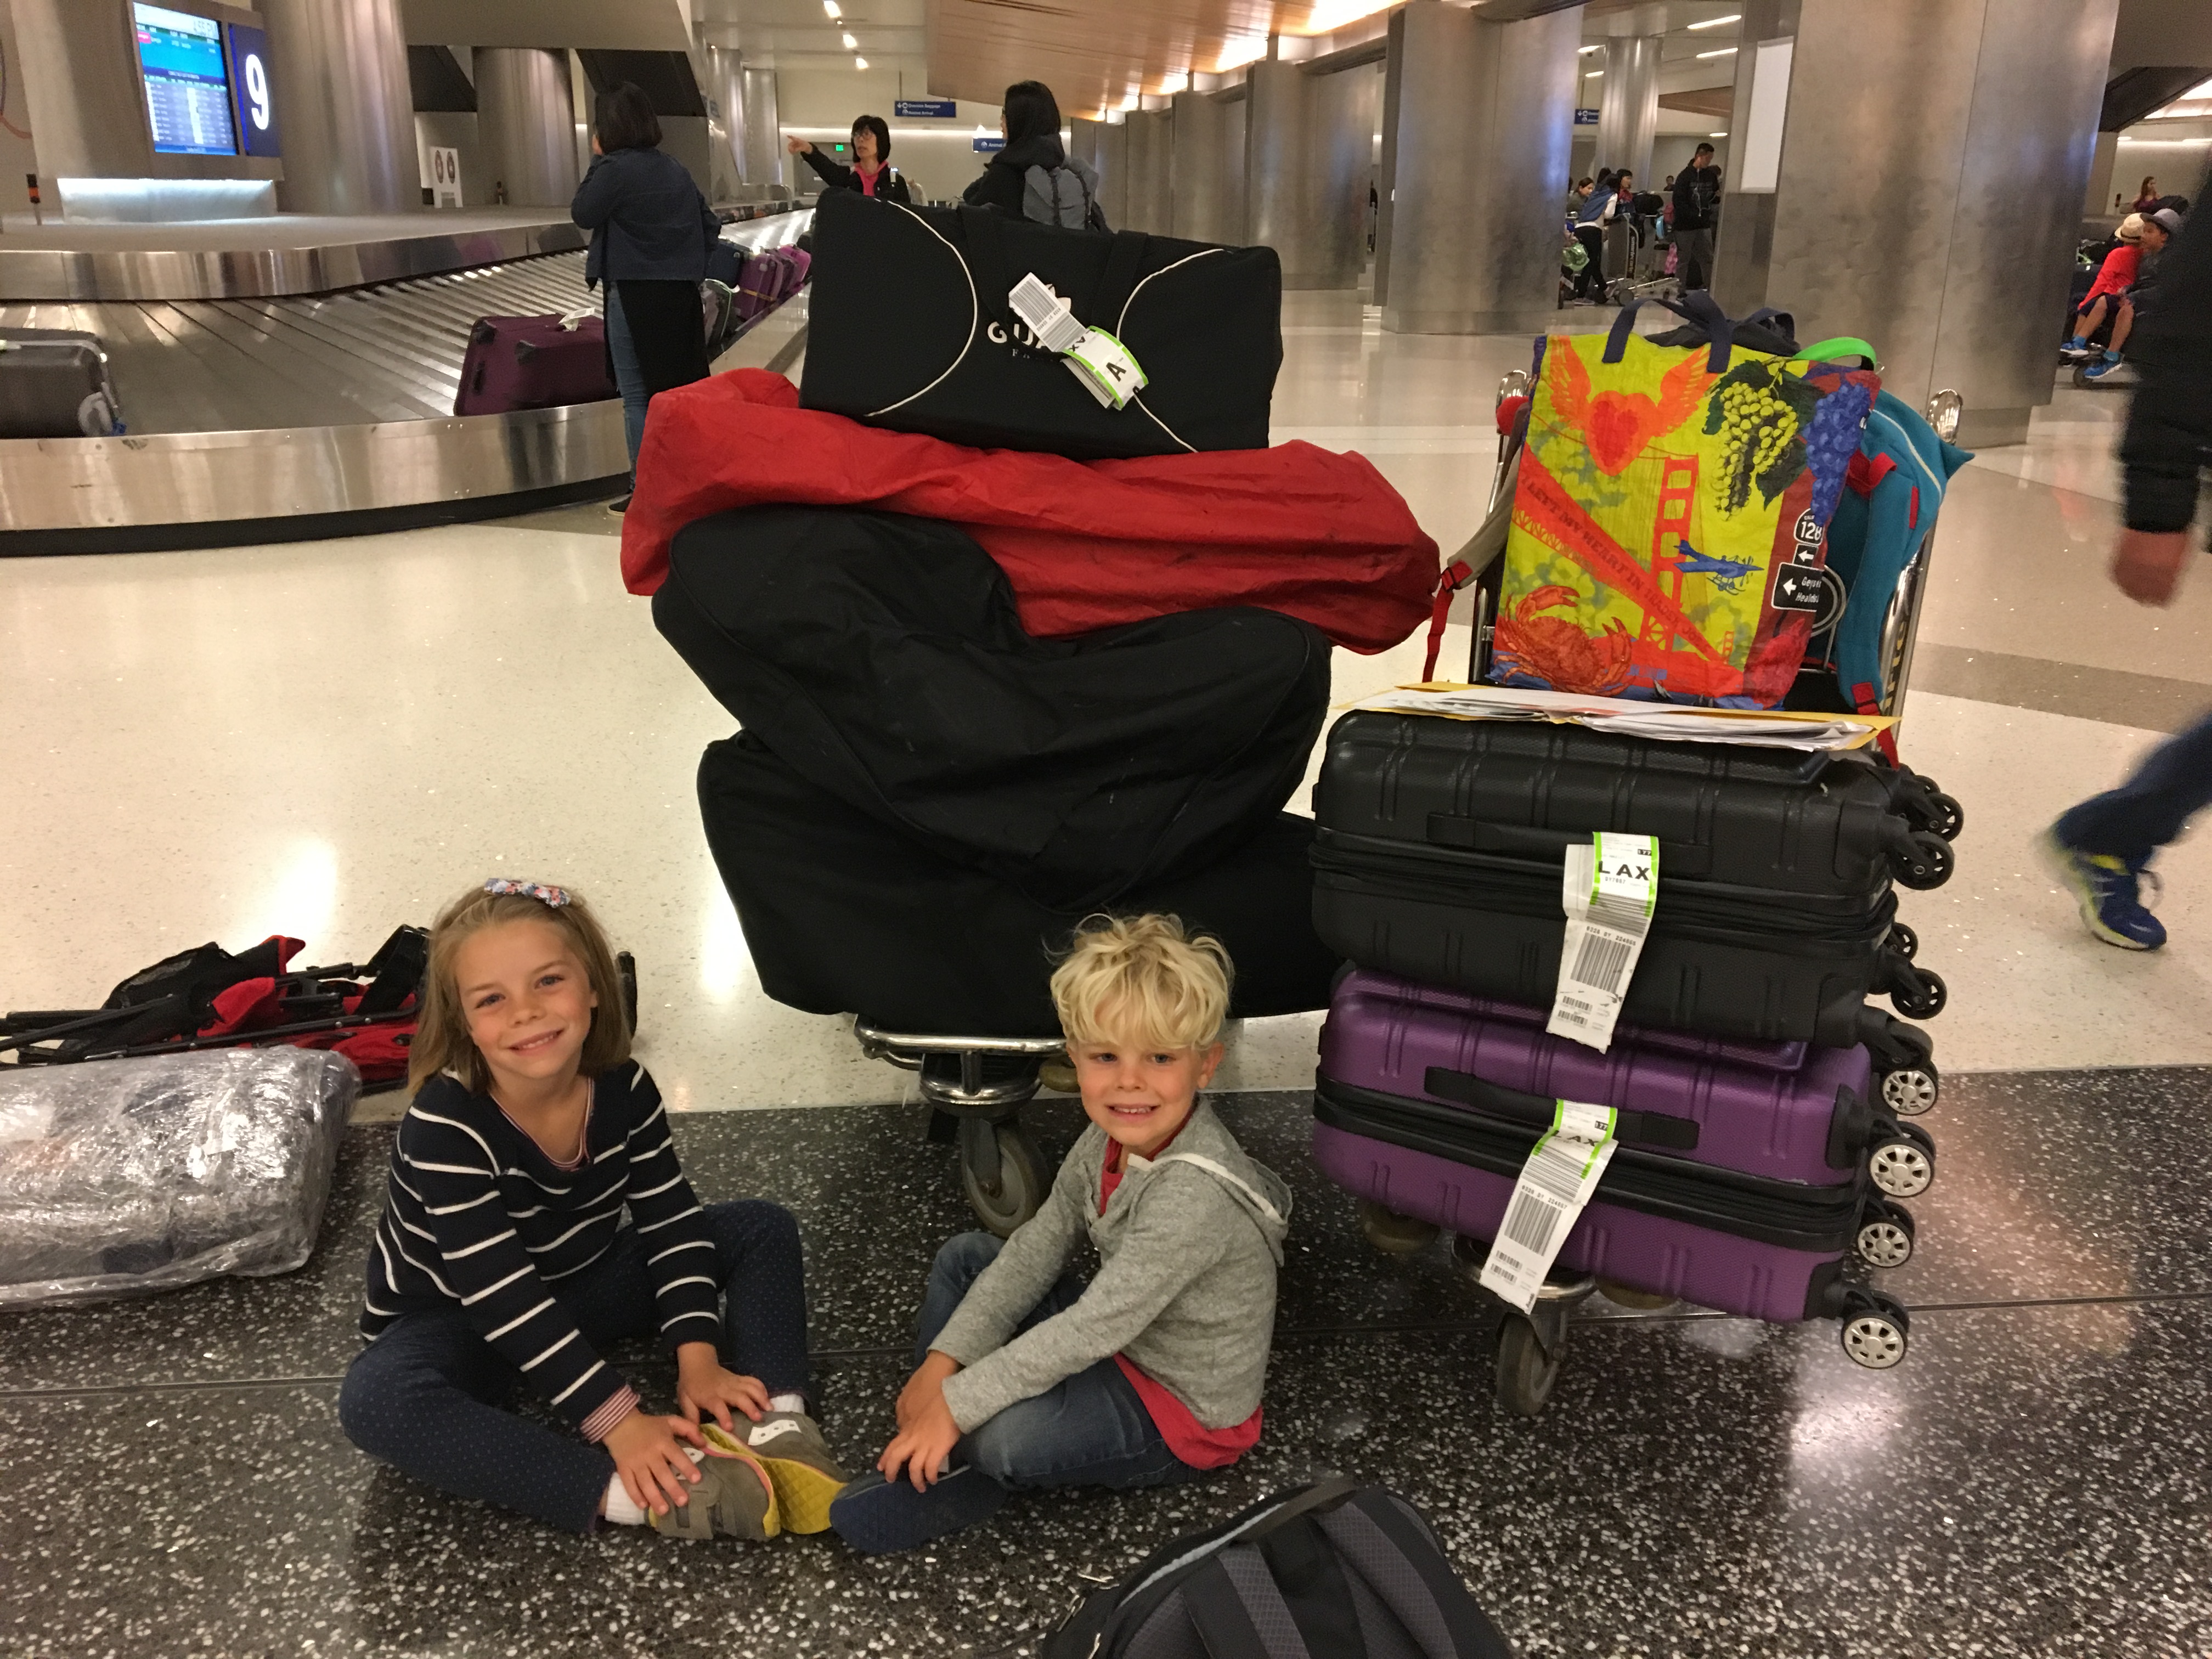
In the photo above, you can see the total amount of bags and items we brought on those two carts. We had:
- 4 carry-on suitcases (described above)
- 2 convertible car seats for the boys in protective black car seat bags (Lena’s inflatable booster seat was inside one of those bags)
- 1 Lotus travel bed for Forest
- 1 Maclaren Volo umbrella stroller in a red airline travel bag
Most airlines now charge for any checked bags, but they will not charge for “baby items.” We could check the car seats, stroller, and travel bed for free. We then carried all the rest of our bags into the cabin with us for free.
On the cart on the right are our additional carry-on bags:
- Lena’s backpack
- Gil’s backpack
- My diaper bag
- Elliott’s backpack
- 1 Trader Joe’s reusable shopping bag filled with non-liquid food, fruits, veggies, and snacks
- (not visible) 1-liter water bottle
Quick note about the last two items: We didn’t purchase food on our flights (and the European airlines we flew did give out any food or drink unless we purchased it — even water!), so we brought a lot of food with us.
While in Europe, we also used this reusable shopping bag and the water bottle daily for our excursions and picnics. These things were some of our most essential gear!
OUR SHOES
After studying the weather, talking with Elliott, and emailing my friend in London, I finally decided not to buy waterproof shoes for our time in England. I knew I might regret it, but it seemed unlikely that we would be outside for a long time in a lot of rain. Besides, rain boots are hard to walk in for long periods, and we don’t even own them anyway. We live in San Diego!
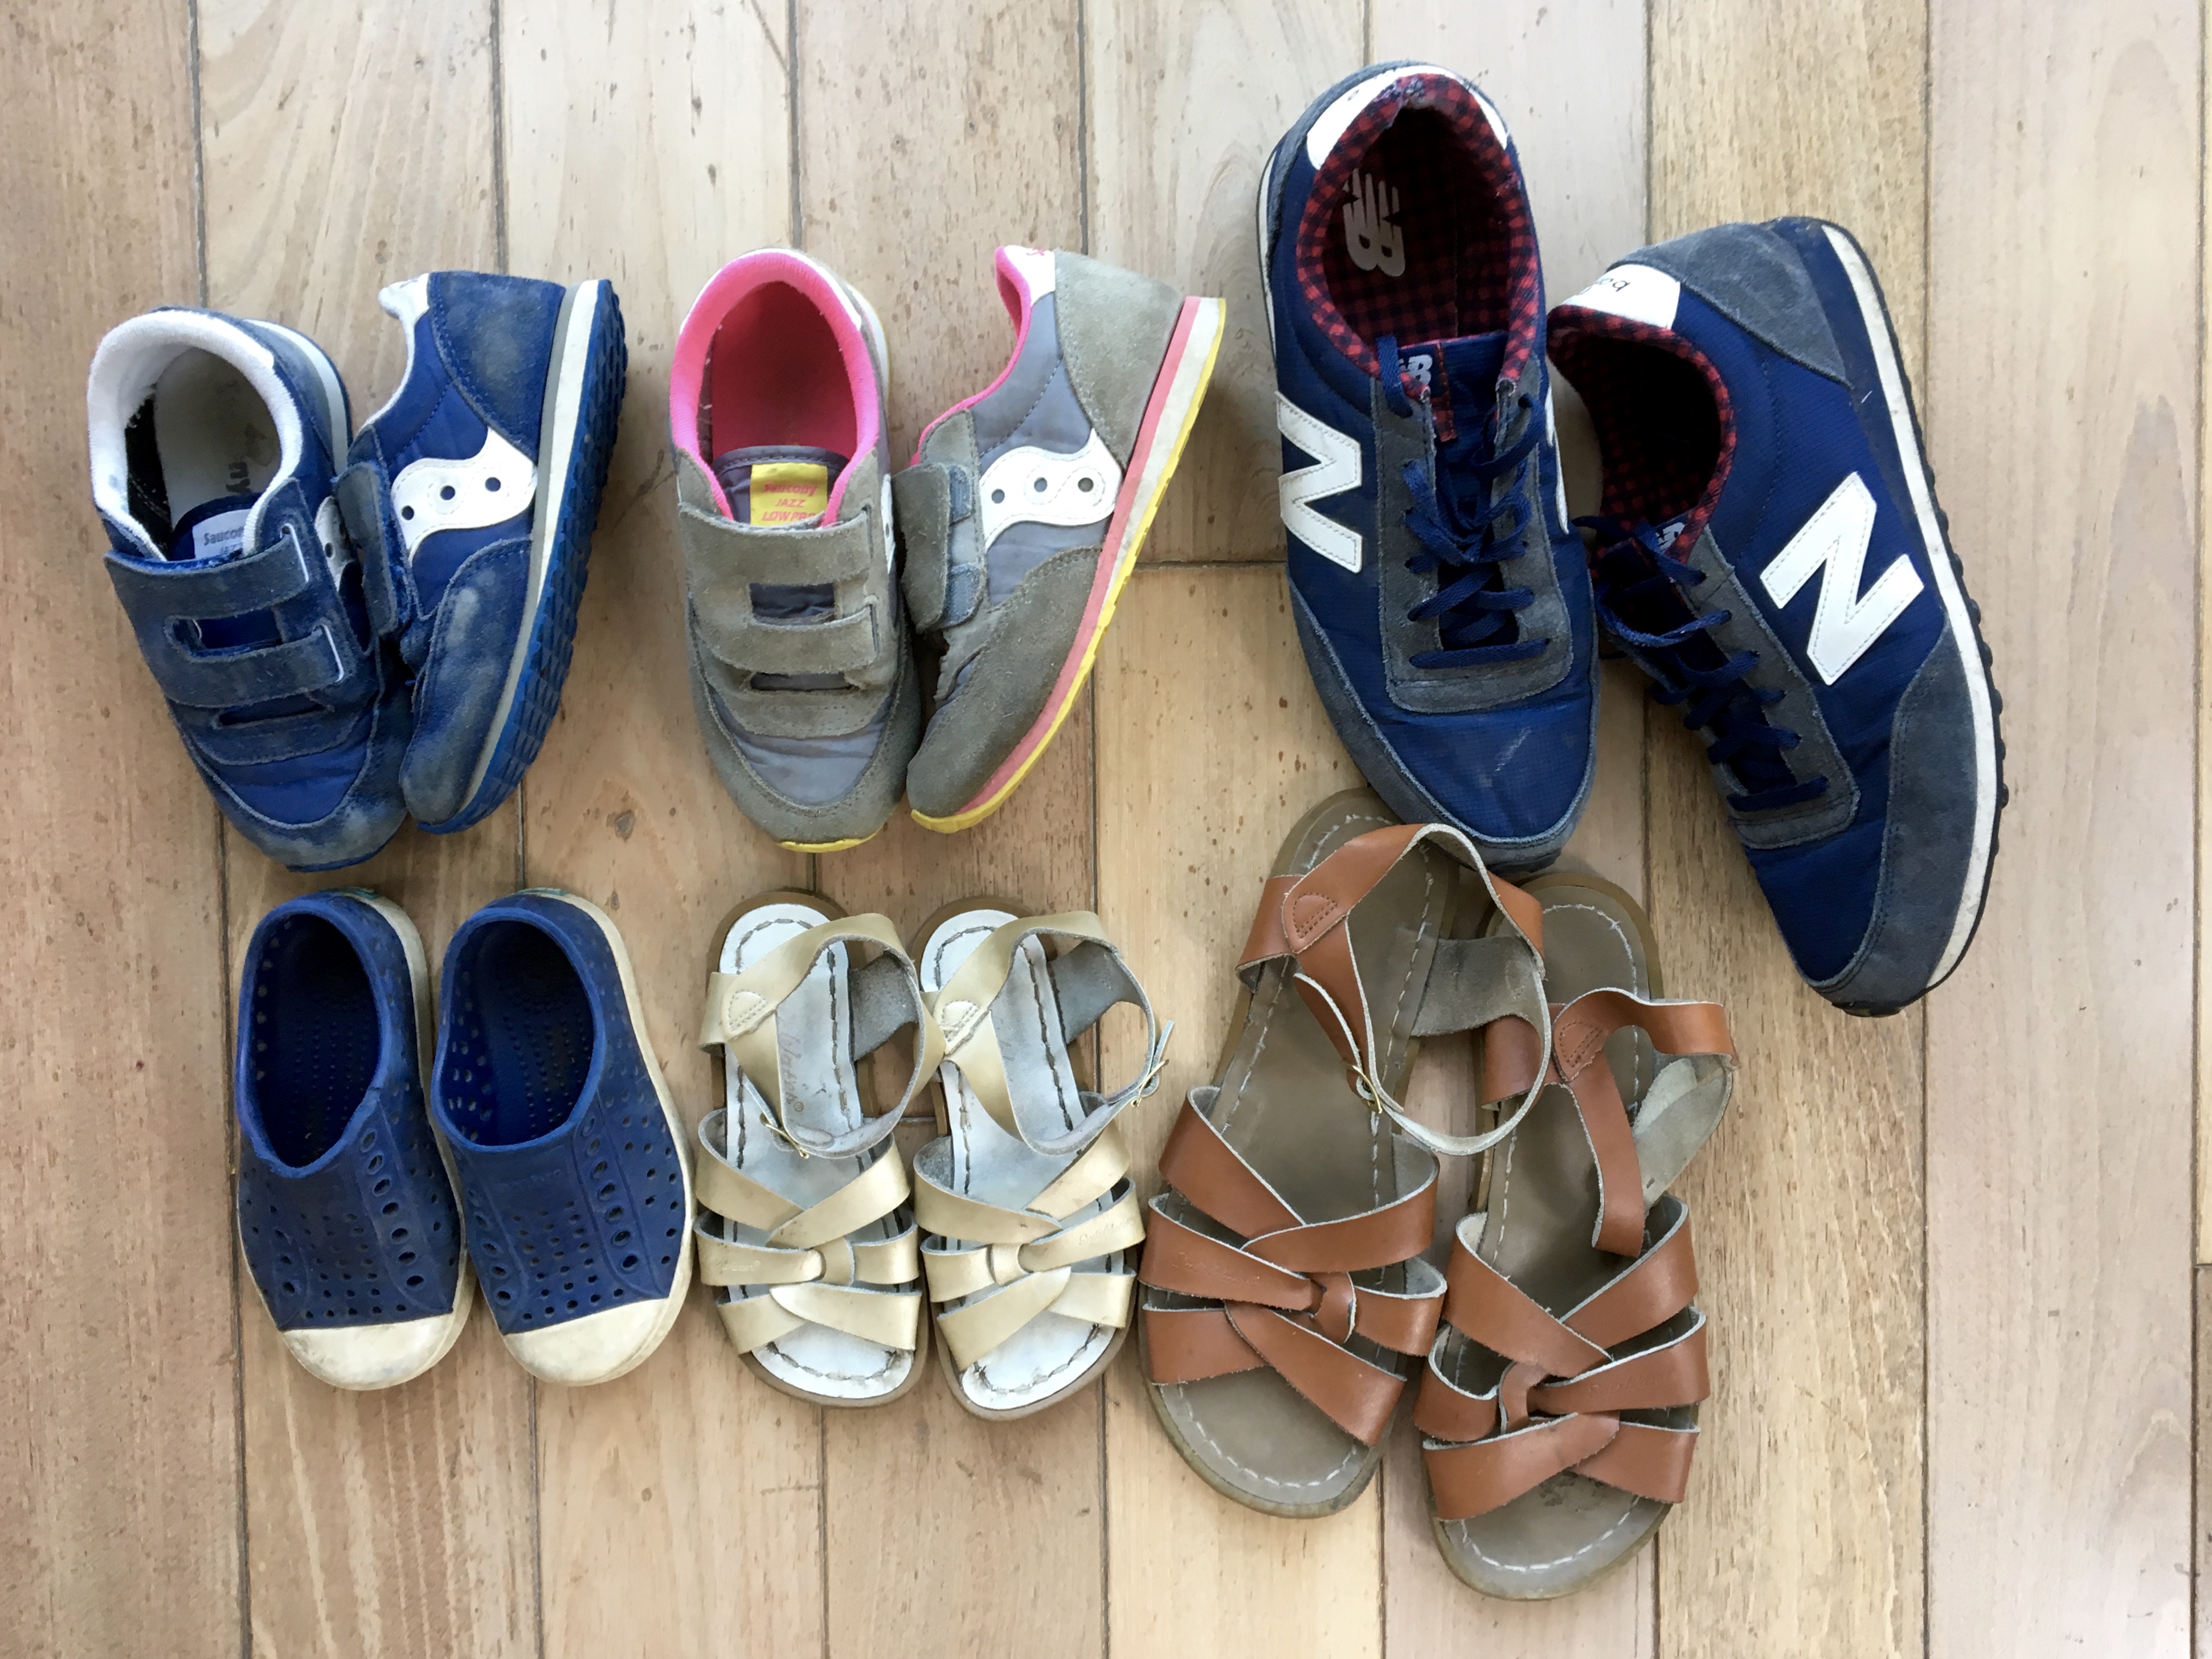
So, in the end, I packed two pairs of shoes for each of us: one pair of comfortable but stylish walking shoes and one pair of sandals. For the kids, I packed their Saucony Jazz velcro sneakers, Gil’s Natives, and Lena’s Saltwater Sandals. For myself, I packed my New Balance sneakers and Saltwater Sandals.
These were perfect choices, thankfully. All our shoes were already broken in and already our favorites. Also, we had glorious weather in England and France, and it never rained.
BECCA’S SUITCASE
Ok, now I’ll explain what we had in each of our suitcases. Just so you know, I love to shop secondhand, and I love getting good deals on high-quality clothing. I also like recycling; most of our furniture was purchased secondhand, and even the diamonds in my engagement and wedding rings were “recycled” from older rings to avoid blood diamond conflicts. Purchasing secondhand clothing is more eco-friendly, too, especially if you are concerned about sweatshop labor. It’s not a live-or-die rule for me, but in general Elliott and I are huge proponents of recycling, including our clothes.
So, even though you are about to see a lot of nice clothing brands listed here, please know that almost all of these clothes were purchased in excellent used condition on eBay, Poshmark, or on my neighborhood yardsale site, or (in a couple of instances) were generous Christmas gifts from my parents.
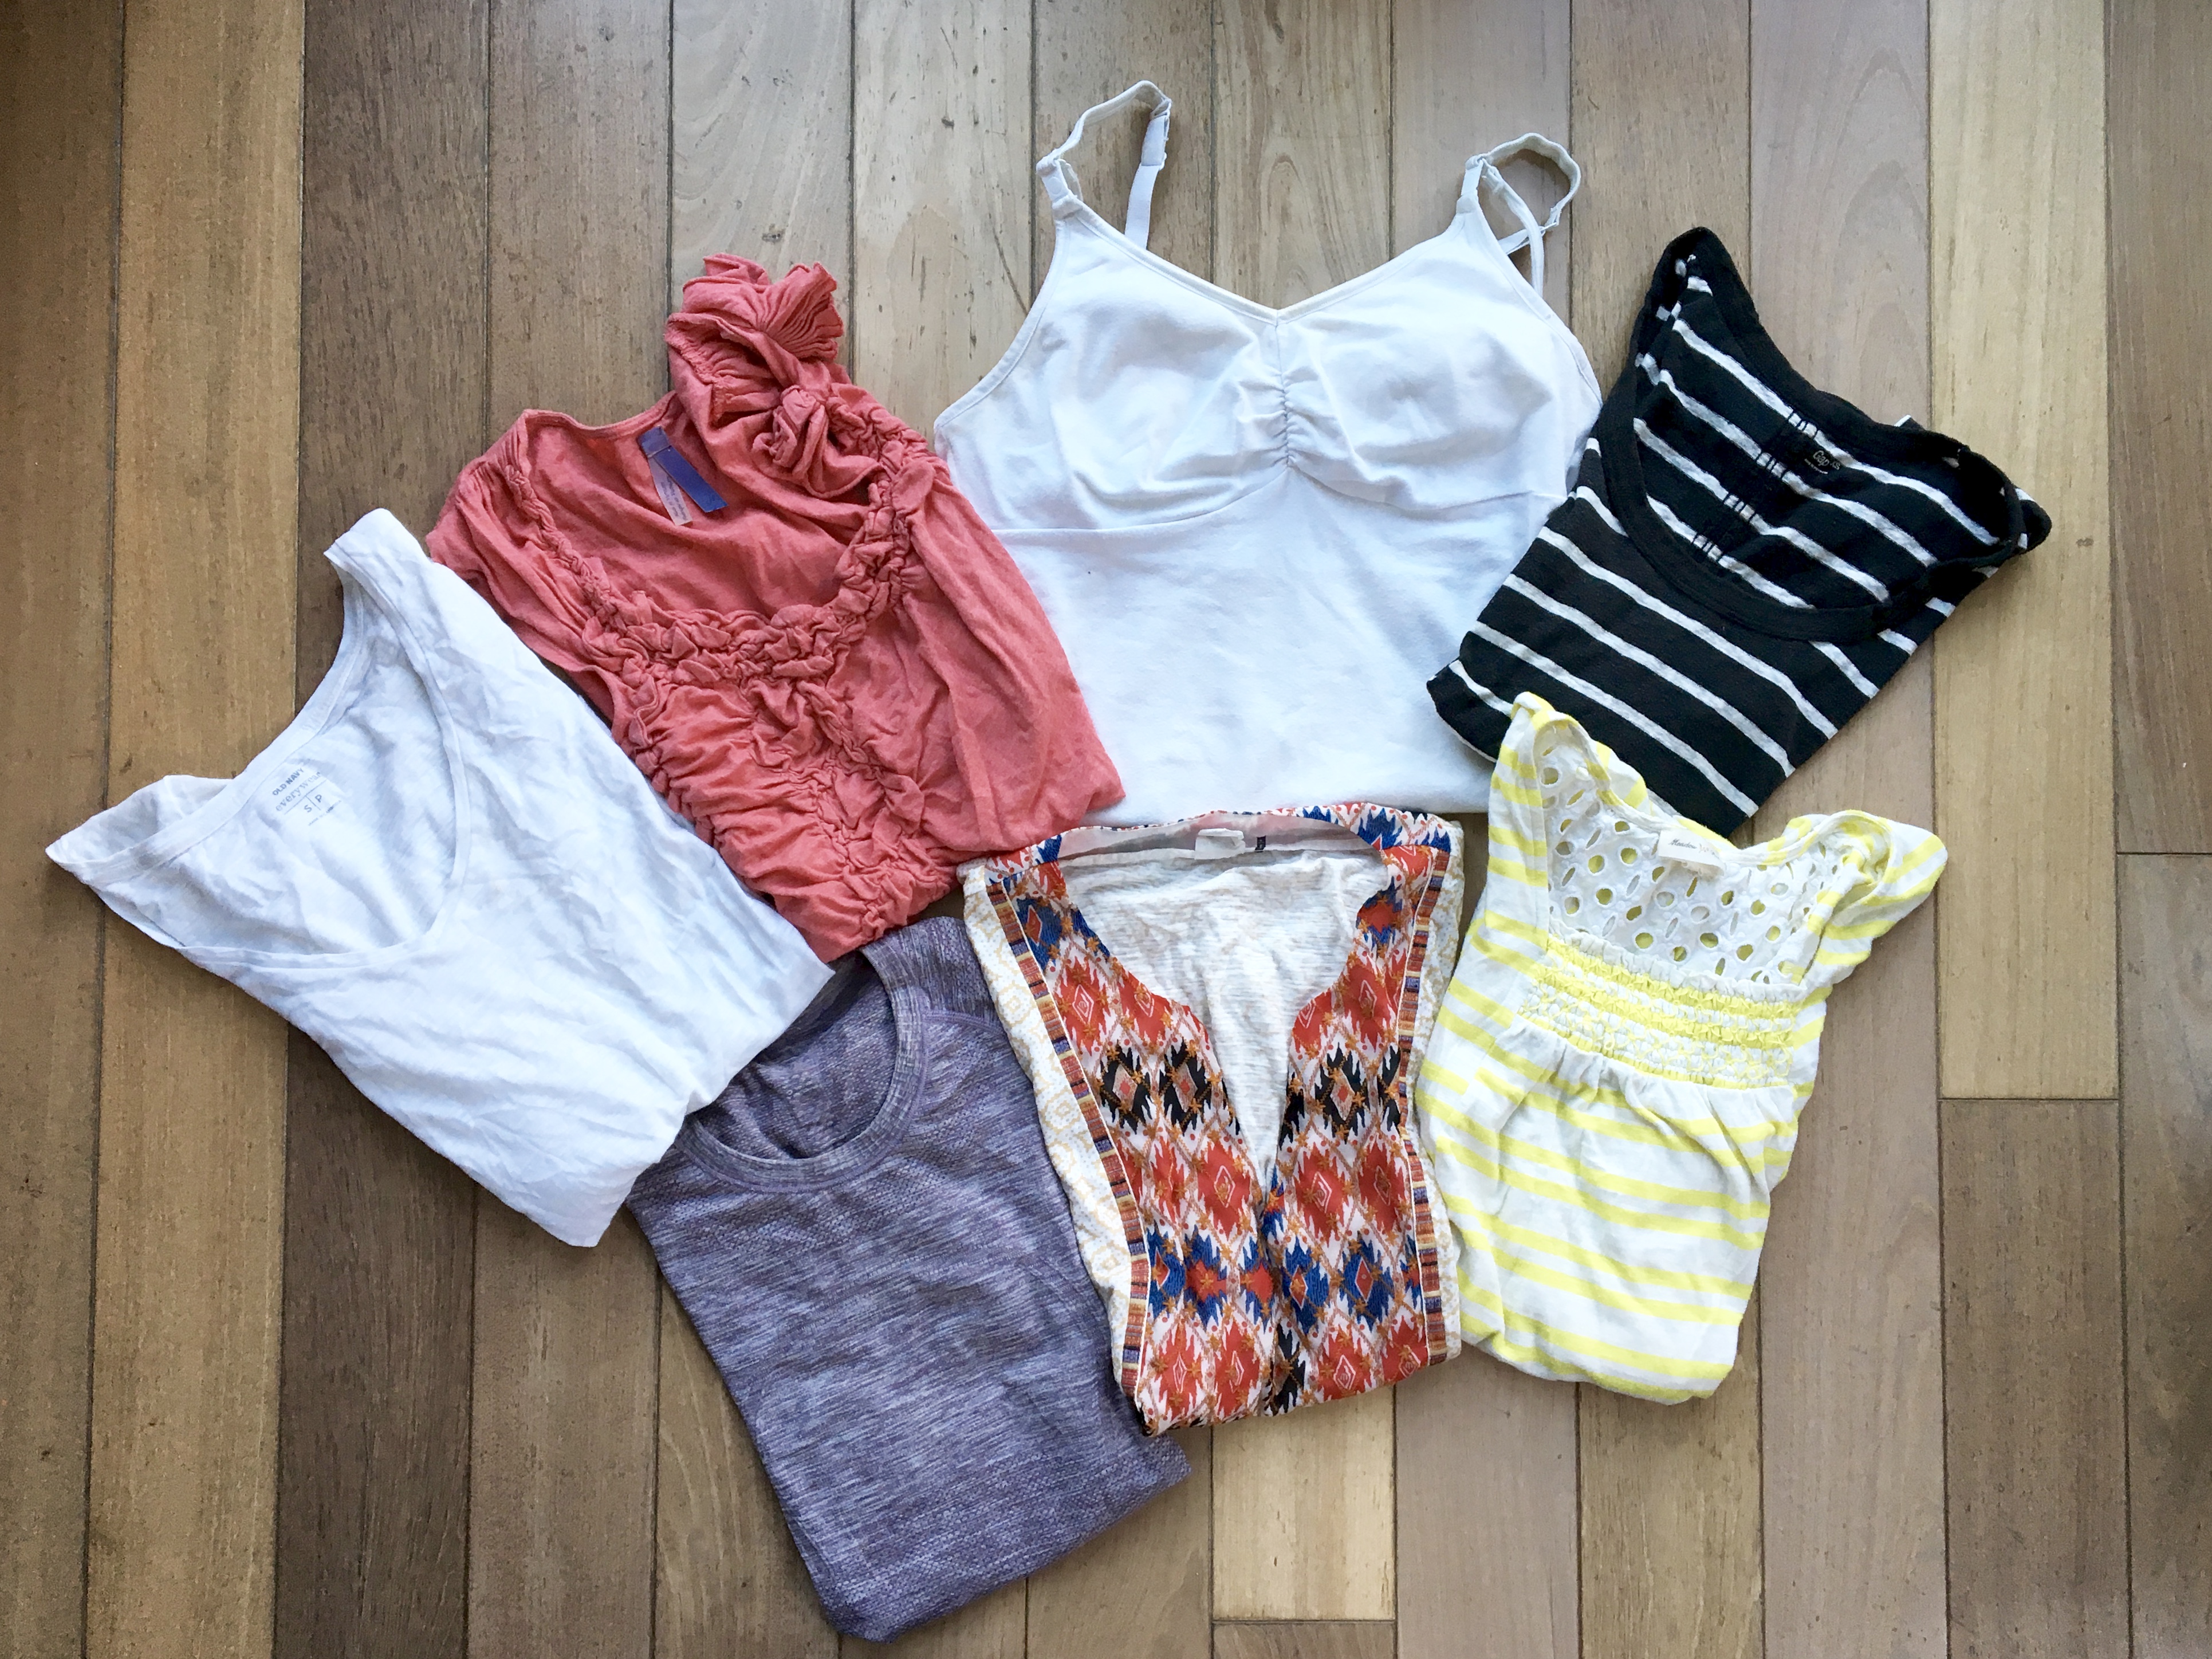 From L to R, top to bottom: Old Navy long-sleeved white shirt, Anthroplogie pink t-shirt, Bravado nursing tank, Gap striped t-shirt, Lululemon t-shirt, and two Anthropologie shirts.
For myself, I packed one long-sleeved t-shirt, five short-sleeved shirts, and one nursing tank. I wish I had packed more long-sleeve t-shirts, but I don’t own many in San Diego. I layered shirts with sweaters–sometimes two sweaters–and it was fine.
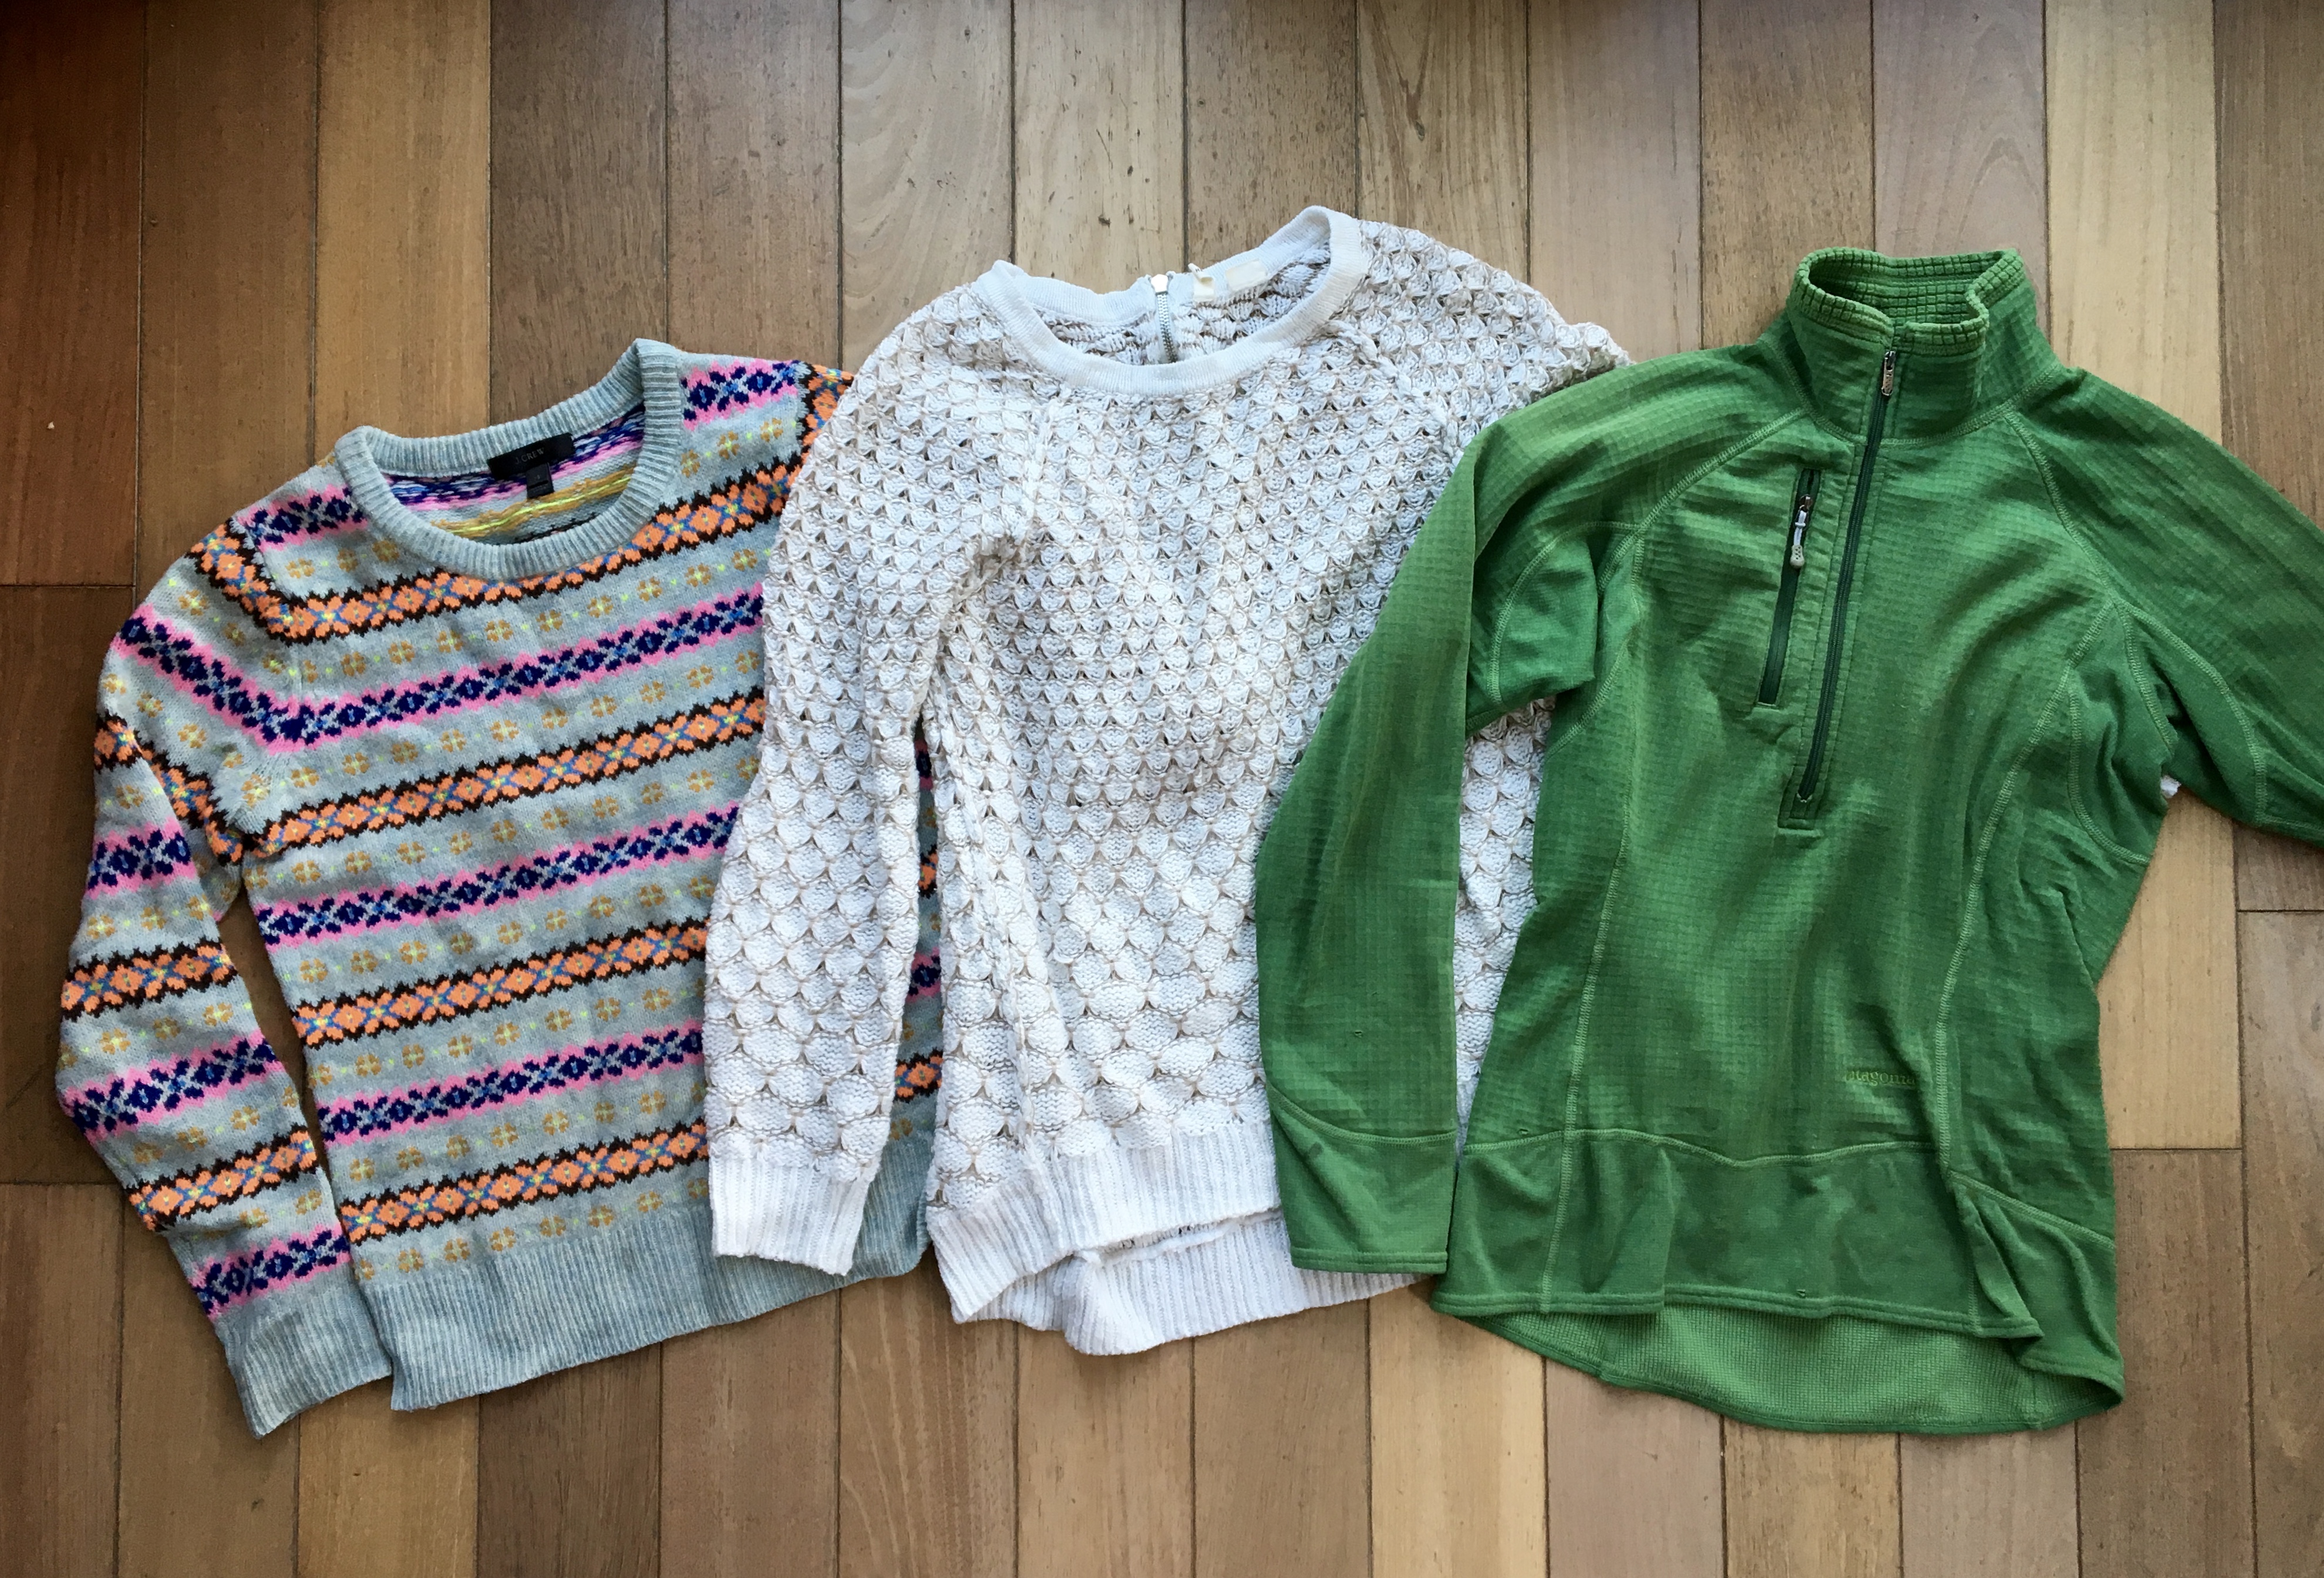 From L to R: J. Crew wool sweater (super warm!), Anthroplogie sweater, Patagonia R2 fleece that I have had for about 10 years and still wear about once a week.
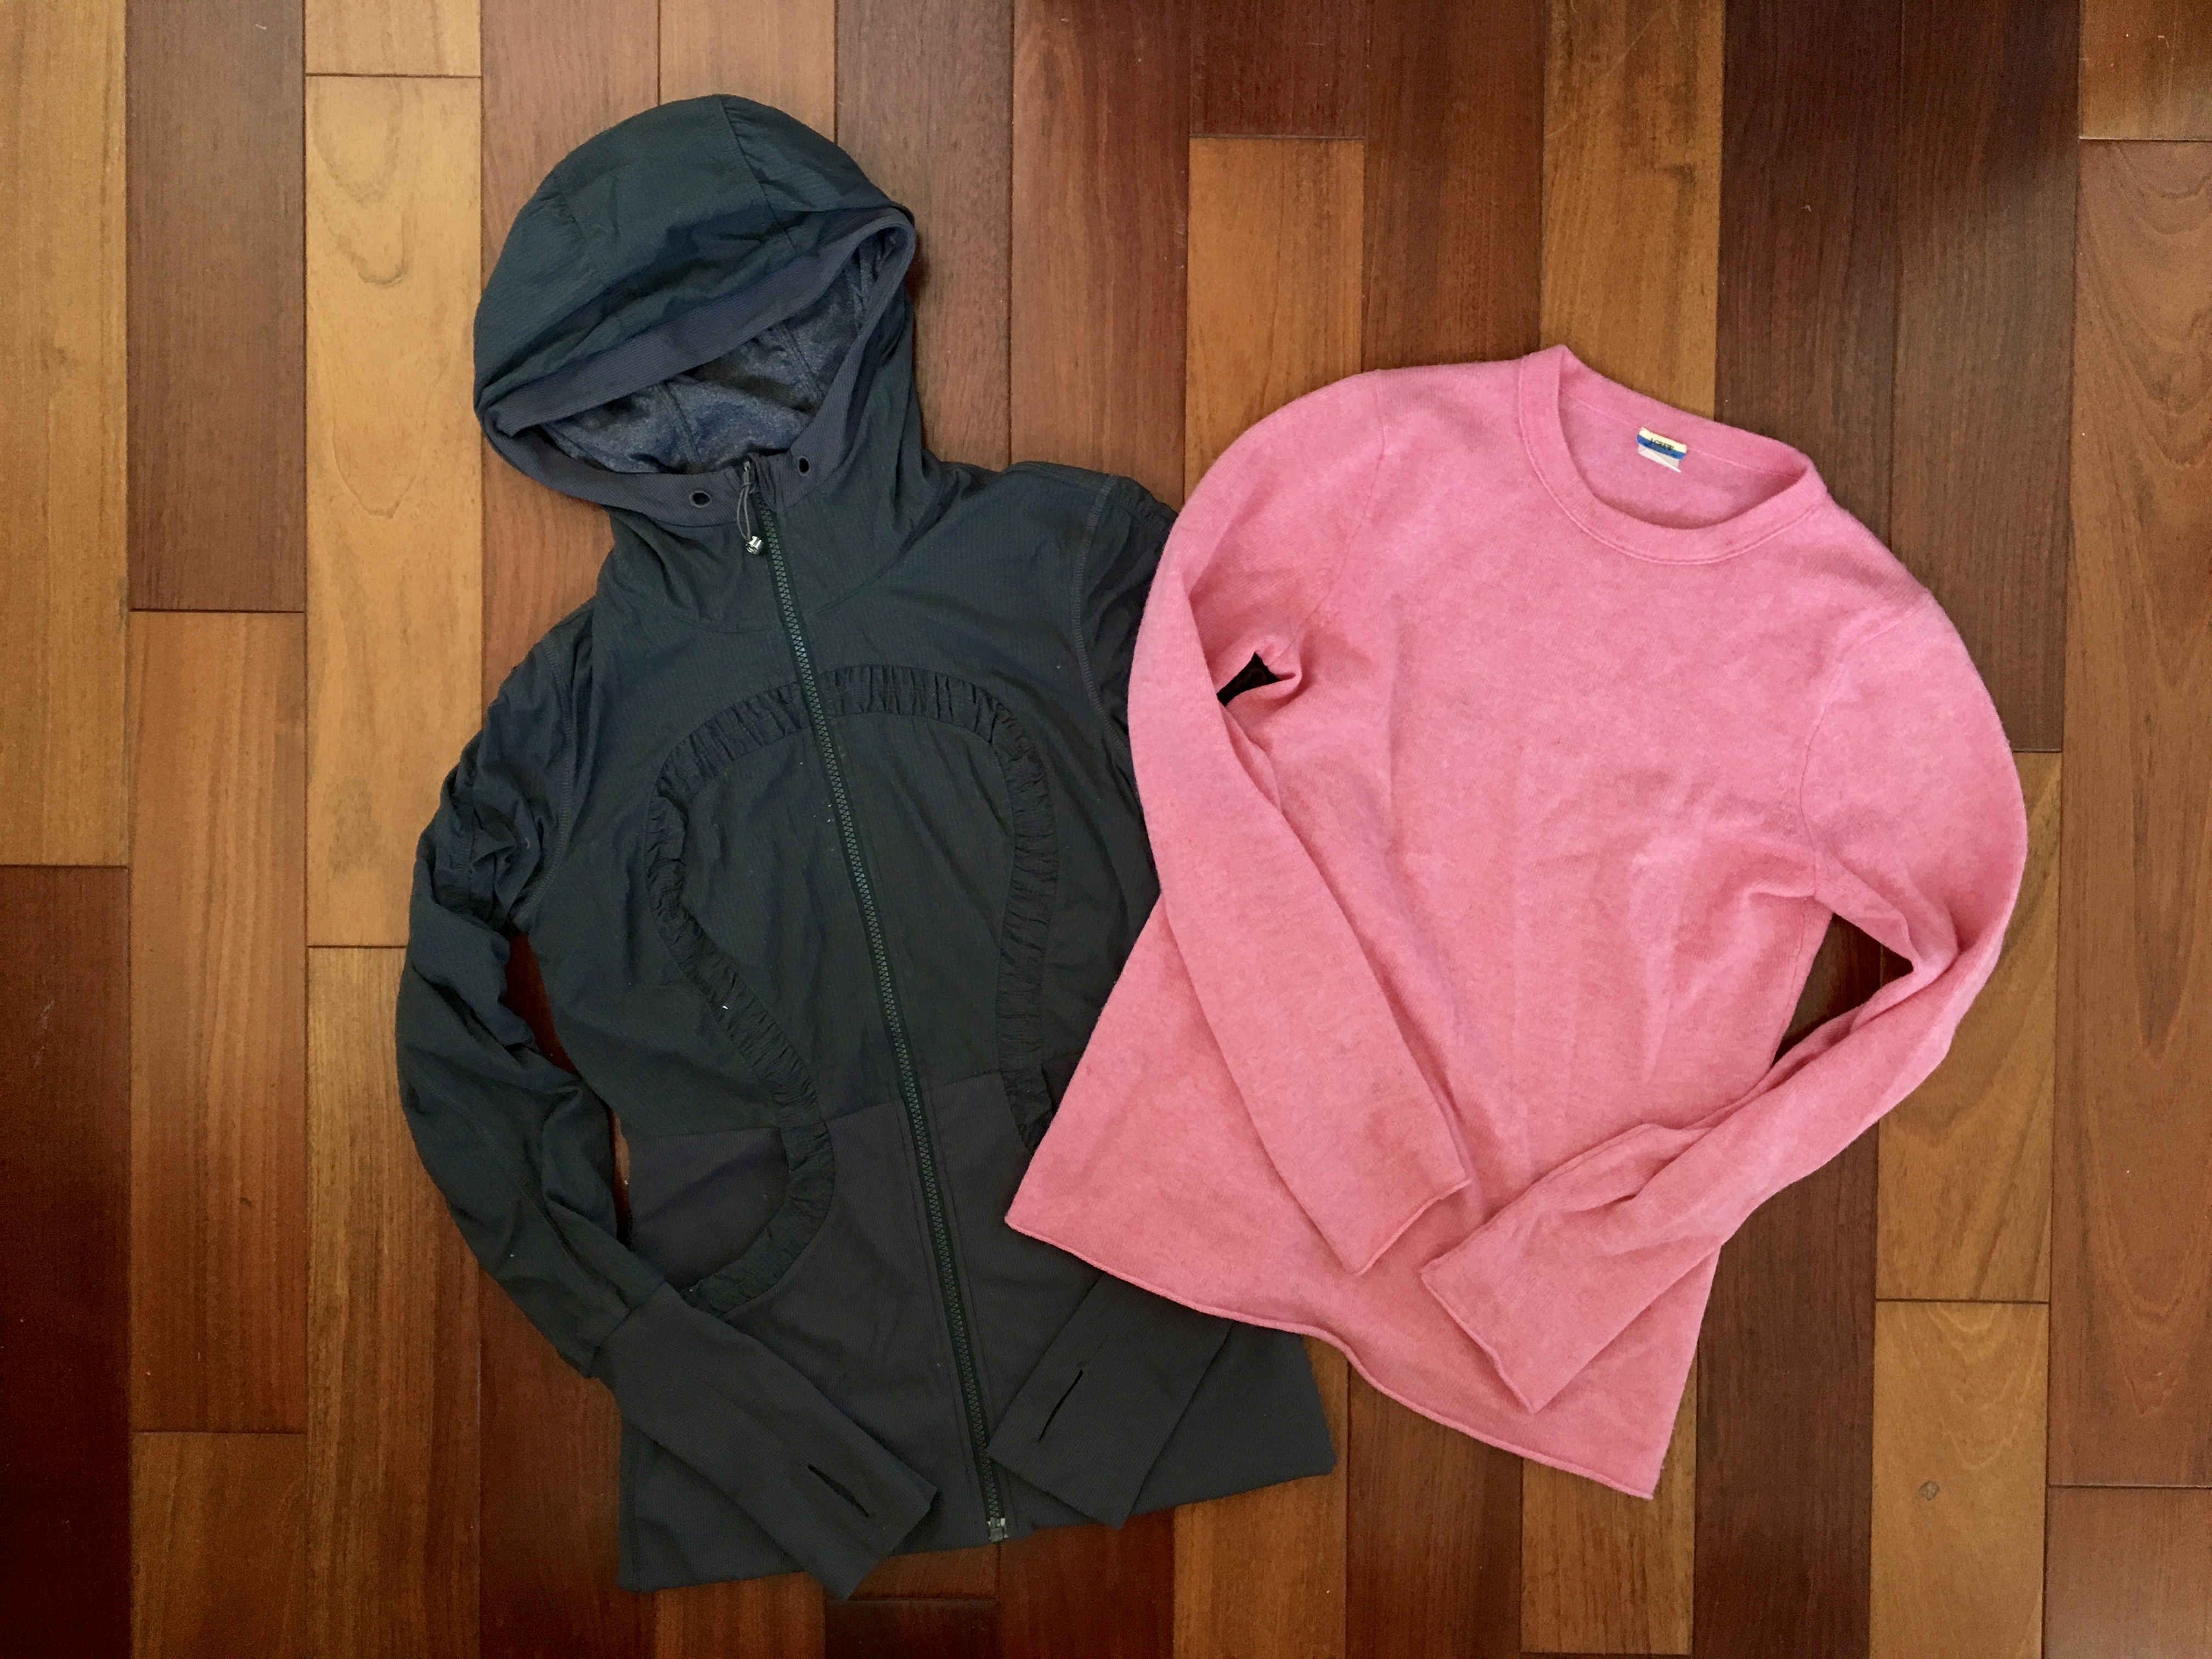 Lululemon jacket (that I also wear at least once a week) and J Crew cashmere sweater (the softest and warmest thing I own… and purchased for $5 on my neighborhood yardsale site).
 Anthropologie linen roll-up pants, J. Crew sweats, Urban Outfitters high rise black jeans, AG teal ankle jeans, Anthropologie jean shorts, Lululemon shorts and capris.
I packed a pair of blue jeans and then pulled them out at the last minute, thinking I had too many pairs of pants. I was wrong. I only wore shorts one day in France, never in England, and so I wore those black and teal pants over… and over… and over. When in doubt, pack jeans!
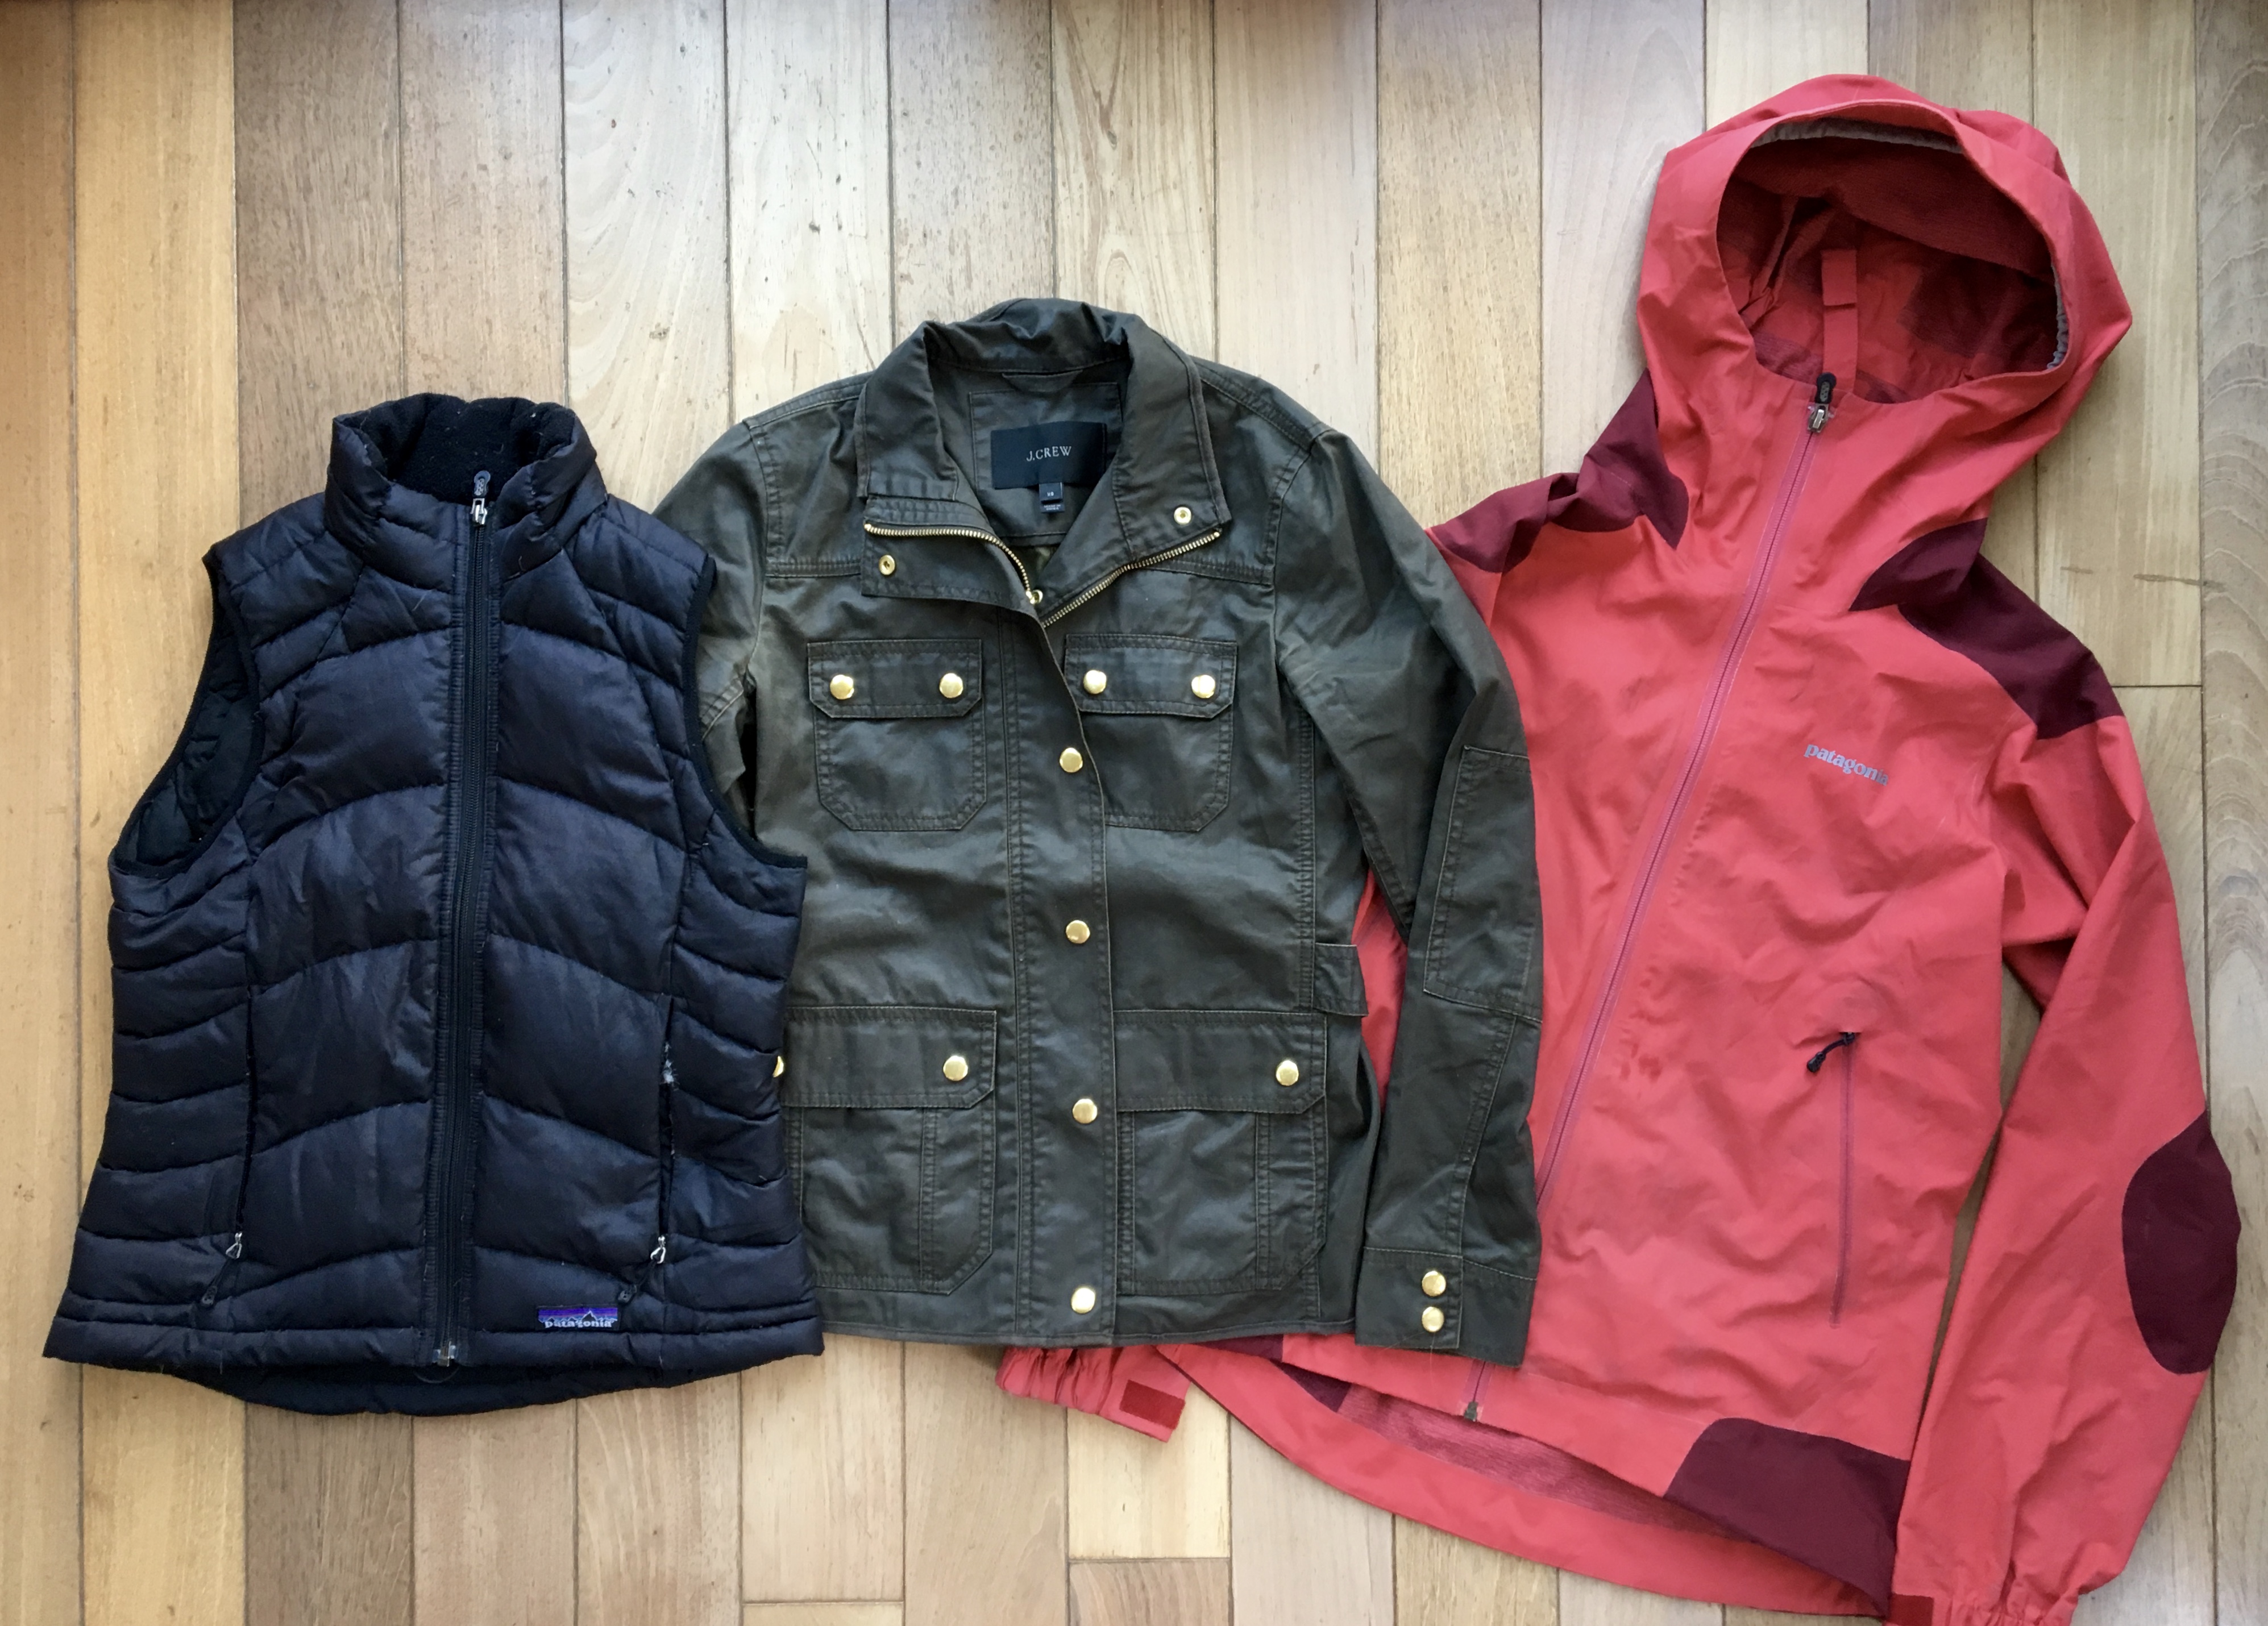 Patagonia down vest, J. Crew Downtown Field Jacket, Patagonia waterproof shell
Mostly my outerwear was warm enough, but I run cold, so even with these layers I sometimes wanted more warmth. I wish I owned a down jacket that I could roll up into a tiny ball and stuff into my suitcase. I’m waiting to purchase one of those when we live in a colder climate.
I also wish I’d packed a scarf. I did pack one and then pulled it out at the last minute, too. (Can you see why Elliott is always sighing over my under packing tendencies?) Lesson learned!
LENA’S SUITCASE
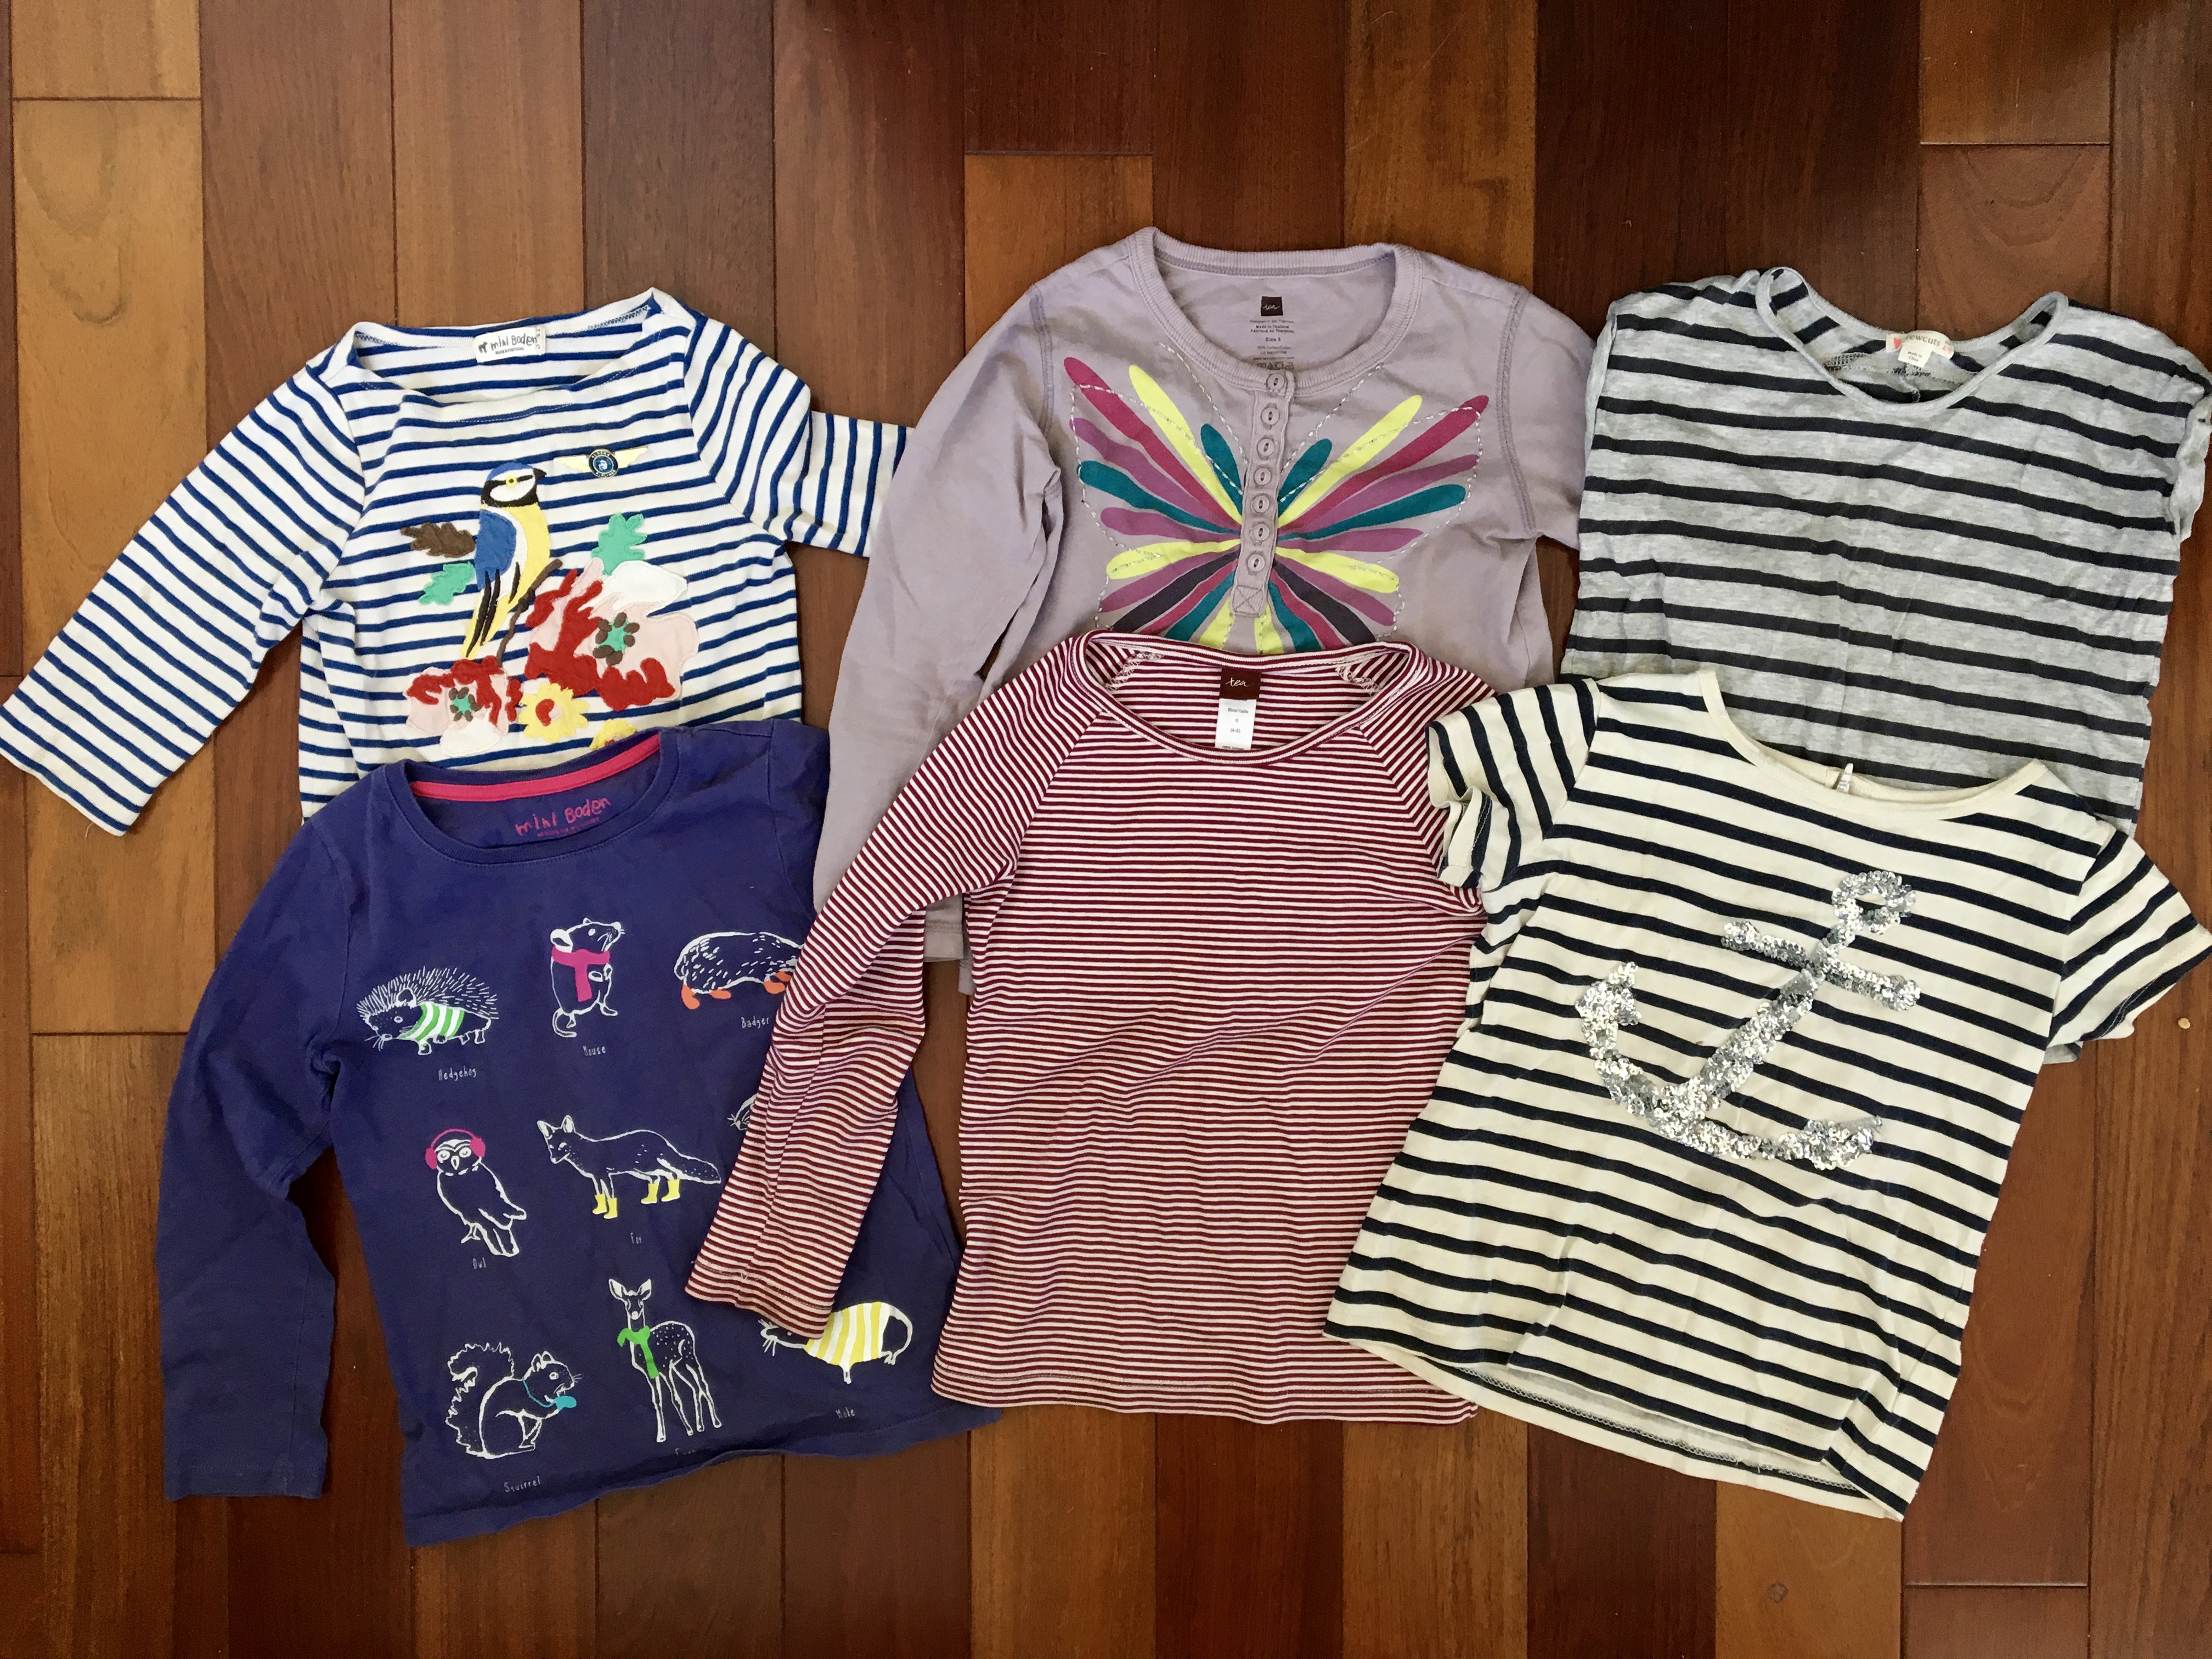 Shirts in the first column are from Mini Boden, second column are from Tea Collection, and third column are from Crewcuts.
For all of Lena’s shirts and pants, I tried to choose items that would mix and match with each other in multiple combinations. I also chose things that would hide dirt; no white or solid-colored shirts here!
 Top row: two pairs of thick and stretchy jersey cargo pants from Tea Collection, black jeans from Joes, blue sweats from H&M, and blue leggings from I-have-no-idea-where! Bottom row: skirt by REI, jean shorts from Old Navy, and exercise shorts with built-in stretchy shorts by Champion.
As with all the kids’ clothes, I also chose things that fit them perfectly and that they already wore every week and loved. In this case, Lena already always picks these clothes out for herself. They were safe bets because I knew she’d be comfortable in them.
 Raincoat borrowed from a friend that she never wore! Down jacket from Patagonia, two sweaters from Crewcuts.
I bought my J. Crew wool sweater secondhand so Lena and I could match, as I knew we’d be wearing both of them a lot in England. We had fun twinning, as you can see here!
GIL’S SUITCASE
 L to R, top to bottom: Gymboree appliqué shirt, Genuine Kids shirt, suuuuuper soft knit t-shirt made locally that he wears every day (“This is my Coronado shirt, Mama”), Gap appliqué LS shirt, super soft knit Corduroy shirt by Out of Print, striped knit polo by Johnnie-O, and LS shirt by Tea Collection. The last shirt is filthy… I took all these photos while unpacking!
 L to R, top to bottom: Ralph Lauren polo shorts, Gymboree shorts, Carters blue cargo shorts, two pairs of jeans by Joes.
Gil’s two pairs of jeans are both size 2T. My skinny little dude!
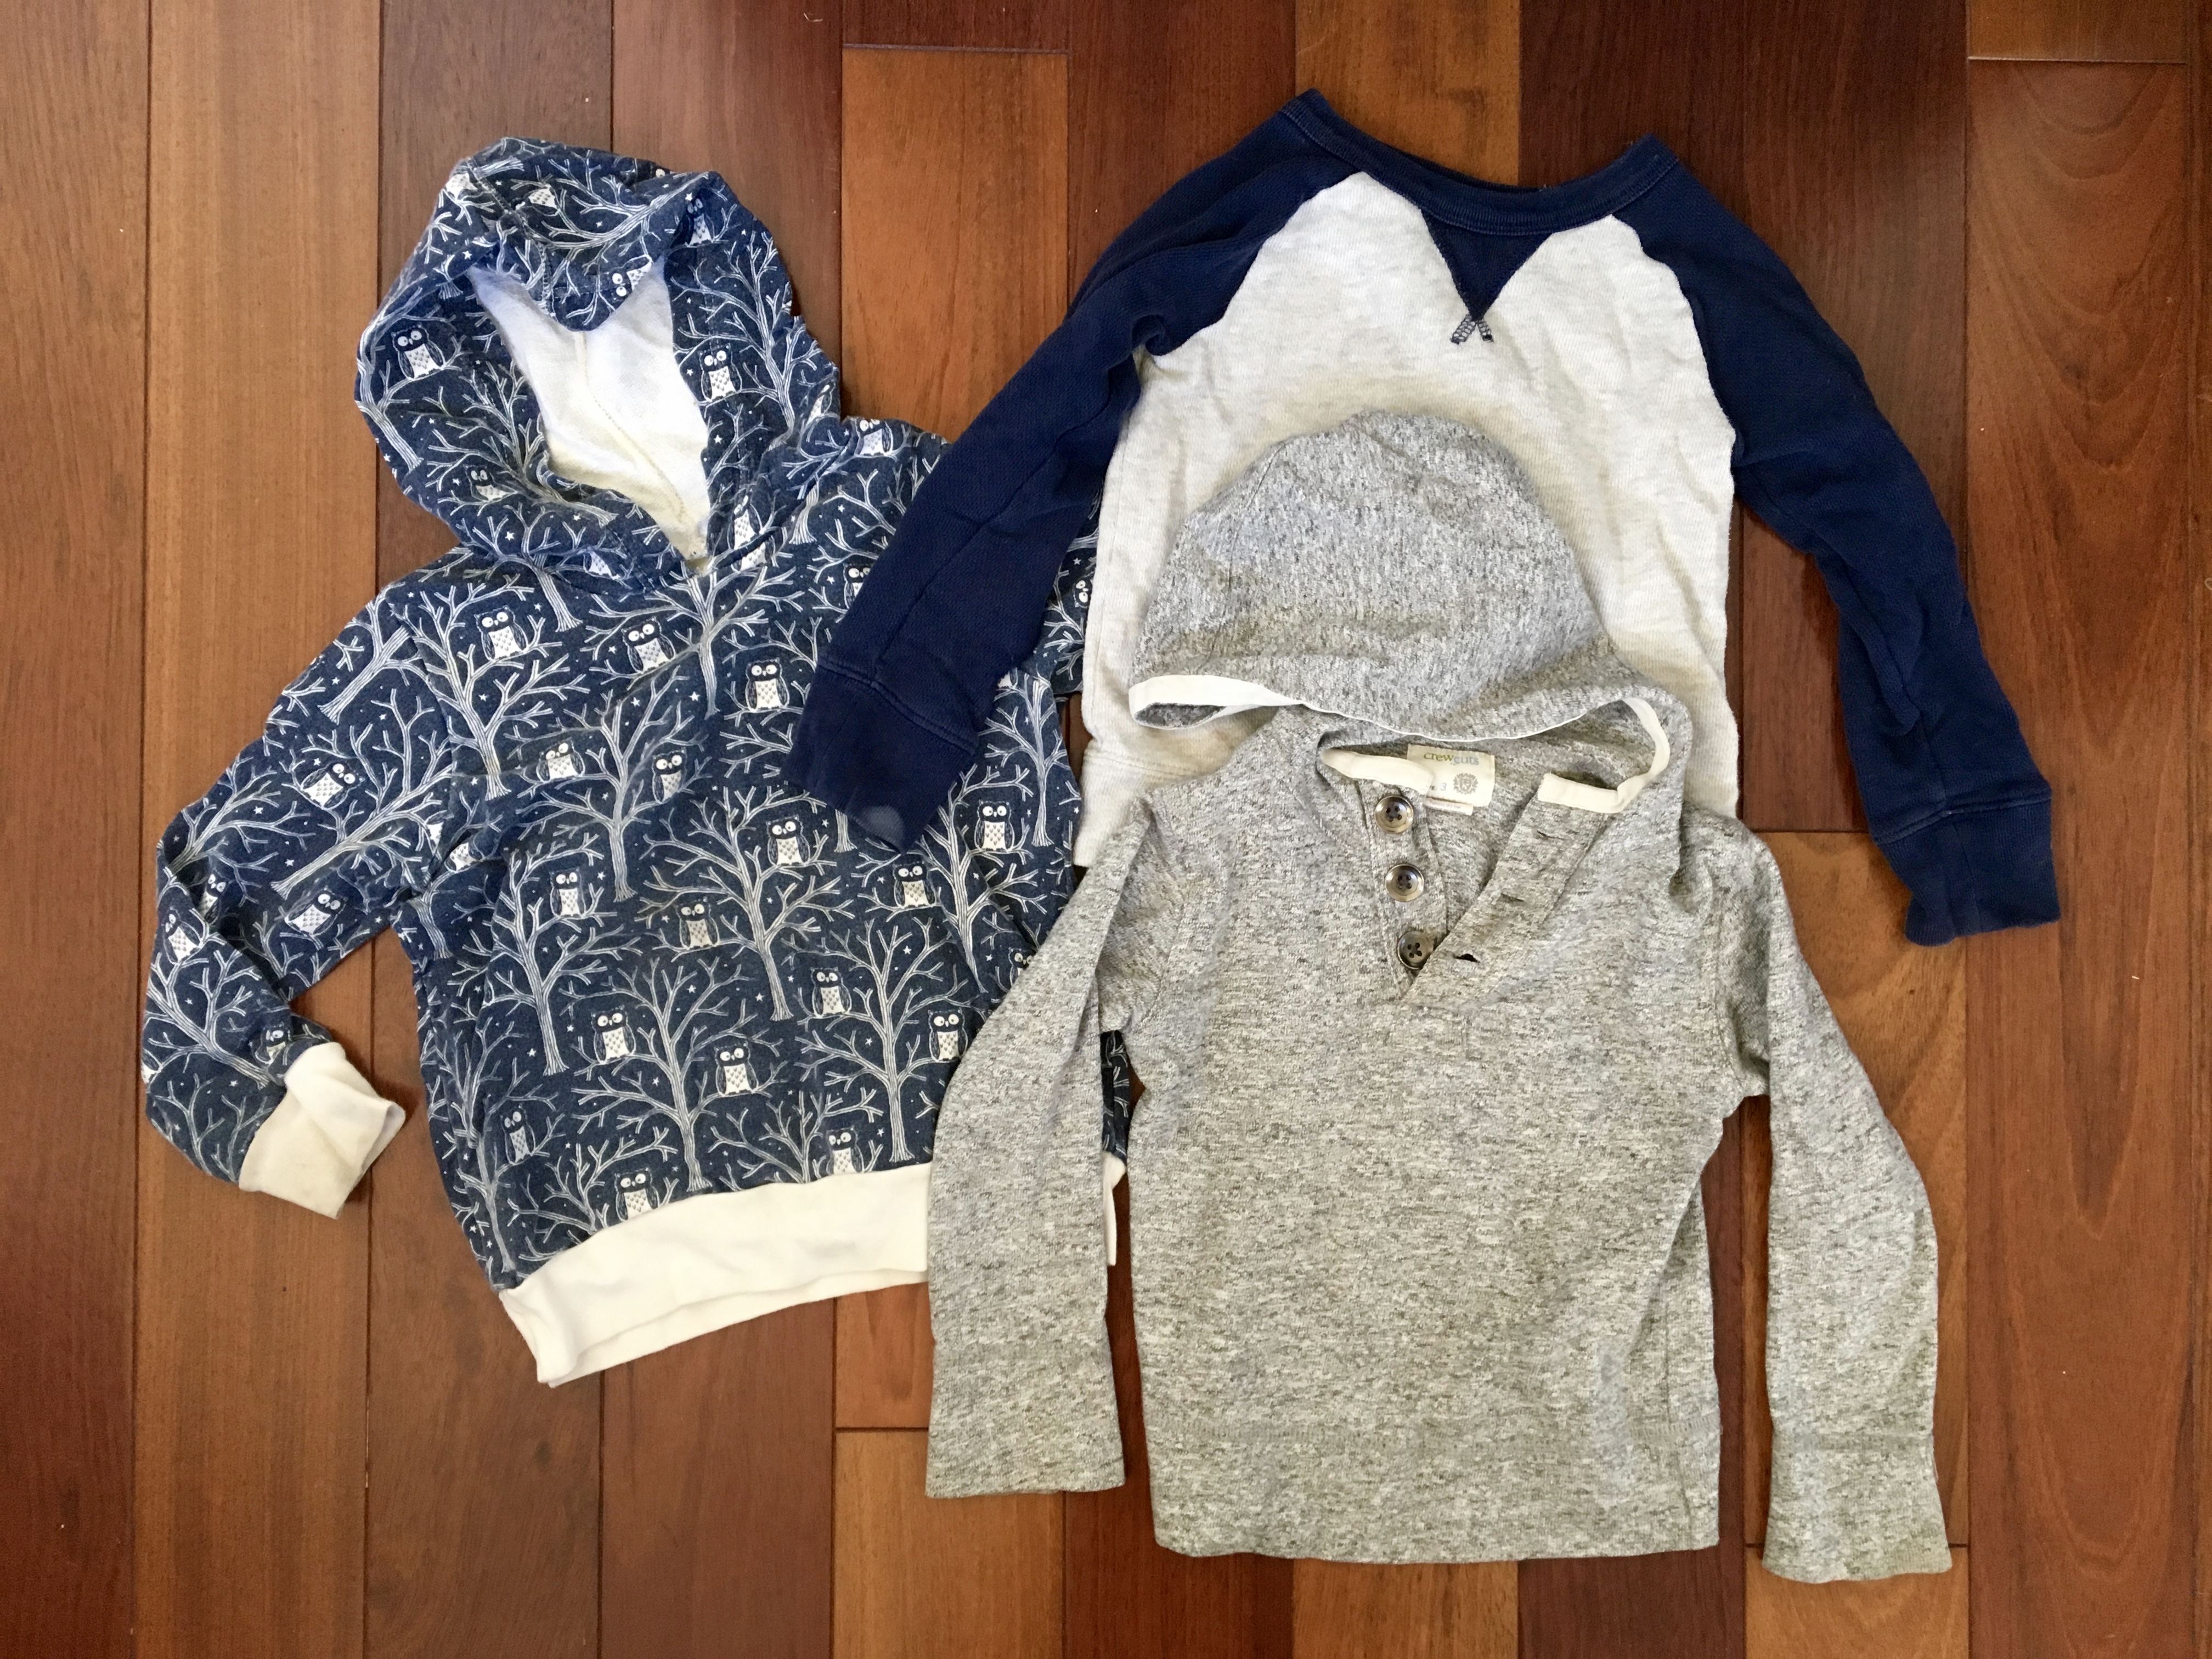 Sweaters are from Winter Water Factory and Crewcuts. They are strategically positioned so you can’t see the huge stain on the blue and gray sweatshirt; everything was headed for the wash.
We packed Gil a lined rain jacket that I loved, but he lost in somewhere in France. Such a bummer. I was looking forward to seeing Forest in that one!
FOREST’S SUITCASE
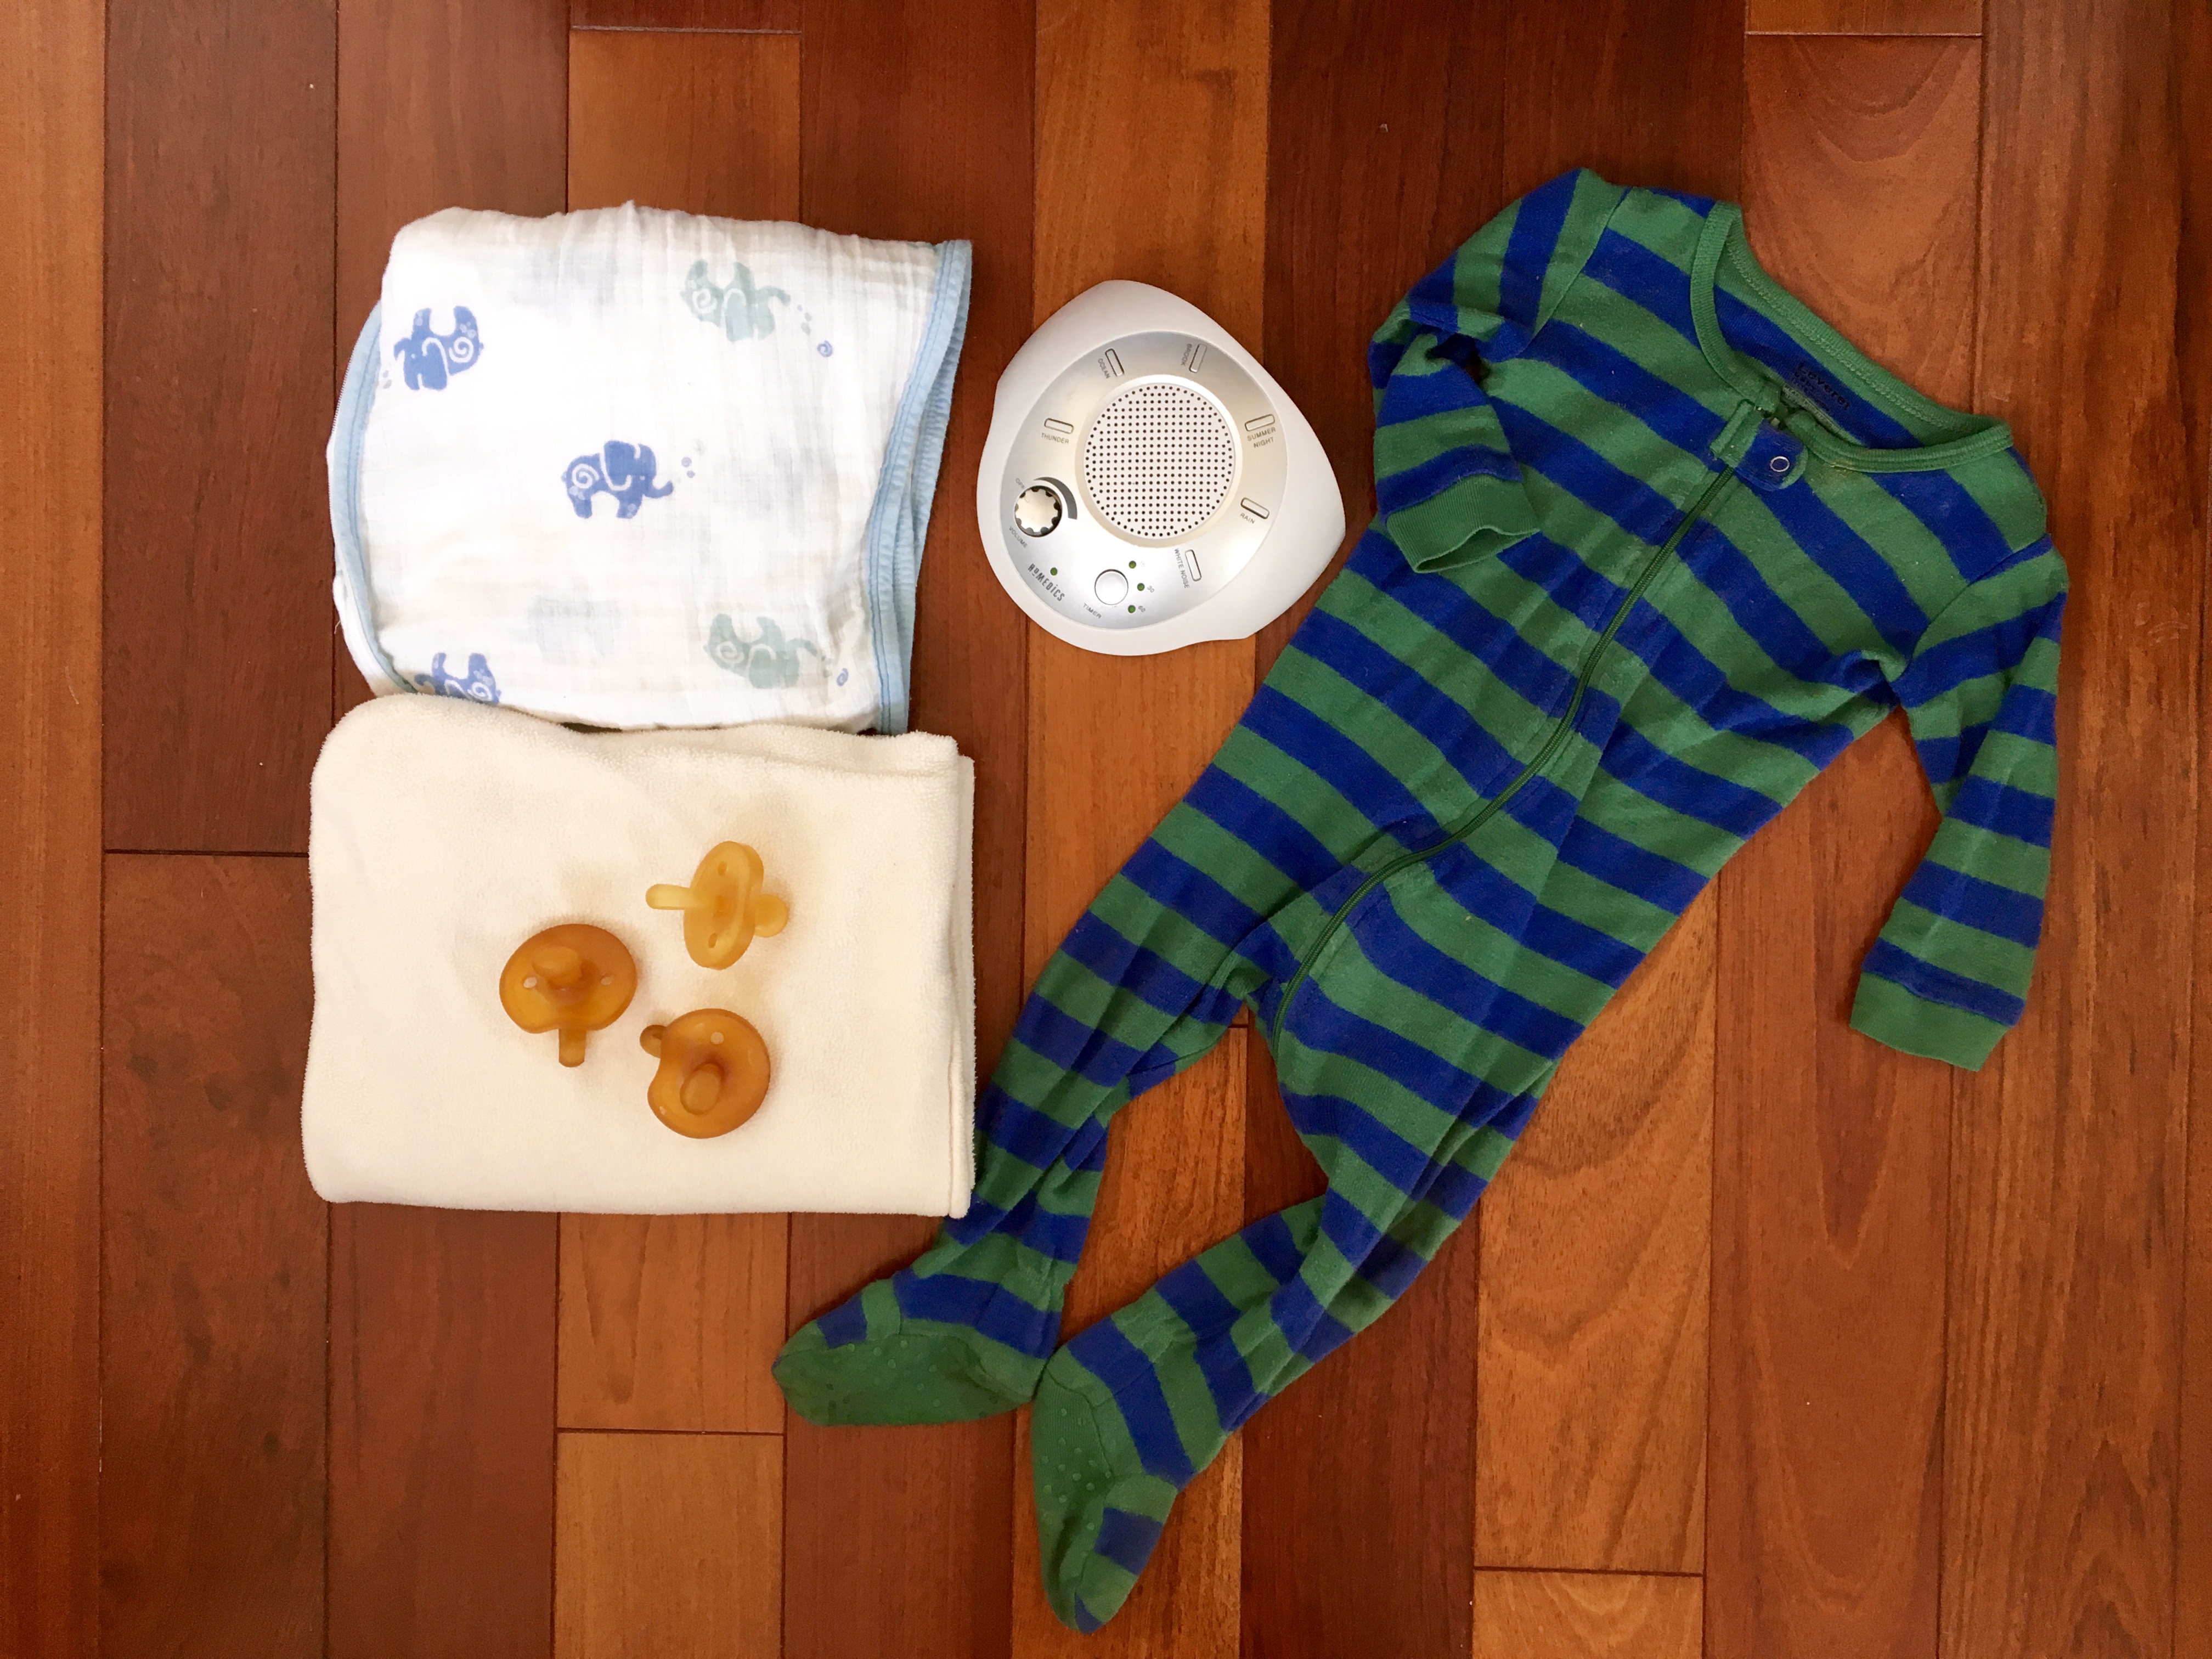 Two sleep sacks (one summer weight by Aden + Anais and one fleece by Halo), multiple pacifiers by Natursutten (I think I packed eight of them!!!), Homemedics white noise machine that we used with batteries the whole time, and a Leveret sleeper.
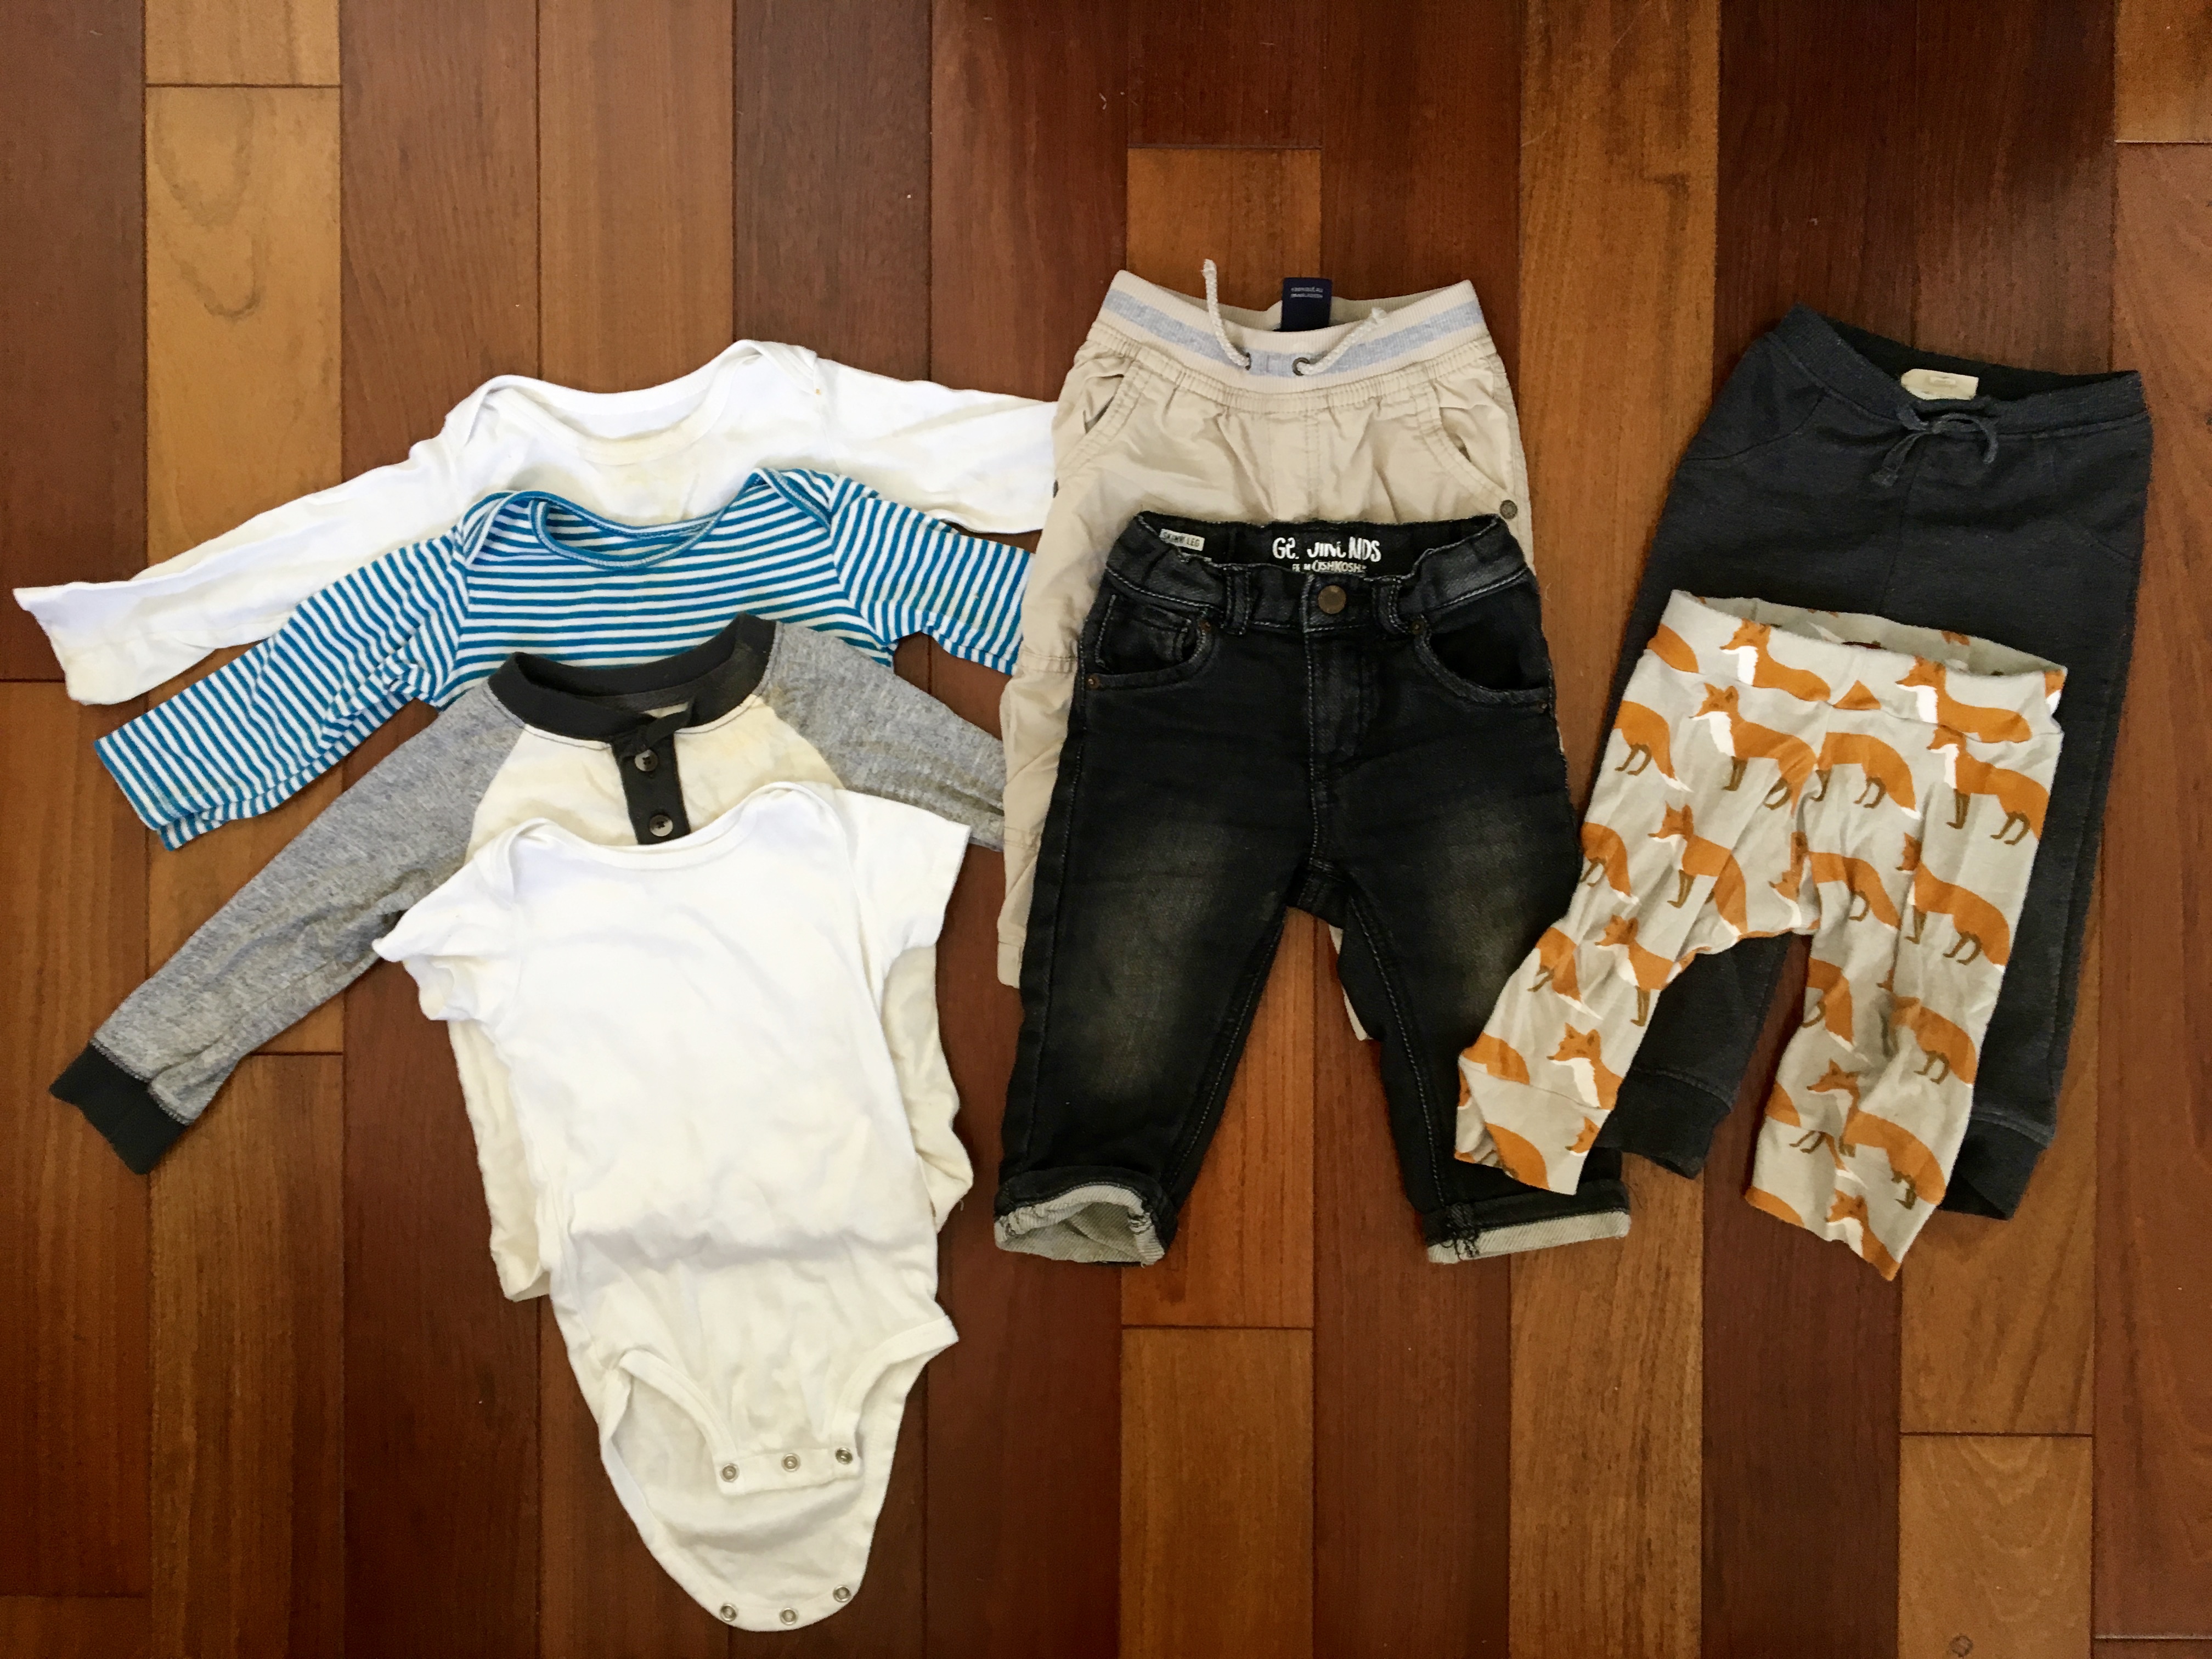 Shirts are from Carters and Genuine Kids.
Pants: Carters lined cargo pants, Genuine Kids black jeans, Genuine Kids gray sweats, and Milkbarn fox leggings.
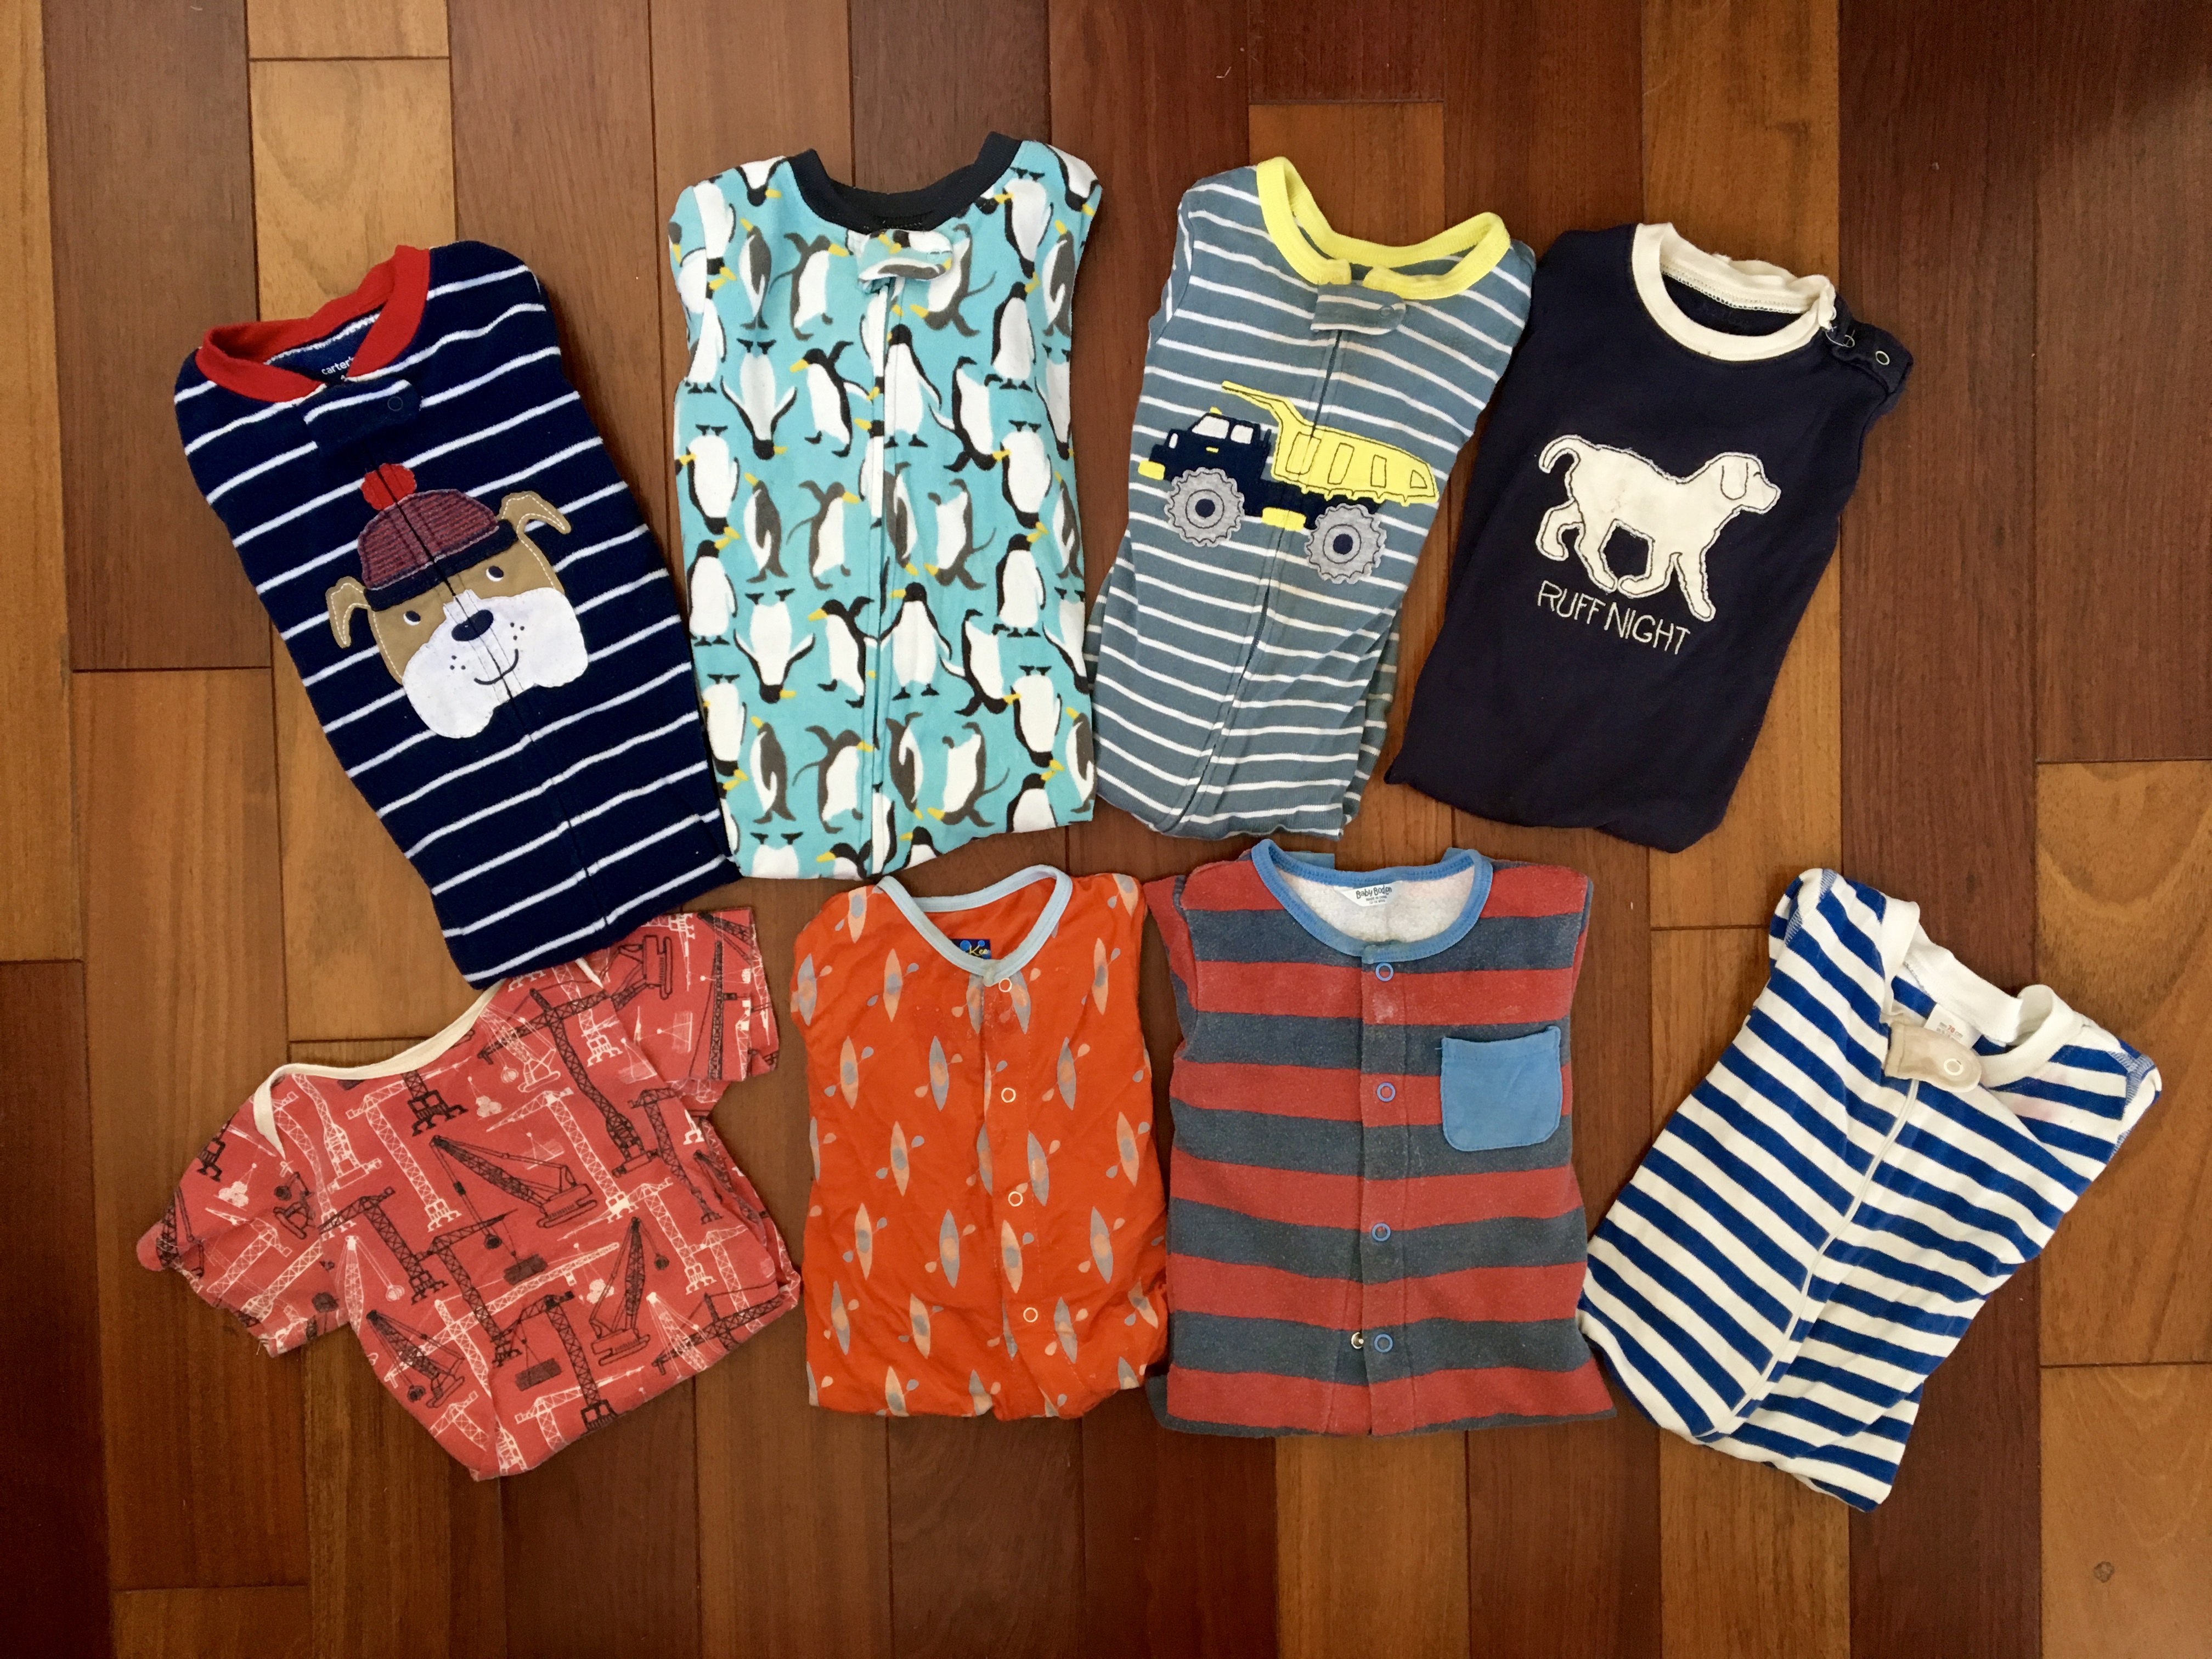 Top row: two fleece footed sleepers by Carters, one (and two more not pictured) cotton stretchy footed sleepers by Carters, and “Ruff Night” romper by Hatley.
Bottom row: short-sleeved summer romper by Winter Water Factory that he never wore (too cold!), Kickee Pants romper, Mini Boden fleece-lined romper, and Hanna Andersson romper, arranged so you can’t see the full extent of how filthy it is…
Even with all these long-sleeved rompers and sleepers–I count nine, in addition to all his pants and shirts!–I still had to do laundry every few days* to keep Forest in clean clothes. With a busy, crawling baby who is learning to eat solids, I changed his clothes at least once a day. I’m so glad I didn’t under pack for him.
*Thankfully, doing laundry often was not an issue. We house-sat in England, stayed at a research/study center in France, and otherwise were in Airbnbs — and all of these places had free laundry. I did laundry and then, European-style, I hung it out to dry!
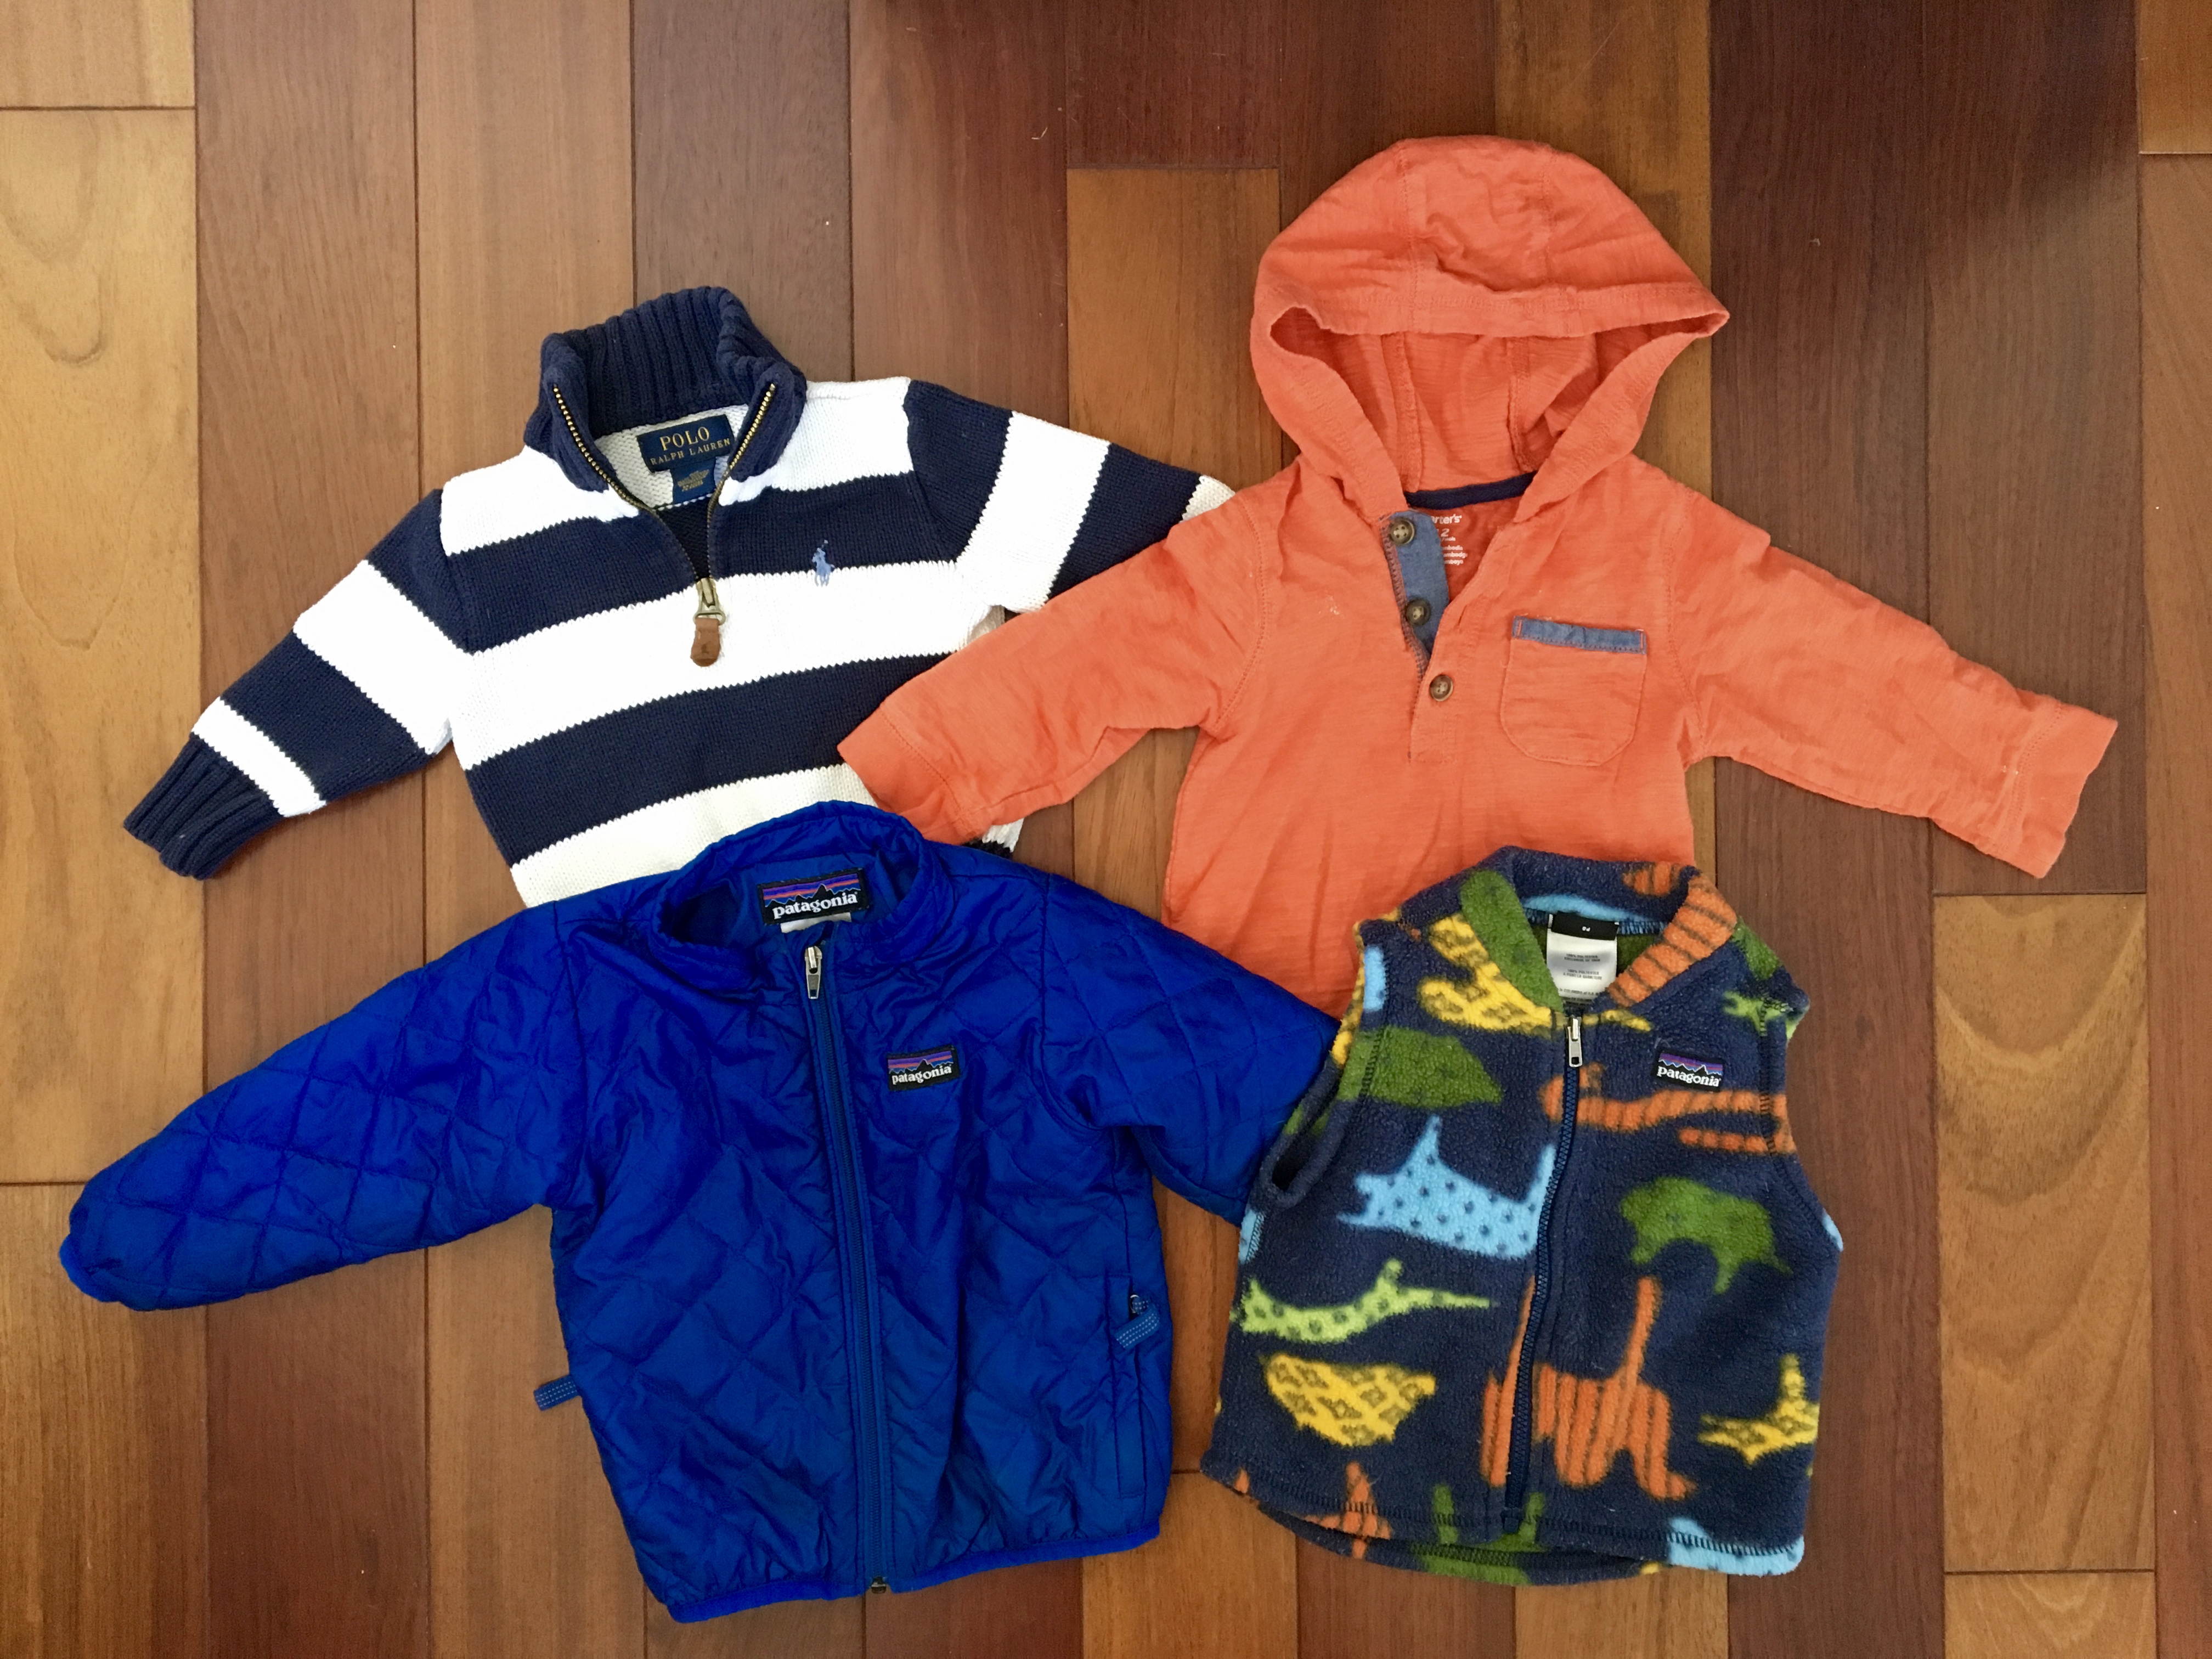 Top row: Ralph Lauren knit sweater, Carters cotton pullover. Bottom row: Patagonia nano down jacket and Patagonia fleece vest.
Buying that coat was a last-minute decision for me. I looked at many different options, and in the end I am so happy with this choice. It was the perfect light layer that kept our baby toasty warm.
We also packed a JJ Cole Bundle Me that kept his lower half warm when he was in the stroller. You can see a picture of it here.
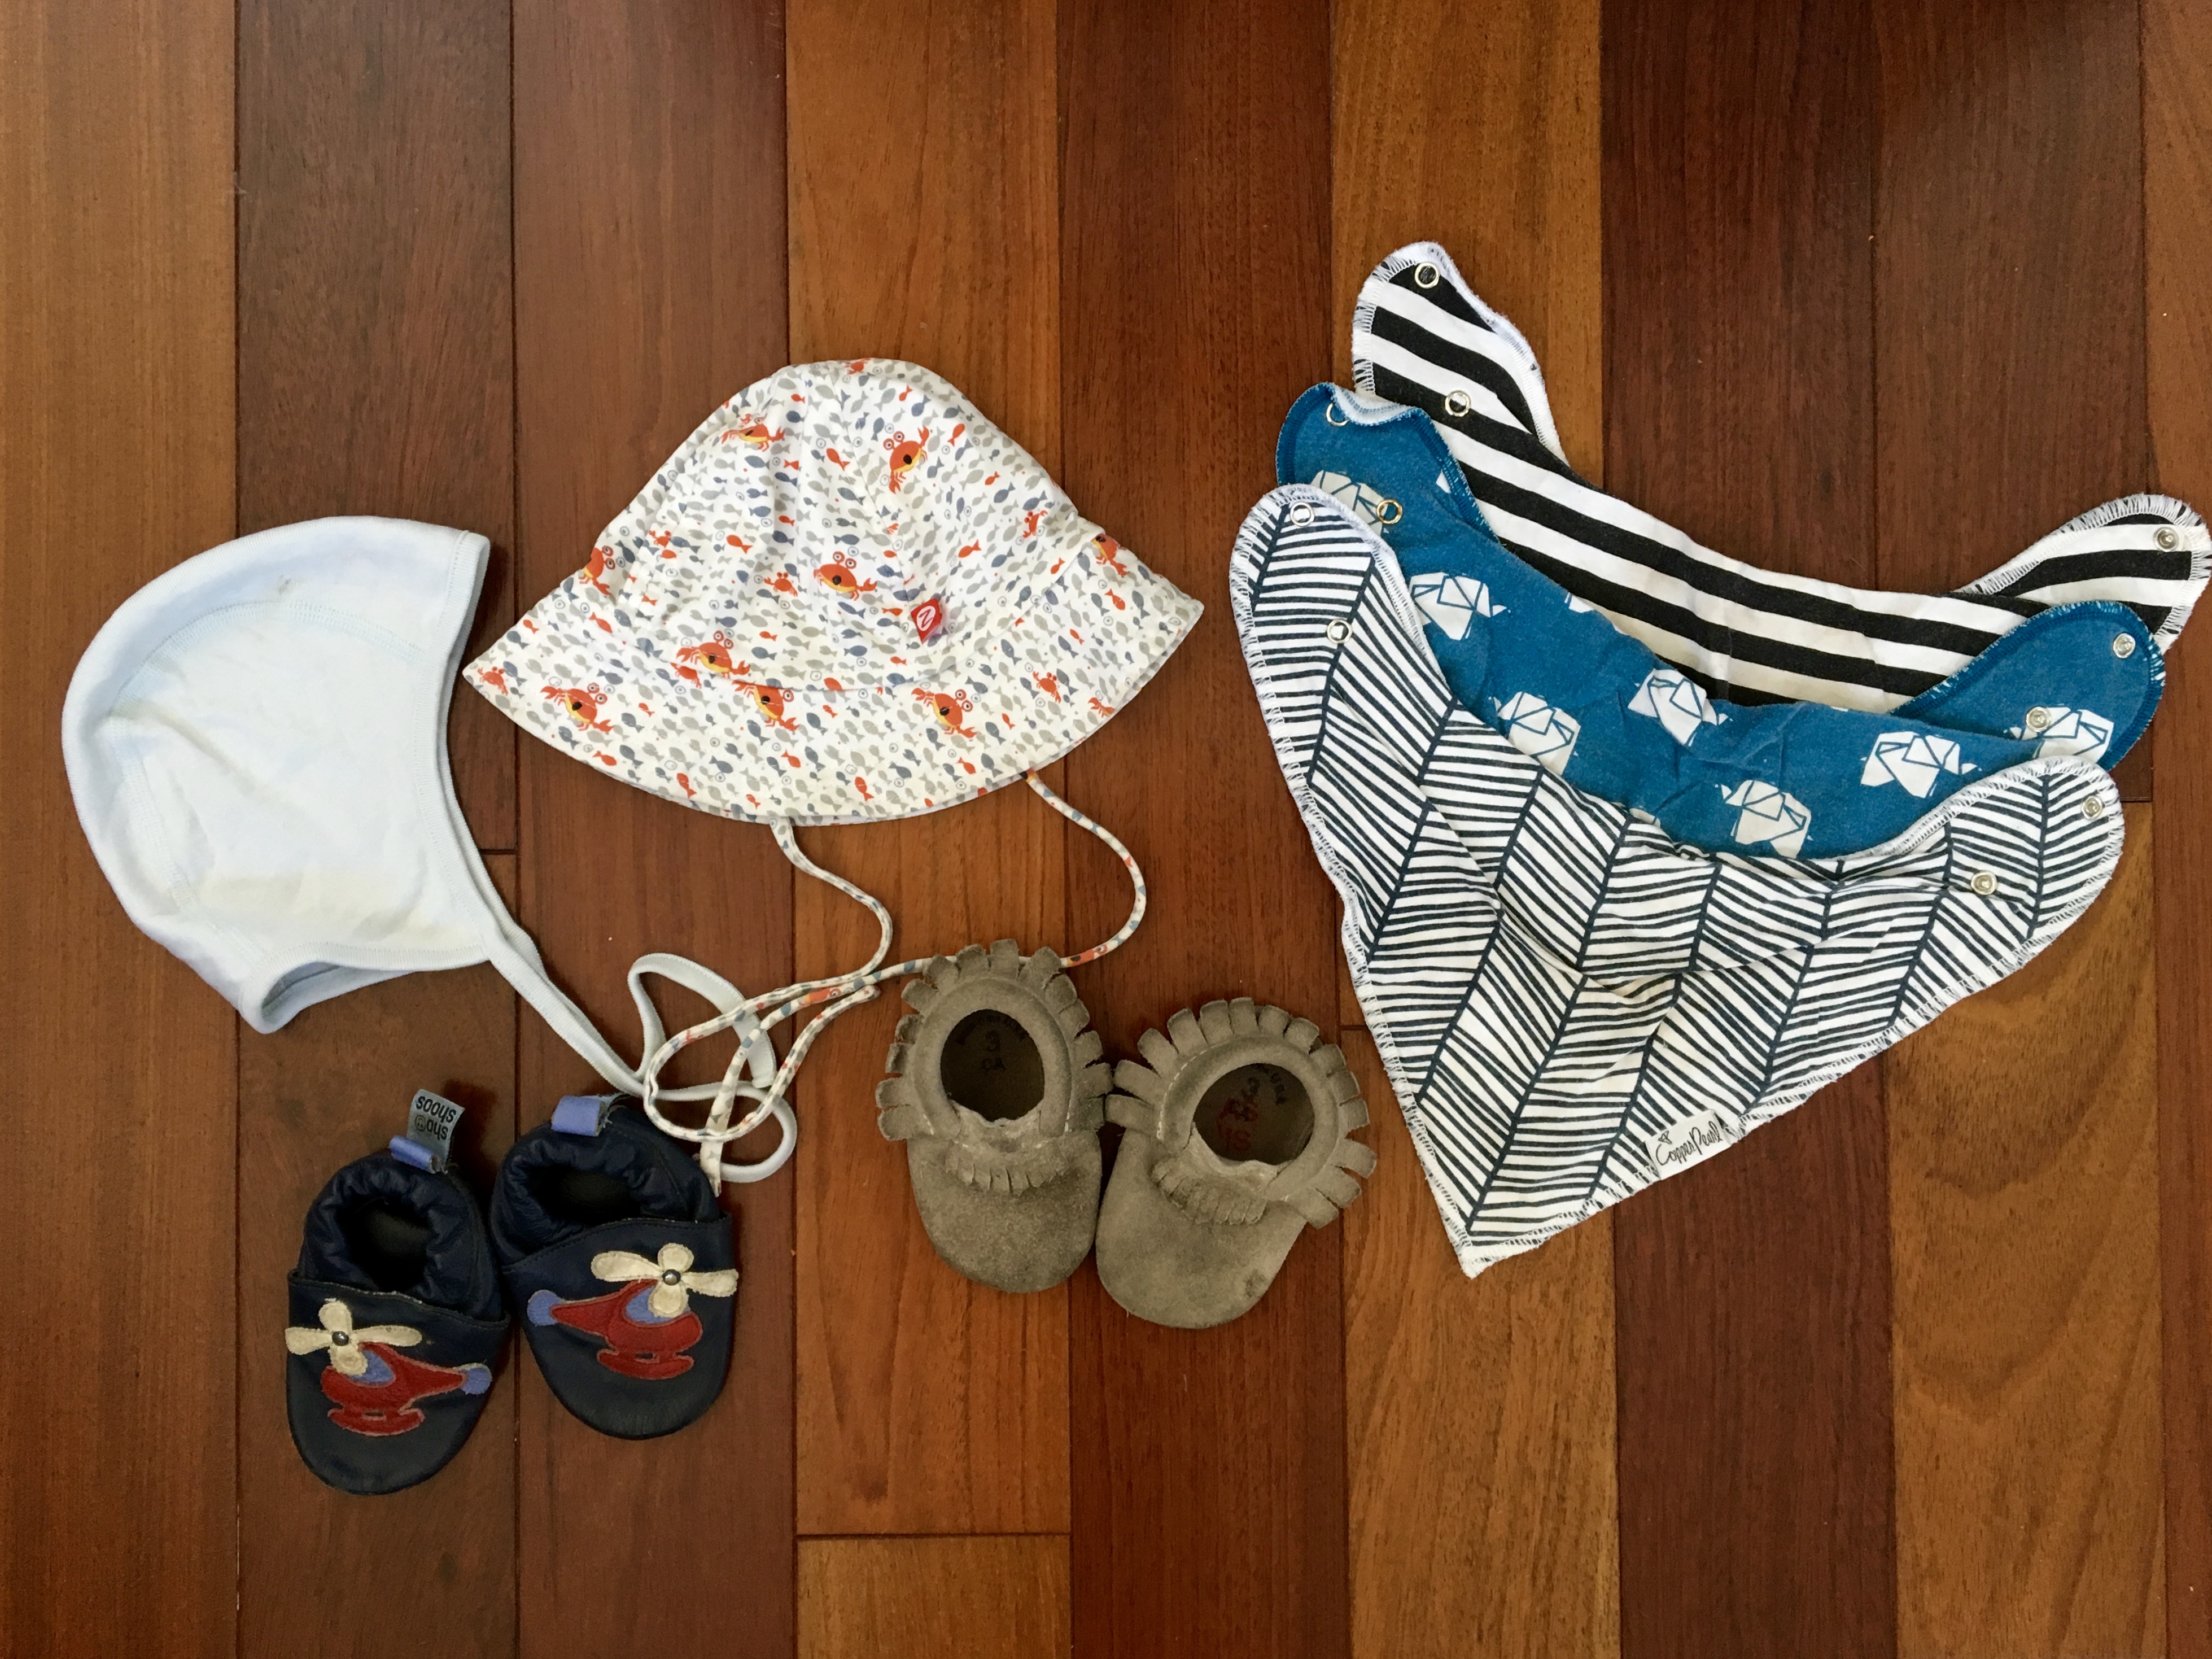 Hanna Andersson pilot cap, Zutano sun hat, dirty (!) bandana bibs by Copper Pearl (I think I packed six total), well-loved shoes by Shoe Too and Freshly Picked.
Other items for Forest that are not pictured:
- Enough diapers to last me about 3-4 days before I could go shopping in England
- Enough wipes to last me a week
- Nuk sippy cup
- Two baby spoons and a toddler fork (that we could also use for eating cans of tuna or yogurts on the go)
- Baby Bjorn bib
- Lots of socks
- A box of Baby Mum-Mums, graham crackers, and other baby-friendly foods for the airplane and my diaper bag
- Also in my diaper bag: extra bibs, this swaddle blanket, my nursing cover, this indestructible book and Peek-a-Who, diaper rash cream
SUNDRY EXTRAS
- Multiple adapters for European outlets, all borrowed from friends
- Schoolwork
- About 30 pages of Lena’s Kindergarten math book
- Our history read-aloud book (Story of the World)
- Books for her to read to me
- About six lightweight, colorful workbooks: Kindergarten-level for Gil (who reads better than Lena does) and First Grade-level for Lena that covered math, handwriting, and phonics
- Activities for the kids
- Lena’s sewing project from American Girl
- Magnetic checkers game
- Coloring books and pencils/markers
- Discman, about 5 CDs (music and Adventures in Odyssey), both kids’ headphones
- 10 thin paperback books for reading aloud
- Two white noise machines with lots of extra batteries (we only ever used one, just for Forest)
- Medications
- Kids’ Tylenol
- Kids’ Melatonin for the plane and jet lag once we arrived
- Thermometers (infant and adult)
- Ibuprofen
- Benadryl tablets and lotion
- Bandaids
- My favorite super-safe sunscreen (which was 13 milliliters too large for European carry-on requirements and got confiscated… boo)
- Nail clippers (infant and adult)
- Multiple small bottles of shampoo and conditioner from various hotels over the years
And I think that’s about it! Epic post! But hopefully this will be a good reference for some of you who might be preparing for upcoming travel — or for me in years to come! (Gotta get wear out of those new suitcases we bought, right?)
Do you have any advice for us for next time?
