Archive | December, 2012

Wednesday morning at the market

 
Many times I worry that I am not living in Italy enough.  Do I appreciate the food, the language, the culture of this beautiful land?  Am I learning the food, the language, the culture?  What ways can I more fully embrace living in Italy?

Once a week I have a ritual that is entirely Italian: Lena and I walk to the Wednesday outdoor market in our town.  I have come to rely on the stalls full of vegetables and fruits to stock my pantry and refrigerator, as I cannot find better prices or fresher produce anywhere during the week. 

I love these trips: pushing Lena’s stroller through the streets of our town and waving at our acquaintances (the old man in the general store, the boy who works in the bottled water store), the arrival in the hustle and bustle of the market, the ritual of tearing off a number printed on thin colored paper from the stack dangling in front of my favorite vendors’ stall, the meanderings from stall to stall until my number is finally called, the routine of ordering in Italian as best I can and being helped along by the vendors (father, mother, and son, I think) who by now smile in recognition at me, love Lena, and know when my baby is due.

Today Lena and I arrived at the market during the morning rush, so while we waited for our turn to get fruits and vegetables, we wandered around the market and took some pictures.

At last it was our turn to buy fruits and vegetables! Afterwards we checked to see how our car wash was coming along.  We borrowed our friends’ van this week while they were out of town and our persnickety old Honda was in the shop.  I decided to get their van cleaned while we were at the market.  The men washed it inside and out by hand… and all for the equivalent of $20.  I’m coming back with our car next week!

11 :: in Italy, Lena, Sicily

the best butternut squash soup you’ll ever have

You think I might be kidding… but I made this soup twice last week!  I’ve been trying to make more soups and cook vegetarian dinners four times a week, so that might be part of what made this recipe so perfect for us.  I think also that the additions of garam marsala (a classic Indian spice blend)*, yogurt, and lime hit the spot for Elliott and me… and Lena too, who is learning to eat her curries along with us. 

And of course, the perfect side for a hearty soup is always warm whole wheat biscuits drizzled with honey… yum! 

Here’s the recipe with my adaptations.  Original recipe from FineCooking.com.

Butternut Squash Soup
Ingredients
  • 2 Tbs. unsalted butter  
  • 1/2 cup thinly sliced leeks  
  • 1/2 cup finely chopped shallots  
  • 1/4 cup thinly sliced celery (halve lengthwise then slice crosswise)  
  • 2 tsp. minced garlic  
  • Kosher salt  
  • 1 tsp. garam masala (see below for my recipe)
  • 5 cups homemade vegetable broth or low-salt chicken broth  
  • 3 Tbs. apple cider  
  • 2 lb. butternut squash, peeled, seeded, and cut into 1/2-inch dice (equivalent to 4 cups when diced)
  • 1/4 cup thick whole-milk yogurt, preferably Greek  
  • Freshly ground black pepper  
  • 1-1/2 tsp. fresh lime juice  
  • 1/3 cup chopped fresh cilantro  

Directions

  1.  In a 4- to 5-quart saucepan or Dutch oven, heat the butter over medium-low heat. When hot, add the shallots, leeks, celery, garlic, and a pinch of kosher salt. Stir well, cover, reduce the heat to low, and cook, stirring occasionally, until the aromatics are softened, 8 to 10 minutes. 
  2. Stir in 1 tsp. kosher salt and the garam masala.
  3. Add the butternut squash, vegetable broth, and cider, stir well, and bring to a simmer over medium heat. Cook, uncovered, stirring occasionally, until the vegetables are very tender and the soup is full-flavored, 7 to 20 minutes.
  4. Take the pan off the heat and let the soup cool for 5 minutes. 
  5. Working in batches, puree the soup in a blender (fill the jar no more than half full and vent the lid, topping it with a folded kitchen towel to prevent hot splashes). Wipe the pan clean and put the soup back into the pan.
  6. Add the yogurt and 1/2 tsp. of the lime juice. Season the soup with salt and pepper. Taste the soup and adjust the seasonings with more salt, pepper, or lime juice as needed.
  7. Ladle into 8 soup bowls and garnish each serving with 1 to 2 tsp. chopped cilantro.


*Our commissary (military grocery store) here in Sicily doesn’t carry garam marsala, so I looked up recipes and made my own mix from spices I already had.  I’ve included the recipe I used and enjoyed below.
 Garam Marsala
original recipe from AllRecipes.com
  • 1 tablespoon ground cumin 
  • 1 1/2 teaspoons ground coriander 
  • 1 1/2 teaspoons ground cardamom 
  • 1 1/2 teaspoons ground pepper 
  • 1 teaspoon ground cinnamon
  • 1/2 teaspoon ground cloves 
  • 1/2 teaspoon ground nutmeg 

 Mix all spices together and store in an airtight container in a cool, dry place.

4 :: in Becoming a Stay-at-Home Mom Series, eat this

Craft Fair Tips & Tricks

Well, dear readers, here it is: the craft fair advice post!  I didn’t know I had learned so much until I began to write it all down for you.  A craft fair is a lot of work with a steep learning curve from start to finish!

Here are my tips as well as my checklists, a few pictures, and some more resources at the end.

Table Decorations & Props 

I felt rushed to build up my inventory (because I only found out about the craft fair three weeks before!) so I spent very little time thinking about how my craft fair table would actually look.  I should have designed my display on my kitchen table before the event so I could play around with spacing, props (like bowls or dishes or pretty trays), and even the amount of products I wanted to display.  Therefore I only had a basic vision for my table and just played around with the design once I got to the fair.  Since I had a couple of hours before the fair began, I could arrange and rearrange a dozen times.

A couple of things I did know ahead of time:  I wanted to use a plain white tablecloth over the dark wooden table to really make my brightly-colored products pop.  I wanted to display smaller items in matching Polish pottery bowls, which are the prettiest things in my kitchen and are very complimentary to my fabric choices and personal style.  I also planned to hang a homemade pennant banner on the front of my table so I didn’t just have a plain white tablecloth there.  (Some of you will remember it from Lena’s first birthday party.)

As you can tell from my photos of the craft fair, my friend Anna spent a lot of time thinking about her display and had some darling ideas and a beautiful vertical display for her chef’s hats.  Her attractive use of space definitely drew customers in!  She also had printed a larger version of her logo to hang on the front of her booth.

Because Anna and I were sharing a table, we both had to crowd our displays in order to show all the items we offered.  Considering this, we took a lot of care to make sure that all our items were grouped well and that we kept any extra inventory off the table to provide as much calming white space between items as possible.  In the end our table looked rich with attractive choices but not overcrowded or overwhelming.

We both encouraged people to interact with our displays and products, meaning Anna was happy for kids to swirl her whisk around a bowl with her felt sugar cubes and felt eggs.  I also cheerfully suggested that people try on my gloves whenever they paused to look at them; I know they look so much more attractive on your hands than simply lying on a table. 

Business Cards and Logo 

Most professional crafters will have invested in a professional designer create a logo for them.  I haven’t done this yet, so I just made my own sign with the name of my shop, a tagline (“Knitted and Sewn by Becca Garber”), and the addresses of my blog and Etsy shop.   In retrospect there were a dozen things wrong with my sign design (ie., it wasn’t colorful, the web addresses were long and distracting), but hey… better next time.  I printed a sign with my shop name, tagline, and web addresses on fine resume paper and framed it in a picture frame we had in our house.  I also printed “business cards” that looked exactly the same as the sign.  These I printed on resume paper and then cut out myself with a craft paper cutter.

Price Tags 

All the resources I read before the craft fair emphasized that your prices must be obvious.  They suggested framing little price signs by each category of your inventory.  I didn’t have enough little frames for that, so I made little paper “price tents” with the name of the product, a description, and its price on the front.  Here’s an example from my bean bags:

The “price tents” were easy to make on Microsoft Word.  I formatted a page to have two columns, typed up a product description and price in each column towards the bottom of the page, and then printed the page.  I cut the page in half lengthwise—two strips of paper, each with a product description and price near the bottom—and then folded the strip in half and folded the ends underneath.  I taped the ends together and this made a little 3-sided tent with the product description and price on the front side.  These stood up well by themselves and didn’t lose their shape throughout the day.  When I packed up after the show, I carefully peeled off the tape and smoothed the papers out.  They’ll be used again!

For individual products like a scarf or hat, I made price tags on fine resume paper and attached them to the product with a natural cotton yarn.  I also made “original price tags” and then “alternative price tags.”  The alternative price tags were $5 less for everything in case I decided to lower my prices to encourage sales halfway through the show.  Kind of awkward to decide this and then have to rewrite your prices with a Sharpie.

I made sure every sign was printed (no random handwritten signs) using the same type of font and the same kind of paper.  This consistency gave cohesiveness to a table full of various products.   

Gift Wrapping  

It’s a nice touch to hand your customer their purchase in a pretty bag or box.  I bought brown paper lunch bags at the grocery store; they were big enough to fit most of my products.  I would have liked to glue on handles with a hot glue gun and twine, but I ran out of time.  I did manage to use a hot glue gun to quickly attach my business card to the front of the paper bags, and that was a nice addition and guaranteed that my customers would go home with my card and all my contact information.

I bought cute red-and-white-striped tissue paper to go inside each bag.  This made the new purchase look more like a gift and reminded everyone that they were shopping for Christmas… yay!

Paperwork: Receipts, Custom Orders, and Inventory Checklists  

These are a few pieces of paper that you might like to have with you at the fair:

The first is receipts.  Some customers might like a receipt of purchase, particularly if they just bought a large item.  You can create your own in Microsoft Word or download a customizable template here.

Secondly, if you are willing to offer custom orders, you might be opening yourself up to a whole new scope of your business.  I was eager to offer custom orders on my gloves, particularly because I’d only had time to make three pairs before the show.  Every time people showed any interest in the gloves I encouraged them to try them on and then pulled out a bag full of yarn so that they could imagine a pair of gloves in colors that appealed to them.  This way I got three custom orders in a three-hour show, which is $75 I wouldn’t have otherwise made!  I designed little custom order forms.

Lastly, you will want to keep an inventory checklist so that you know what you’re selling.  I made a nice one on Microsoft Word but ended up just keeping a running list myself of what I had sold and for how much.  This tally of how much I had made thus far also motivated me to keep selling hard! I’m glad I have this record because my memory fades quickly and I’ll need to know these figures for taxes in April.

 
Ploys

By this I mean candy or cookies or your business logo stickers or whatever encourages people to come on over, snag a handful, and take a look.  I wanted to accommodate all those who might be tempted by chocolate!  I set out an attractive Polish pottery dish that matched my other display dish and filled it with Hershey’s kisses wrapped in Christmas-colored foil.  These were a hit… especially with me.  

Craft Fair Checklist

  • Your inventory with price tags either attached now or made to be attached later.  I recommend packing everything in a rolling suitcase!
  • Table decorations and/or props
  • Receipts
  • Custom order forms
  • Inventory checklist/price list
  • Paper towels for unfortunate spills or accidents or to provide shape to your products (like stuffing hats instead of laying them flat on your table)
  • Mirror so people can see what they look like as they try your products on!
  • Cash—I had $20 in $10, $5, and $1 bills and it was more than enough as people began paying in cash immediately and bulked up my stash.  I also accepted checks.
  • A small table or a chair on which to place your cash box, paperwork, pens, and water bottle, as it’s awkward to have them on the floor and you need to use your table to display your wares.
  • Office supplies
    • Tape—masking tape for securing your tablecloth/décor and gift tape for odds and ends
    • Pens and Sharpie
    • Pins—preferably plain metal straight pins so as to be as invisible as possible in your display
    • Safety pins
    • Scissors
    • Needle and thread
    • Calculator
  • For yourself
    • Camera
    • Phone
    • Water or drink of preference (ie. decaff coffee for that early morning for me!)
    • Sweater if the craft fair location is cold
    • Food—consider including a full meal if you’ll be there all day, but also consider that the booth down the hall selling fresh Mexican street tacos might be calling your name!  Also consider if you want to eat behind your table (not recommended for appearance’s sake…) and who will sit there in your stead while you go eat.  Can your husband or a good friend relieve you for 30 minutes and also be trusted to bring in sales while you’re gone?
Resources and Other Considerations

OK, now go forth, craft, and sell!

71 :: in arts and crafts, knitting business, Making Room {Handmade}

three for thursday {and some thoughts}

From our walk this morning: persimmons for Elliott (he loves them), Lena enjoying her red Christmas ball from the grocer, and the colors of our Italian neighborhood that make me happy.

Currently reading: Blog, Inc.by Joy of the blog Oh Joy!  She’s giving me so much to think about for my blog.  I am trying to read quickly, though, as I have less than four weeks to finish my book goal (read a book a week in 2012) and six books to go (yikes!).

Currently listening to: Ordinary Time.  Elliott and I bought their Christmas CD (< you can listen to the whole CD there) when we heard them perform at our church in Cambridge, MA, back in our courtin' days.  It's one of my favorite Christmas CDs.  Any other good suggestions? Currently thinking about: How I really need to sweep the floors.  Honestly… our floors.  I have to sweep them at least twice a week to keep on top of all the dust and grime.  How often do you have to clean your floors??

Currently planning: Pretty much nothing.  I’m so glad that Night of Noel and the craft fair are over and I can just relax a bit!  I am getting excited about making these cinnamon rolls for breakfast for the single sailors in the barracks this Saturday, though. 

Currently making me happy:  The sweetness of life during this holiday season.  Elliott and I are so happy these days and are having so much fun together in the evenings as we work on our projects side by side.  Lena is cheerful and responsive and sweet, a delight to be around as she learns and grows each day.  We all pat my growing stomach with thankfulness and awe.  These are precious days before our family expands in less than two months!  After many years of waking up in the morning and often dreading what the day held (I hated math in high school, I was stressed by exams in college, I feared the chaos of work, etc.), it is so wonderful to wake up each morning and be thrilled to start the day.  To kiss my husband (who is actually beside me instead of deployed) and go get my baby girl from her crib to snuggle with us in bed for awhile, to make warm oatmeal for breakfast to give us a toasty start for the day, to go on walks with Lena around our lovely neighborhood, to spend Lena’s naptimes cleaning and writing and reading and creating, to cook a meal for dinner every night and welcome Elliott home with peace and joy…

… oh, I am so blessed!

10 :: in husband, Lena, Sicily, thoughts

Night of Noel

Lemme just say… Night of Noel… around here, it’s a big deal.

(OK, it’s a big deal for the group of Christian women connected to a rather small Naval Air Station on a rather small island in a rather small sea.) 

For the past couple of years, Night of Noel has been ah-may-zing.  My friend Joy (creator of Peppermint Bark Chocolate Chip cookies) transformed our chapel fellowship hall into a land touched by elves with twinkle lights.  Unfortunately two things happened between last year and this year: Joy moved away this summer, and I volunteered to be the Hospitality Chair for my Bible study this fall.  Unconnected, right?  I thought so… until I found out that part of my new job included all the decorating for Night of Noel. 

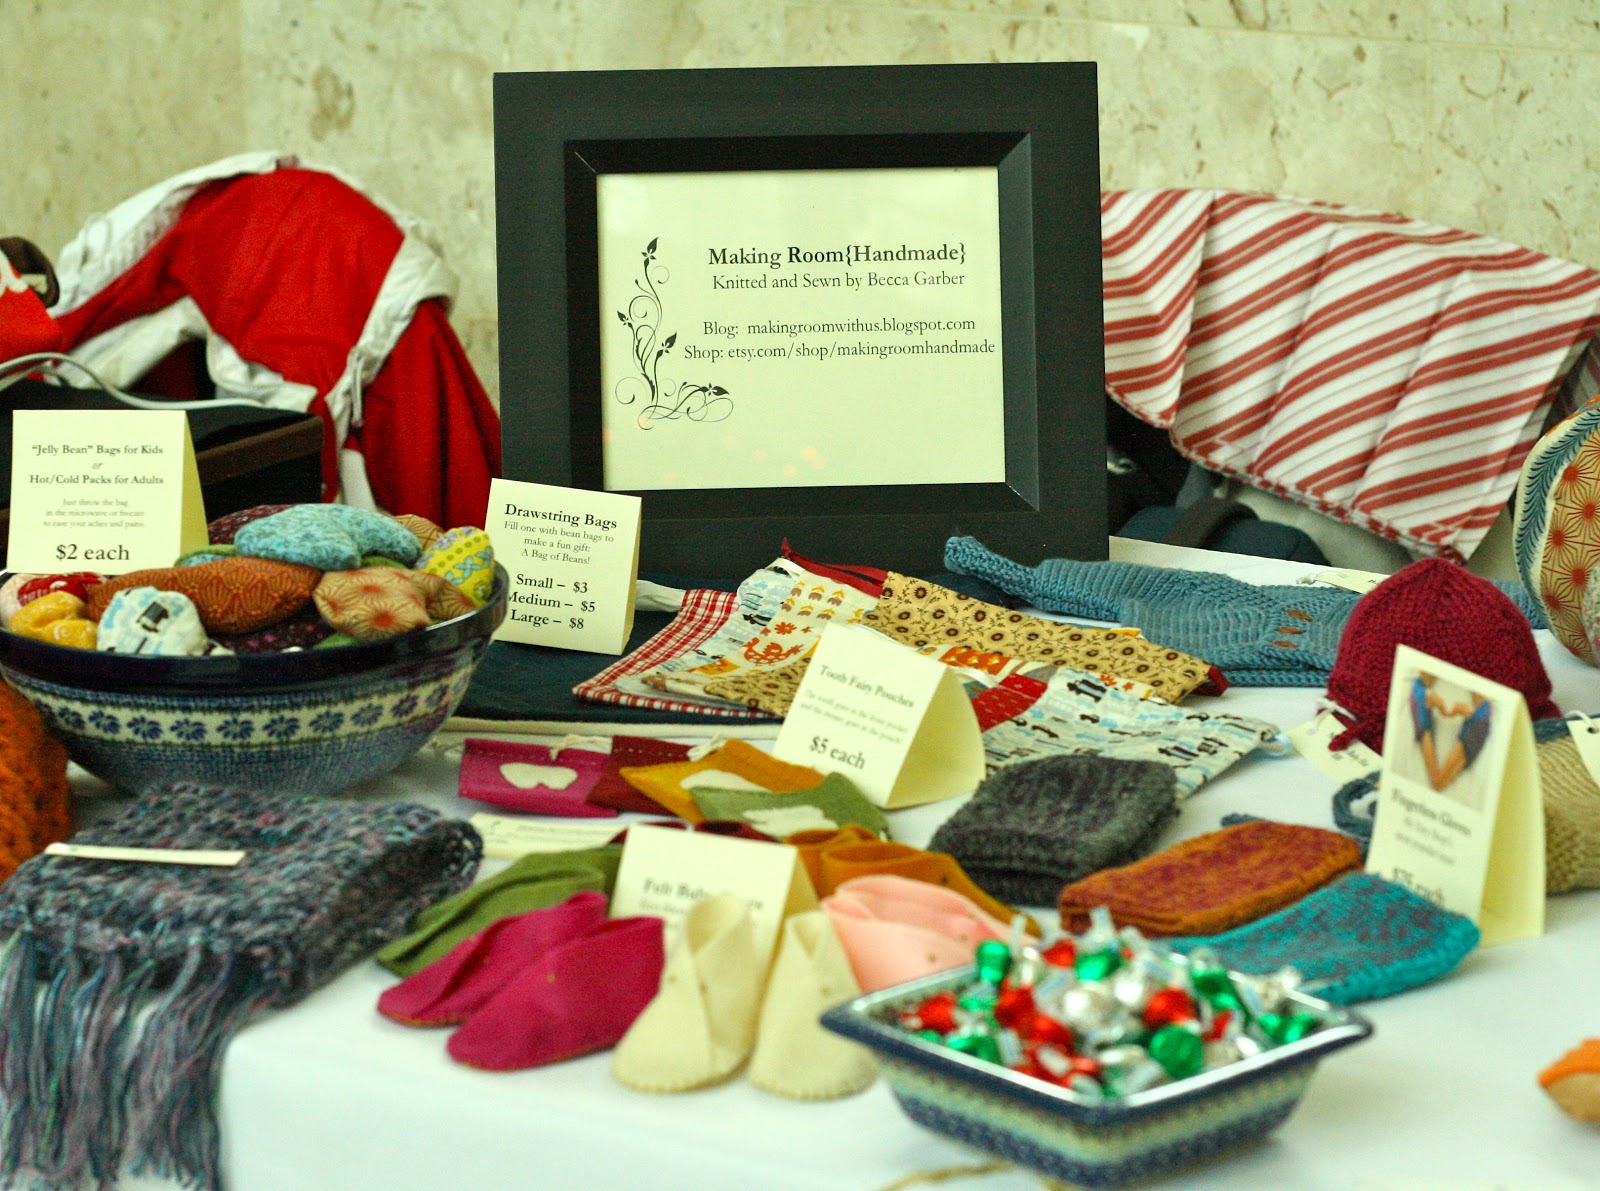
For those of you who don’t know me that well, I’m not much of a decorator, or even that creative.  Sure, I like making things, like Peppermint Bark Chocolate Chip cookies and felt baby shoes, but generally I follow recipes or adapt patterns… or take a little jaunt around Pinterest.

Well, it was too late to turn back now.  Recreating the magic of Night of Noel was up to me.  Or so I thought.

What I found out, however, was that even though Night of Noel’s beauty was up to me in theory whereas in reality I had a small army around me of dedicated, creative, and profoundly hardworking women.  I showed up on Friday for an evening of decorating the hall and couldn’t believe it when about 10 other women showed up too.  On Sunday afternoon even the guests who showed up early were happy to put the batteries in the last set of twinkle lights or take pictures of my table when I didn’t have time.

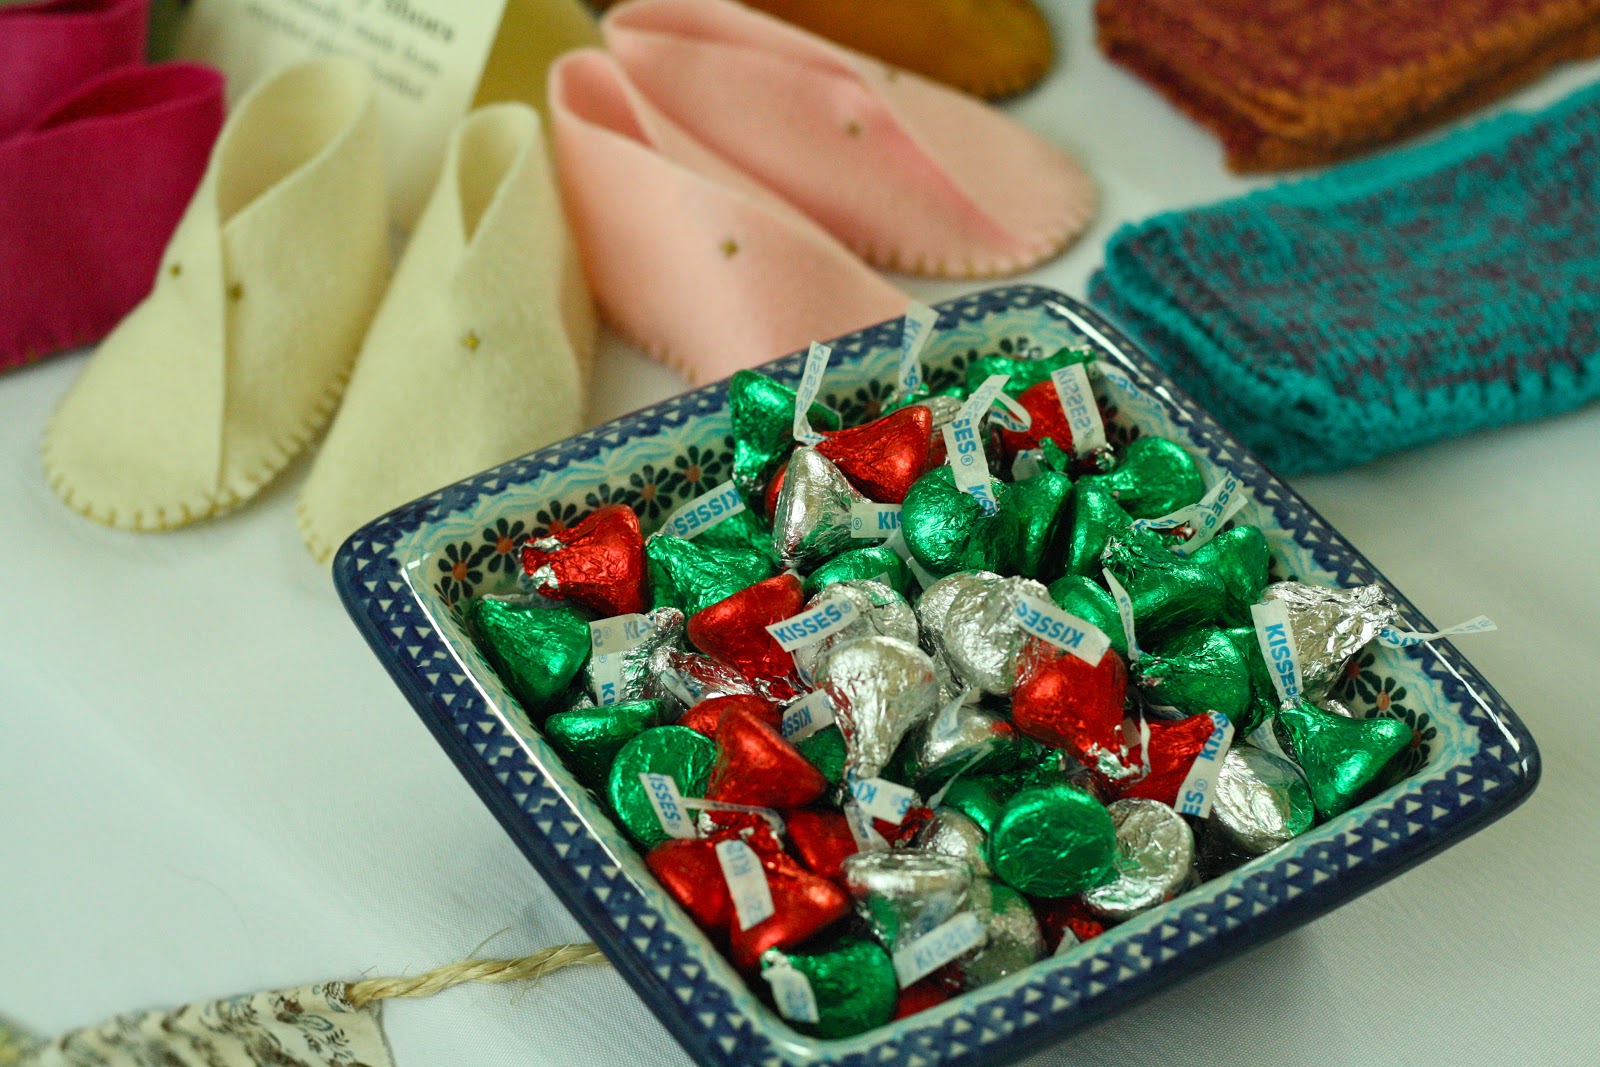
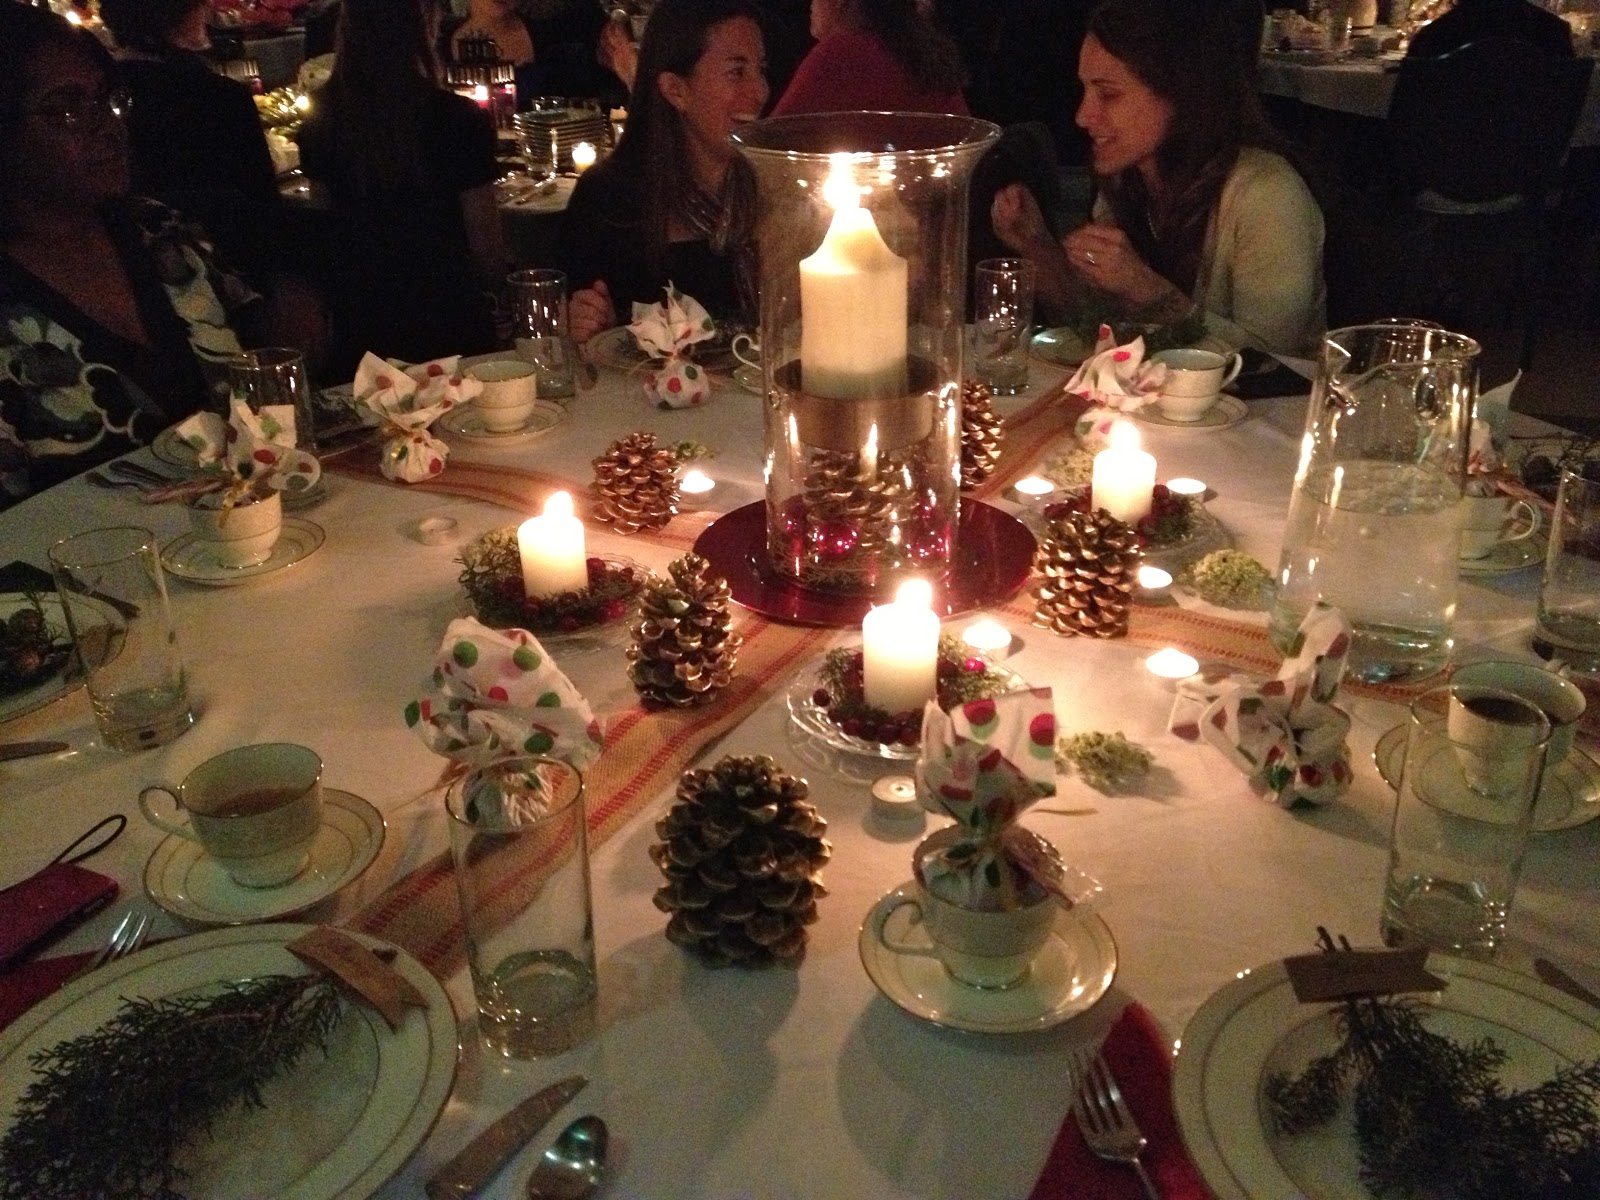
And my table that I was hostessing?  It was a collaborative effort between my dear friend Becca and me (Becca Squared was at it again) and pretty much every idea was hers.  Don’t you love the pine branches with the little place cards and the burlap straps that make the table look like a rustically wrapped gift?  I added gilded pine cones that I’d collected on our latest Mt. Etna hike and spray painted gold, and then sprinkled greenery and cranberries around some of the candles on the table.

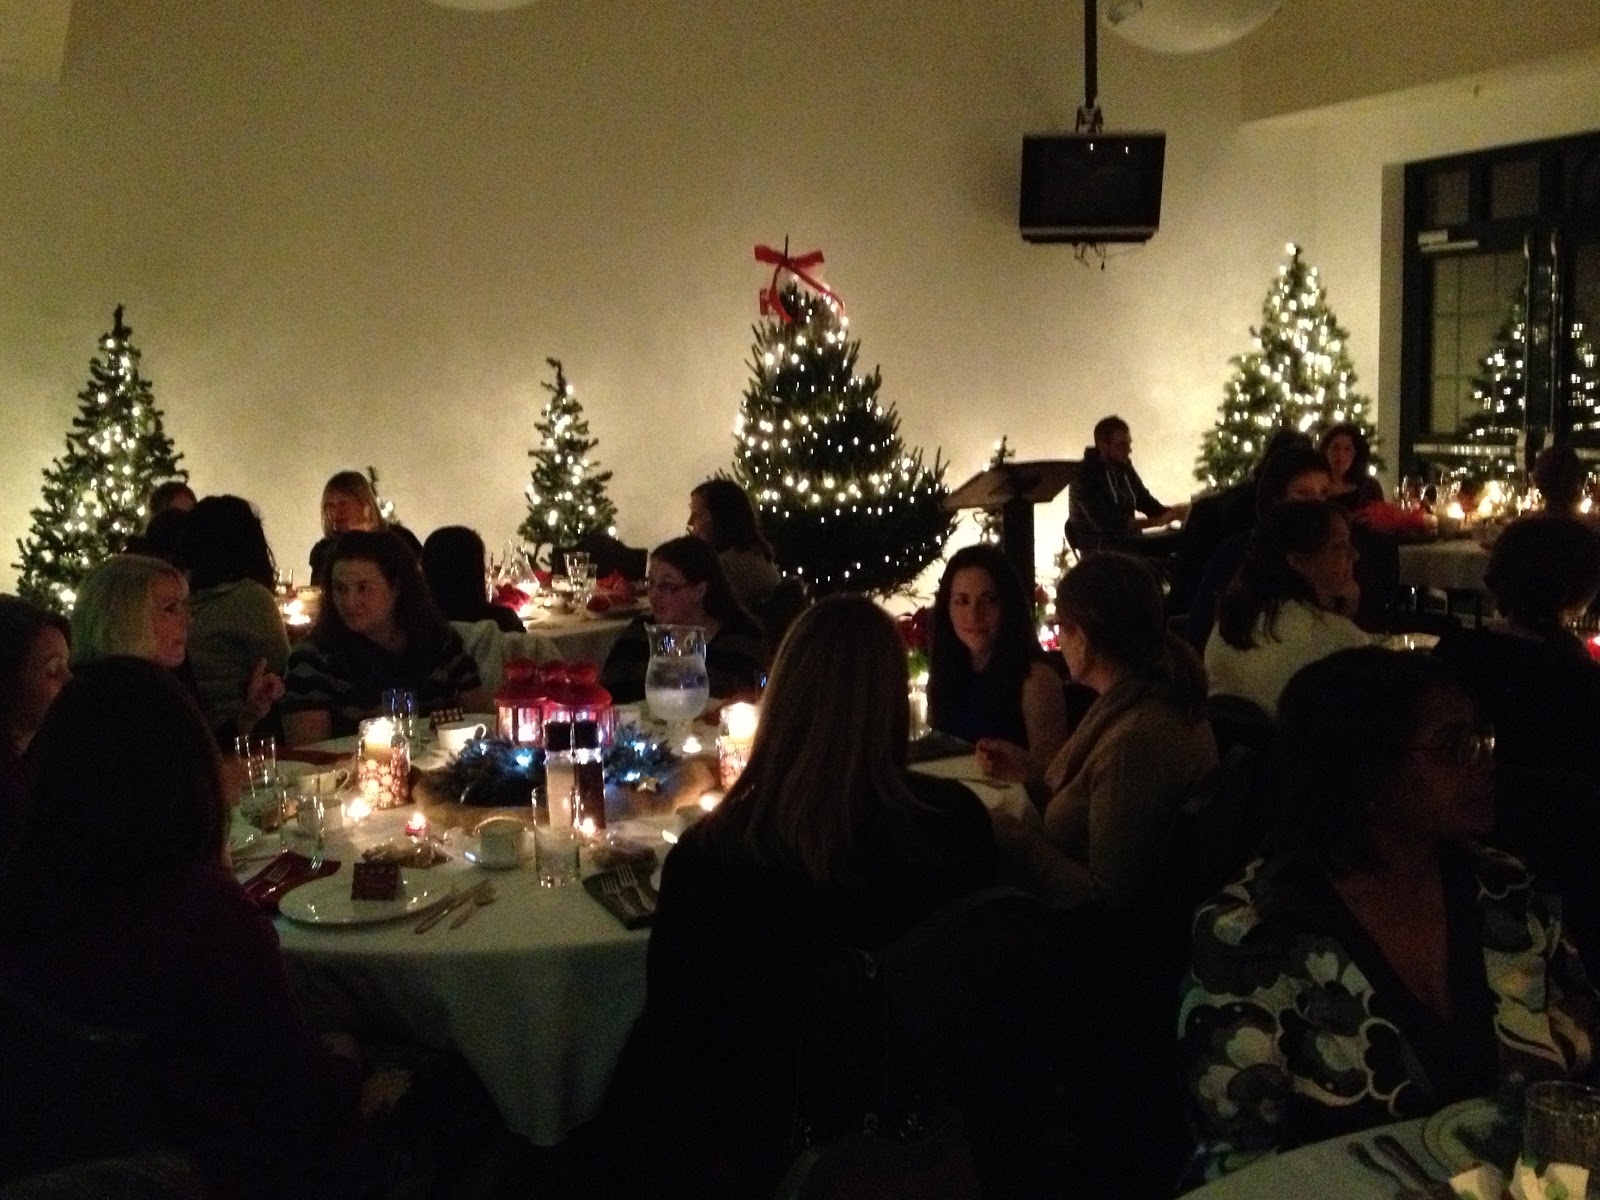
Christmas trees decorated with simple white lights were an easy solution to my decorating woes for the rest of the hall.  Next year (did I just say that?) I might elevate the smaller trees onto tables so that the whole room could see them.   There are at least five trees that are invisible in this picture:

The delicious meal was perfectly prepared by one of Lena’s favorite Italian babysitters, Maria.  We started with bruschetta and Maria’s famous campanada, a Sicilian specialty.  Later the main course included a chicken cutlets and the local classic: pasta alla Norma (eggplant, tomato, and ricotta pasta).

And then, just as I was beginning to breathe a sigh of relief, disaster struck.  
We hostesses were responsible for our table’s dessert, and I thought chocolate fondue would be an easy and elegant option. Unfortunately I had no idea how many things were wrong with this plan.   
  1. I have never made fondue before in my life.  
  2. The commissary (grocery store) didn’t have the right kind of chocolate, but I didn’t know that so I just bought baking chocolate.  (Gag.)  
  3. I made it in a crock pot over the course of several hours while I furiously finished decorating and then began hostessing my table.
When I hurried into the kitchen to supervise the serving of my dessert, the fondue was not fondue.  As one friend aptly put it later, it looked like coffee grounds.  Coffee grounds!!!  The chocolate had formed large, grainy clumps and separated from the oil.  I swirled a spoon around the pot with horrified despair.  
Meanwhile my guests in the hall sipped their hot cider by candlelight and waited for dessert.  The waiters around me were quickly plating white chocolate raspberry cheesecake and individual dark chocolate mousse that other table hostesses had brought.
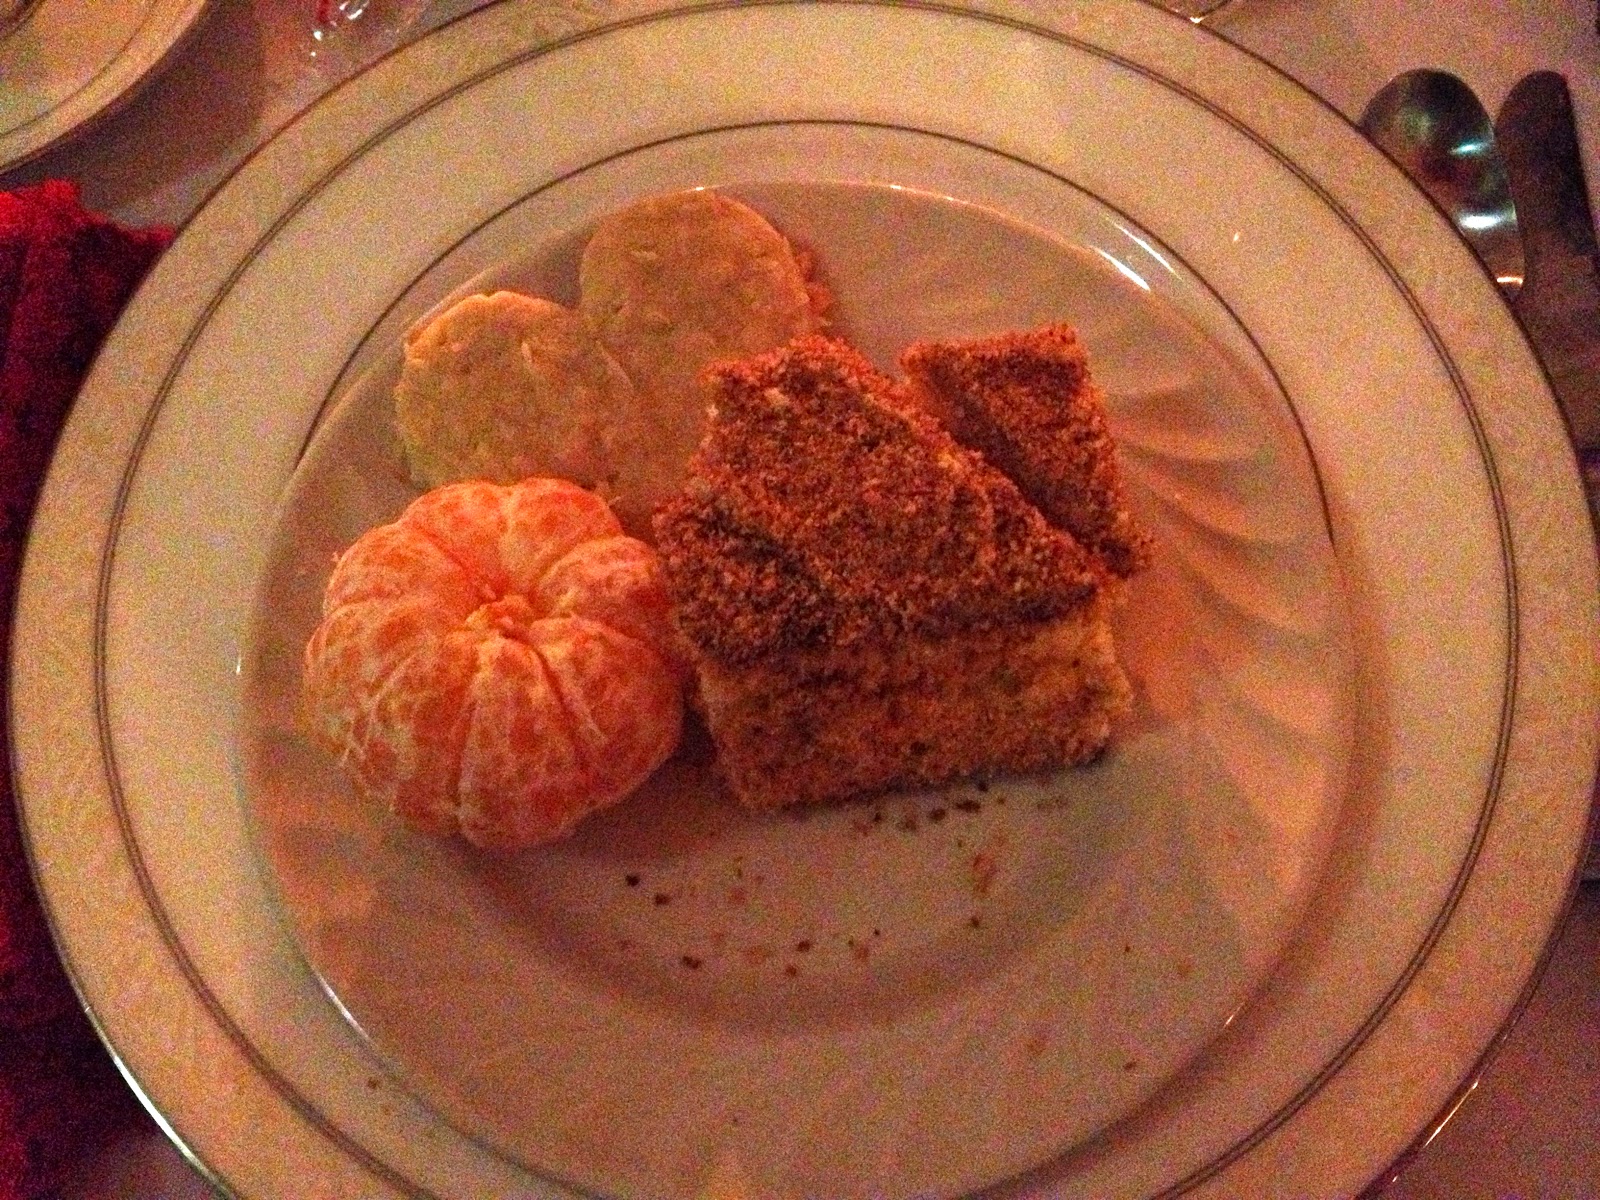
In the end, Maria saved the day.  She had made a huge Italian cake just because… because she’s Maria and she does unexpectedly sweet things like that.  I asked the waiters to plate slices of her cake with the best of our fondue dippers: oranges and coconut cookies.  It was a meager offering compared to my dreams, and I ate it like humble pie.

For the first time in my life that evening I received a public thank you and a gift for decorating the event.  I have always wondered what it feels like to be one of those extraordinary, capable women who gets a gift bag and a big thank you in front of a room of applauding people enjoying her handiwork.  Now I know how it feels.
It feels undeserved, because there are probably 15 other people who deserve this applause more than you do, 15 people who worked just as hard as you did but with no job description to egg them on.
It feels false, because “Becca’s beautiful vision” was all from those 15 other women.  And Pinterest.
And it feels so sweet, because the people applauding are grateful and appreciative even when they eat oranges for dessert instead of chocolate and when they can’t see the miniature Christmas trees on the floor. 
There is no Pleasure like that of receiving Praise from the Praiseworthy.
-Richard Steele-
Related Posts Plugin for WordPress, Blogger...
11 :: in arts and crafts, holidays, thoughts

Powered by WordPress. Designed by WooThemes